-5% on your 1st eSIM
WELCOME5
Loading...
Will my phone work in Japan? Learn how to check carrier bands, eSIM support, APN settings, and VoLTE so your phone connects reliably across Japan.
 Dimitri Morvan
You're standing at Narita or Haneda with a dead-simple question and a very annoying consequence if you get it wrong. If your phone won't connect, you lose maps, train apps, hotel messages, ride-hailing, and the ability to sort out a problem fast. The blunt answer to will my phone work in Japan is yes for most recent phones, but only if the device is network-free, supports the right LTE bands, and is set up correctly for eSIM, APN, and dual-SIM behavior.
The mistake travelers make is treating this like a brand question. It isn't. Japan's networks are strong, modern, and broad, with near-universal 4G coverage in populated areas and 5G population coverage at 98.1% in 2025 according to the telecom summary cited here, so the issue is compatibility, not raw network reach (Japan network coverage summary). The same source notes the major operators, NTT Docomo, KDDI, SoftBank, and Rakuten Mobile, all have very high 4G coverage in populated areas, which is why a good phone usually works and a poorly matched one fails in predictable ways.
If you want the short version, treat this like a checklist, not a guess. Confirm the phone is not carrier-locked, confirm the model and band list, confirm eSIM support if you want a fast setup, and confirm how your phone handles VoLTE and a second line before you fly.
The traveler at the gate is usually already online on airport Wi-Fi, refreshing a boarding pass and wondering if the same phone will still work after landing. That's the right instinct, because will my phone work in Japan is never a single yes or no. It depends on four layers, and if any one of them fails, the trip gets awkward fast.
A carrier-locked phone is the easiest way to sabotage your setup. If your device is locked, it may reject a local SIM or eSIM, which means you're stuck with roaming or no service at all. That's why the first question is not brand, not country of purchase, and not “it worked in Europe,” but whether the device is carrier-free.
Practical rule: if the phone is locked, stop there and fix that first. Nothing else matters until the device accepts another carrier profile.
Japan runs on LTE first, with 5G expanding on top of that layer. The country's common compatibility bands include LTE Band 1, 3, 8, 18, 19, 21, 26, 28, 41, and 42, with 5G n77, n78, n79, and n257 mentioned in the compatibility references (Japan compatibility bands overview). The point is simple, your phone doesn't just need to be “international,” it needs to support the Japanese bands that matter where you're going.
A phone can be perfectly fine on paper and still stumble during setup. Some phones support eSIM but need carrier provisioning, some support LTE but not the VoLTE profile a network expects, and some do both but only after a manual APN update. That's why good travel prep is layered, not hopeful.
You don't need to overcomplicate it, but you do need to do four checks before wheels-up, exact model number, band list match, and eSIM or SIM configuration readiness.
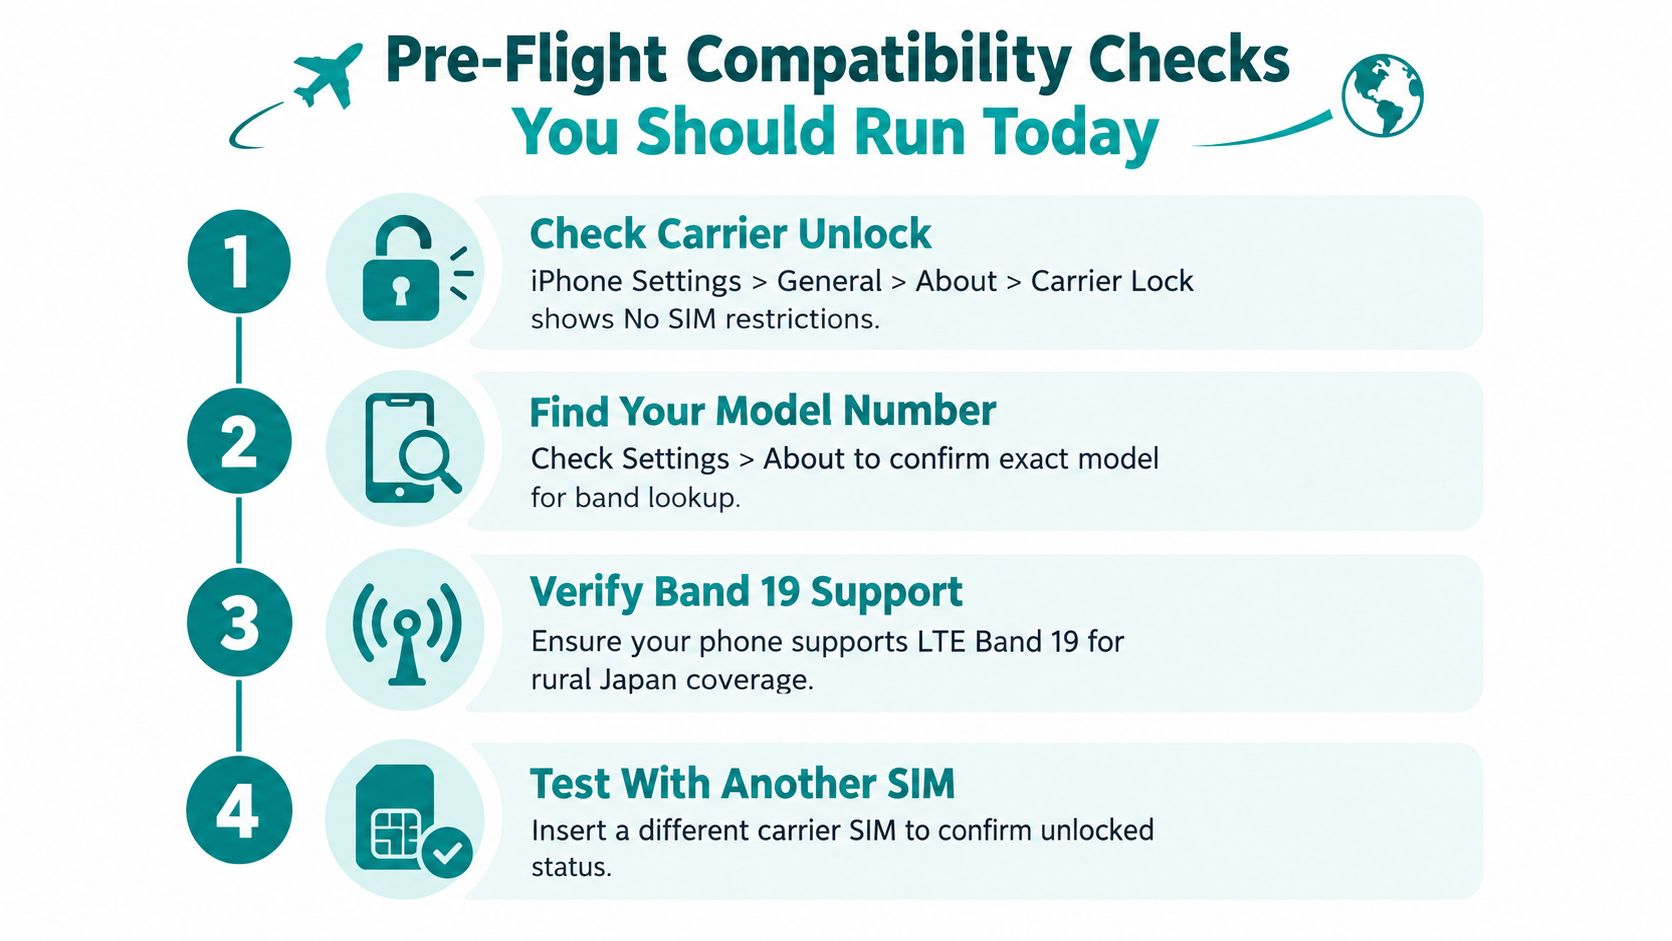
On iPhone, check Settings > General > About > Carrier Lock. If you see No SIM restrictions, that is the result you want. On Android, the path changes by brand, but the quickest real-world test is still to insert a foreign SIM or eSIM and see whether the handset accepts it. If it refuses another carrier, you have the problem in hand before the flight instead of after landing.
If you want a tighter walkthrough for iPhone checks, this guide on checking iPhone carrier status is the right first stop.
Model number matters because regional variants differ. An “iPhone 15 Pro Max” is not specific enough by itself. You want the exact code in the device settings, then match that code against the spec sheet or a band database such as Kimovil if you use it as a lookup tool.
The same applies to Pixel and Galaxy phones. A recent phone can still miss a band that matters in Japan, and that is where confusion starts. A carrier-free phone can still be the wrong hardware variant, so stop treating carrier status as the whole story.
For a fast yes, start with LTE Band 1 and Band 3, because those are the backbone in cities. Then check whether the phone also supports the lower-frequency coverage bands that keep service alive beyond Tokyo and Osaka. If the phone has the Japanese LTE set and the main 5G mid-bands, the odds are strongly in your favor.
Hard rule: Band 1 and Band 3 get you through the city. Missing the rural bands is what turns a smooth trip into a patchy one.
A handset can be band-compatible and still lack reliable eSIM support. That matters because many travelers now prefer digital activation instead of hunting for a kiosk or carrier desk. If your phone does not support eSIM, you are back to physical SIM or roaming. If it does, you can get connected before you leave the hotel room or even before departure.
Bottom line: if your phone passes those four checks, you are in good shape. If it fails any one of them, fix the failure before you fly.
Japan looks simple from a distance, then gets more specific the moment you leave the city. The carriers build on Band 1 and Band 3 for urban coverage, but the band that decides whether your phone stays useful in rail corridors, mountain routes, and remote stops is Band 19. That's the band many travelers miss, and that's why a phone can feel excellent in Tokyo and strangely unreliable in Hokkaido or Kyushu.
Band 1 and Band 3 are the starting point for serious compatibility. Add Band 19, and you've covered the low-frequency reach that helps service travel through tougher terrain and older building stock. The compatibility guidance in the brief also flags Band 8, 18, 21, 26, 28, 41, and 42 as useful layers, with Band 21 acting as an au supplement and Band 28 part of the newer transition layer (Japan compatibility guidance). Low bands matter because they travel farther and penetrate obstacles better than higher-frequency layers.
Japan's 5G story is not some exotic special case. The common carrier bands cited here are n77 and n78, with n79 also used by some major networks, while n257 appears in the broader compatibility list (Japan 5G compatibility overview). If your phone lacks those mid-bands, it can still function on LTE, but you should not expect full 5G access across the major carriers. The key point is that 5G is a bonus layer, not the base requirement.
If your phone has Band 1, Band 3, and Band 19, it's the kind of device I'd trust for cross-country use. If it misses Band 19, I'd still call it fine for Tokyo and Osaka, but I'd expect weaker behavior on the edges of the map. That's the exact pattern I've seen when phones do fine in the core city and degrade once the route gets rural or mountainous.
| Band / Frequency | Docomo | au (KDDI) | SoftBank / Y!mobile | Typical Coverage |
|---|---|---|---|---|
| Band 1 / 2100 MHz | Core layer | Core layer | Core layer | Strong city coverage |
| Band 3 / 1800 MHz | Core layer | Core layer | Core layer | Strong city coverage |
| Band 19 / 800 MHz | Important rural layer | Limited or shared role | Less central | Better reach outside metros |
| Band 21 / 1500 MHz | Supplemental use | Supplemental use | Less common | Extra urban capacity |
| Band 28 / 700 MHz | Transition and reach layer | Transition and reach layer | Transition and reach layer | Helpful for broader coverage |
| n77 / n78 | 5G city layer | 5G city layer | 5G city layer | Main 5G access |
| n79 / n257 | Network-dependent 5G layers | Network-dependent 5G layers | Network-dependent 5G layers | Broader 5G compatibility |
The clean takeaway is this. Band 19 is the silent deal-breaker. If your route stays in Tokyo and Osaka, you can get away with a lot. If your route includes rural Japan, don't guess.
The right answer depends on how much friction you tolerate. eSIM, physical SIM, and home carrier roaming all get you online, but they behave very differently once you land. The best choice is the one that matches your need for speed, your need for a local number, and your need to keep SMS alive for banking or 2FA.
Tourist eSIMs are usually data-only, which is exactly why they're easy to sell and easy to use. You install the profile before or after landing, the data line comes up quickly, and you keep your home SIM active for calls and texts if your phone supports dual-SIM behavior. That setup is the least messy for navigation, messaging apps, and transit.
If you want a deeper look at plan selection, the guide to the best eSIM for Japan is a useful companion read.
A physical SIM is fine if you already know your phone has a tray, you don't mind the swap, and you're comfortable with airport pickup or another collection step. The downside is obvious, you're dealing with plastic, time, and a physical handoff when you'd rather just get moving. For many travelers, that's enough friction to skip it.
Roaming starts the moment the phone latches onto a partner network, which makes it very convenient for short trips or travelers who must remain reachable on the original number. It's also the least elegant option if you care about cost control or predictable behavior. When roaming is on, people often forget it's on, and that's when the bill anxiety starts.
If you're checking device status or planning to switch carriers, a practical resource on Perth mobile phone unlocks from CTF Mobile Phones & Computer Repairs can help you understand what a handset without carrier restrictions should look like in practice.
Here's the simple decision line. If you want the least fuss, use eSIM. If you need legacy voice behavior, a physical SIM may still be workable. If you only care about staying reachable for a day or two, roaming can be acceptable.
A lot of travelers think the hard part ends once the SIM or eSIM is installed. It doesn't. The connection still has to authenticate, route correctly, and behave properly for both data and voice. That's where APN, VoLTE, and dual-SIM configuration decide whether your phone acts like a travel tool or a headache.
Many tourist eSIMs push the APN automatically through the profile, so the phone just comes up and works. That's the ideal case. But if you bring a manually installed profile from another carrier, or if the provisioning is incomplete, you may need to enter the APN by hand.
The rule is simple, if the profile doesn't self-configure, the handset can sit there with bars and no data. That's why APN is often the first fix, not the last one. If you want a plain-English primer before traveling, the guide to what is an APN is worth skimming before you leave.
Japanese networks prioritize VoLTE for voice. If the phone lacks the right provisioning, calls can fall back badly or fail to behave the way you expect. A phone that supports VoLTE on its home carrier isn't always guaranteed to carry that same behavior cleanly onto Japanese networks, because carrier-side provisioning still matters.
That's the trap. The handset can be modern and still behave as if voice is half-broken. If you need local calling, keep this in mind before relying on the device for reservations, hotel calls, or backup contact.
The best pattern for most travelers is to set the Japan line as the data SIM and keep the home line active for SMS and voice. That way, banking texts, login codes, and other identity checks still land on your original number while Japan handles the data load. Modern iPhones and many Pixel devices are good at this. Older Samsung models can be more restrictive, especially when you're trying to combine line types.
Keep the Japan line on data, keep the home line alive for 2FA, and don't let roaming quietly eat the whole trip.
If your travel setup supports it, this is the cleanest way to avoid SMS surprises without giving up local data performance.
The fastest way to fix a travel phone problem is to stop guessing and match the symptom to the likely cause. If the phone is acting up in Japan, the problem is usually one of a few repeat offenders. Do the fix that matches the symptom, then move on.
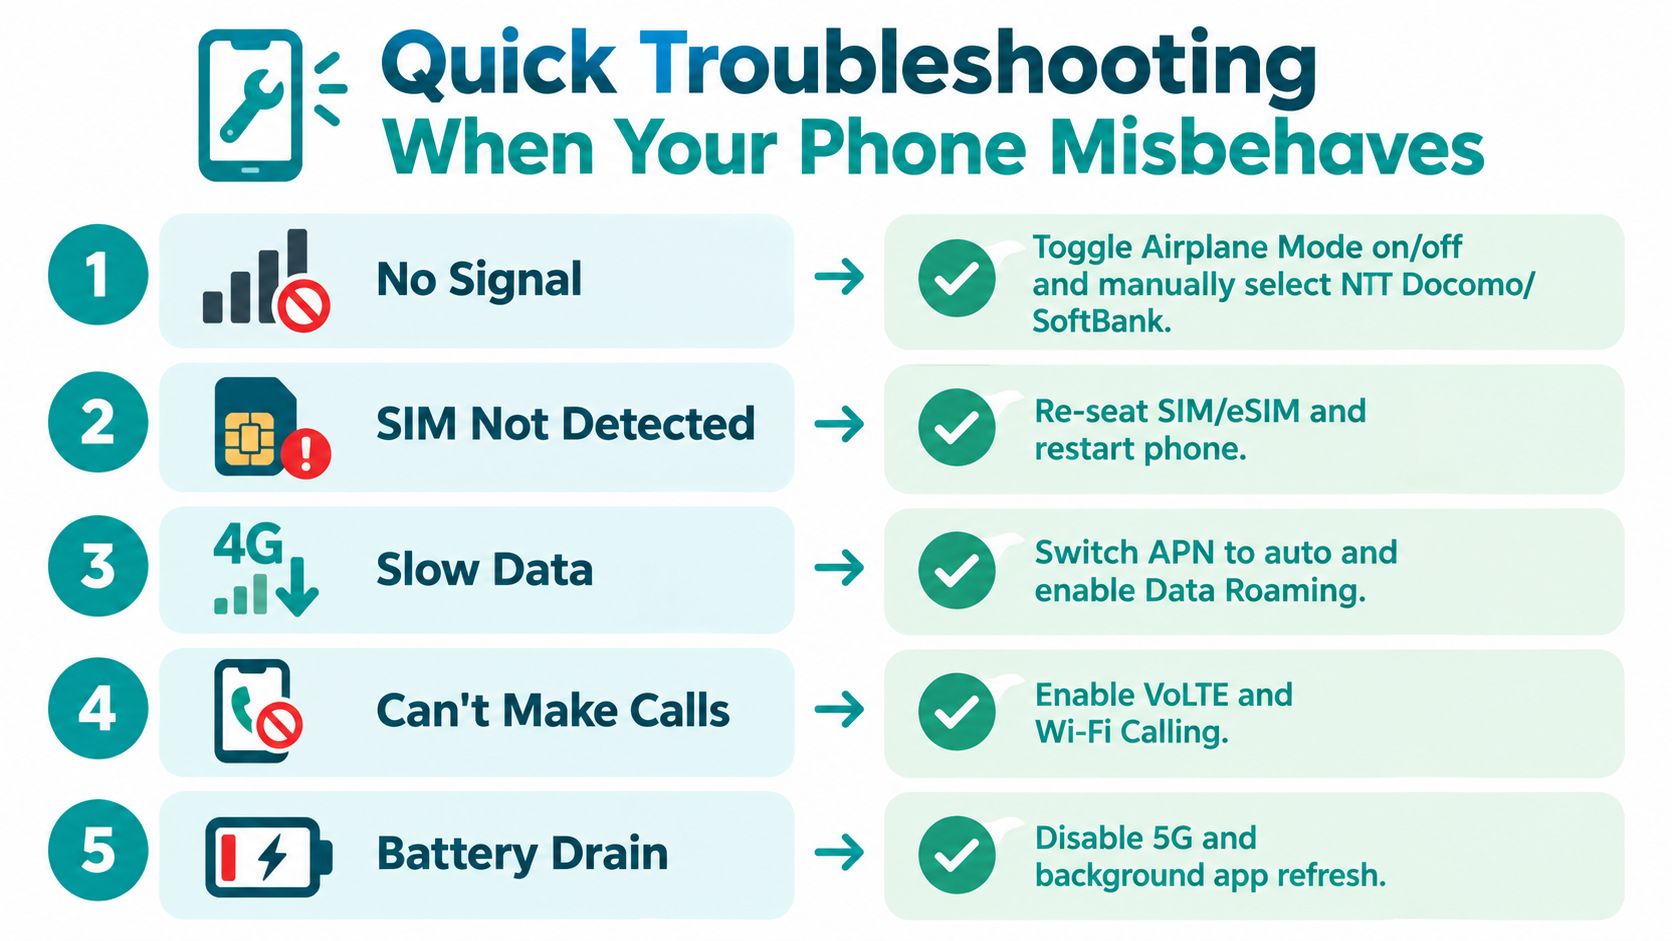
Toggle Airplane Mode on, wait a short moment, then turn it off. If that doesn't help, manually select the carrier instead of letting the phone auto-pick one. On a new arrival, the phone can cling to a bad network handoff longer than you want.
That usually points to VoLTE or provisioning. Recheck the network mode, force the device back onto the strongest data-compatible setting, and make sure the carrier profile supports voice on the Japan line. If the line is data-only by design, then the fix is not a setting, it's understanding that voice won't come from that SIM in the first place.
Hardware compatibility matters, not menu toggles. If the phone misses the important Japanese low-frequency bands, you can't configure your way out of it. Change the device or the route, not the settings, because the radio mismatch is the issue.
That's usually an authentication or network trust problem. Re-scan the QR code on a stable Wi-Fi network, confirm the device IMEI is accepted, and make sure the handset isn't half-sleeping from a previous failed attempt. A clean reinstall often beats repeated retries on shaky airport Wi-Fi.
Some Japanese MVNOs limit tethering, or the APN you're using doesn't permit it cleanly. Try the correct APN first, then accept that the plan may not be designed for hotspot use. That's a plan limitation, not a phone defect.
For diagnostics, iPhone users can open field test mode with *3001#12345#*, while Pixel and Samsung devices usually expose engineering or network screens through their dialer or settings menus. If you're stuck during activation, your IMEI is in the device settings and on the SIM tray or box label, and that's the number support teams usually need first.
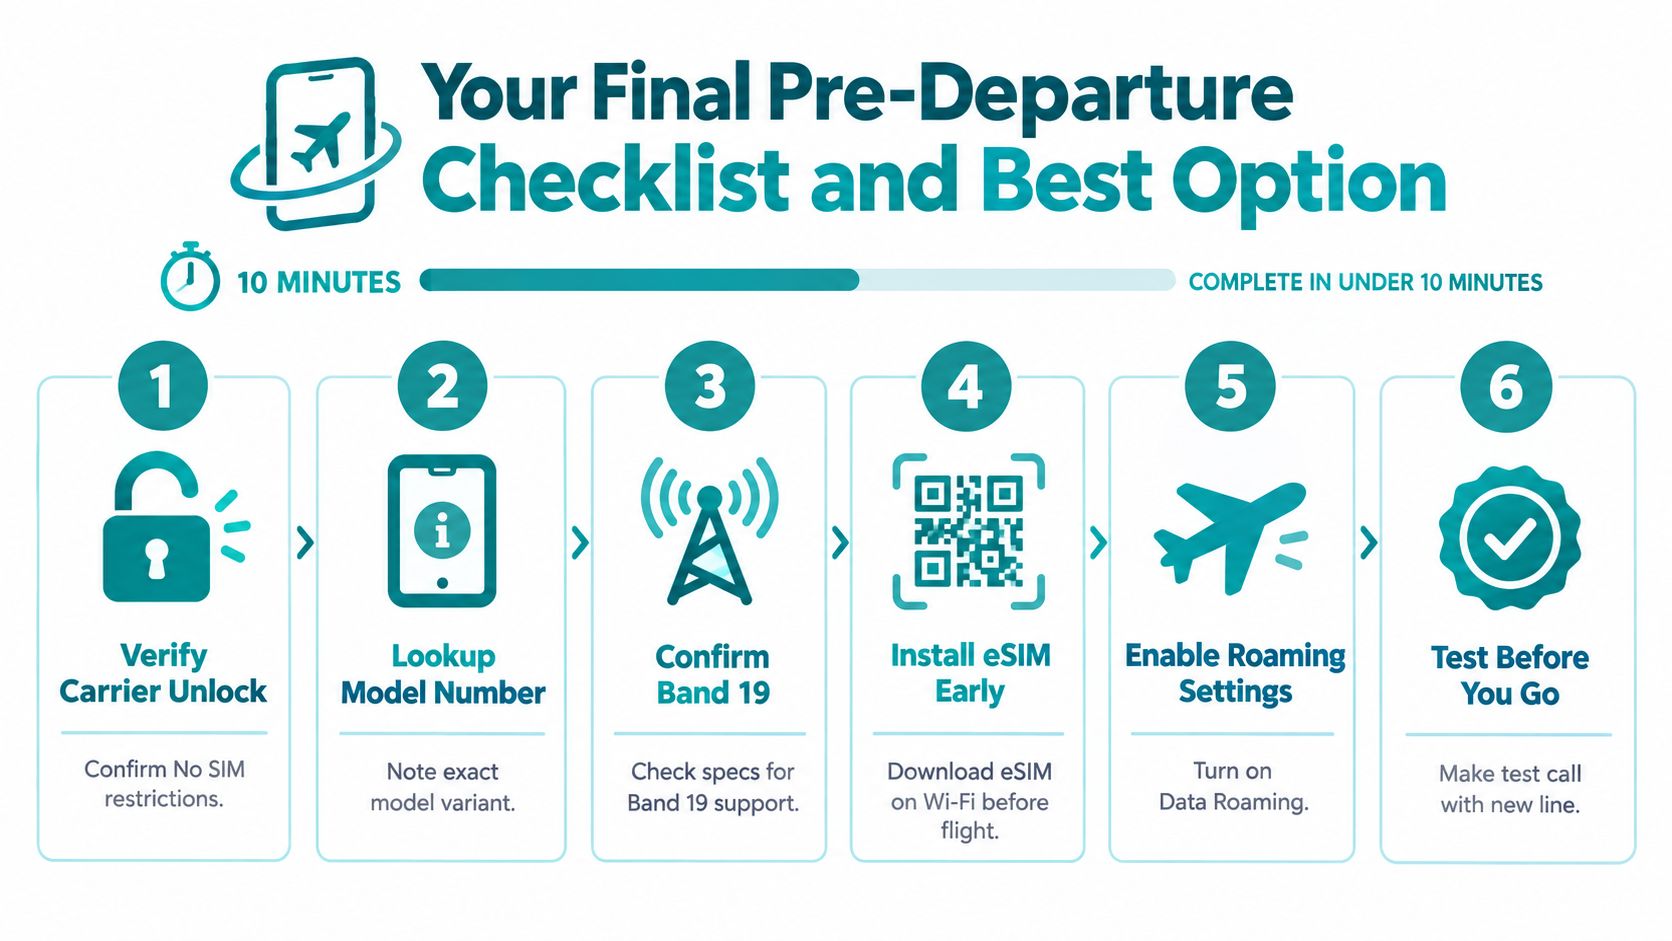
Before you leave, run this in order, carrier unlock, model number, Band 19 support, eSIM eligibility, and APN auto-install. If all five check out, your phone should behave normally in Japan. If one of them fails, fix it now, because airport stress is the worst time to debug a radio issue.
For most international travelers, the cleanest setup is an eSIM data plan with the home SIM left active for SMS and account recovery. Roaming only really makes sense if you're staying very briefly, need your home number continuously reachable, or don't want to manage a second line at all. For rural itineraries, I'd prioritize the phone that supports the right bands over any clever plan choice.
Simsima offers Japan eSIM plans with QR-based activation before departure, and it fits the use case where you want data ready without touching a kiosk line or shipping a plastic card. If you want the simplest path, visit Simsima and pick the Japan plan that matches your trip length, then install it on Wi-Fi before you fly.
If you want a no-drama Japan setup, start with a phone that isn't tied to a single carrier, check the bands, and install your data line before you board. Simsima gives you a straightforward way to do that without a store visit, and it keeps your home number available for the logins and texts you still need.

Founder of Simsima. A passionate traveler based in Barcelona, he helps travelers stay connected without breaking the bank on roaming fees.
LinkedIn