-5% on your 1st eSIM
WELCOME5
Loading...
Learn how eSIM works on iPhone, from the hardware inside to activation, dual-SIM travel setups, and quick fixes when activation stalls.
 Dimitri Morvan
An eSIM on iPhone is a downloadable digital SIM profile stored inside the phone, and Apple says supported iPhones can manage eight or more eSIMs. Apple introduced eSIM support with the iPhone XS, iPhone XS Max, and iPhone XR in 2018, then moved US iPhone 14 models to eSIM-only operation in September 2022.
You've just landed abroad. The airport display is telling you where to collect your bag, your phone says “No Service,” and the public Wi-Fi is too weak to load a map. You need data now, but you don't want to find a kiosk, handle a tiny plastic SIM in a crowded terminal, or discover a painful roaming charge later.
That's the practical appeal of an eSIM. You can download a carrier profile over Wi-Fi before takeoff or after landing, then use the iPhone's built-in cellular hardware without inserting anything. You can also keep your home number available for calls and texts while a second, often data-only travel line handles maps, messages, and browsing.
The important part isn't just scanning a QR code. How eSIM works on iPhone involves a rewritable chip, a secure carrier provisioning system, iOS line management, and a few choices that determine which line uses data. Once those pieces make sense, the airport setup stops feeling like magic and starts feeling like a short checklist.
At the boarding gate, you open your travel provider's email and install the eSIM while your regular Wi-Fi still works. The iPhone adds a new line, you label it “Europe Trip,” and leave it switched off until arrival. Nothing has been removed from the phone, and your home number remains in place.
After landing, you turn on the travel line and select it for cellular data. Your home line can remain available for calls or text messages, while the travel eSIM supplies the connection for navigation, translation, ride-hailing, and messaging apps. The exact behavior depends on your carrier, plan, phone model, and region, but the basic arrangement is straightforward.
The airport rule: install before you need the connection. Activation requires Wi-Fi or cellular access, so a stable connection at the gate is safer than relying on a congested arrival hall.
An eSIM is not a second phone number by definition. It's a digital SIM profile that tells the iPhone how to authenticate with a mobile network. A travel provider may offer data only, while a traditional carrier may provide calls, texts, and data through its own profile.
That distinction matters when you pair lines. Your home plan might stay enabled for incoming communication, but you'll generally want the travel line selected under Cellular Data. You should also review data roaming for the home line, because leaving it available for voice and texts doesn't mean you want it carrying mobile data abroad.
The following explanation starts inside the phone, then moves outward to activation methods and everyday line selection. By the end, you'll know what iOS is downloading, where that profile lives, and how to prevent the most common dual-SIM mistakes.
Think of a physical SIM as a removable hotel keycard. It identifies you to a network, and changing hotels means replacing the card. An eSIM uses a fixed lock inside the phone, but the room assignment can be downloaded, changed, or removed through software.
That fixed lock is the eUICC, an embedded Universal Integrated Circuit Card. It's a rewritable SIM component built into the device rather than placed in the tray. Instead of holding only one removable carrier identity, it can store multiple operator profiles that iOS can manage.
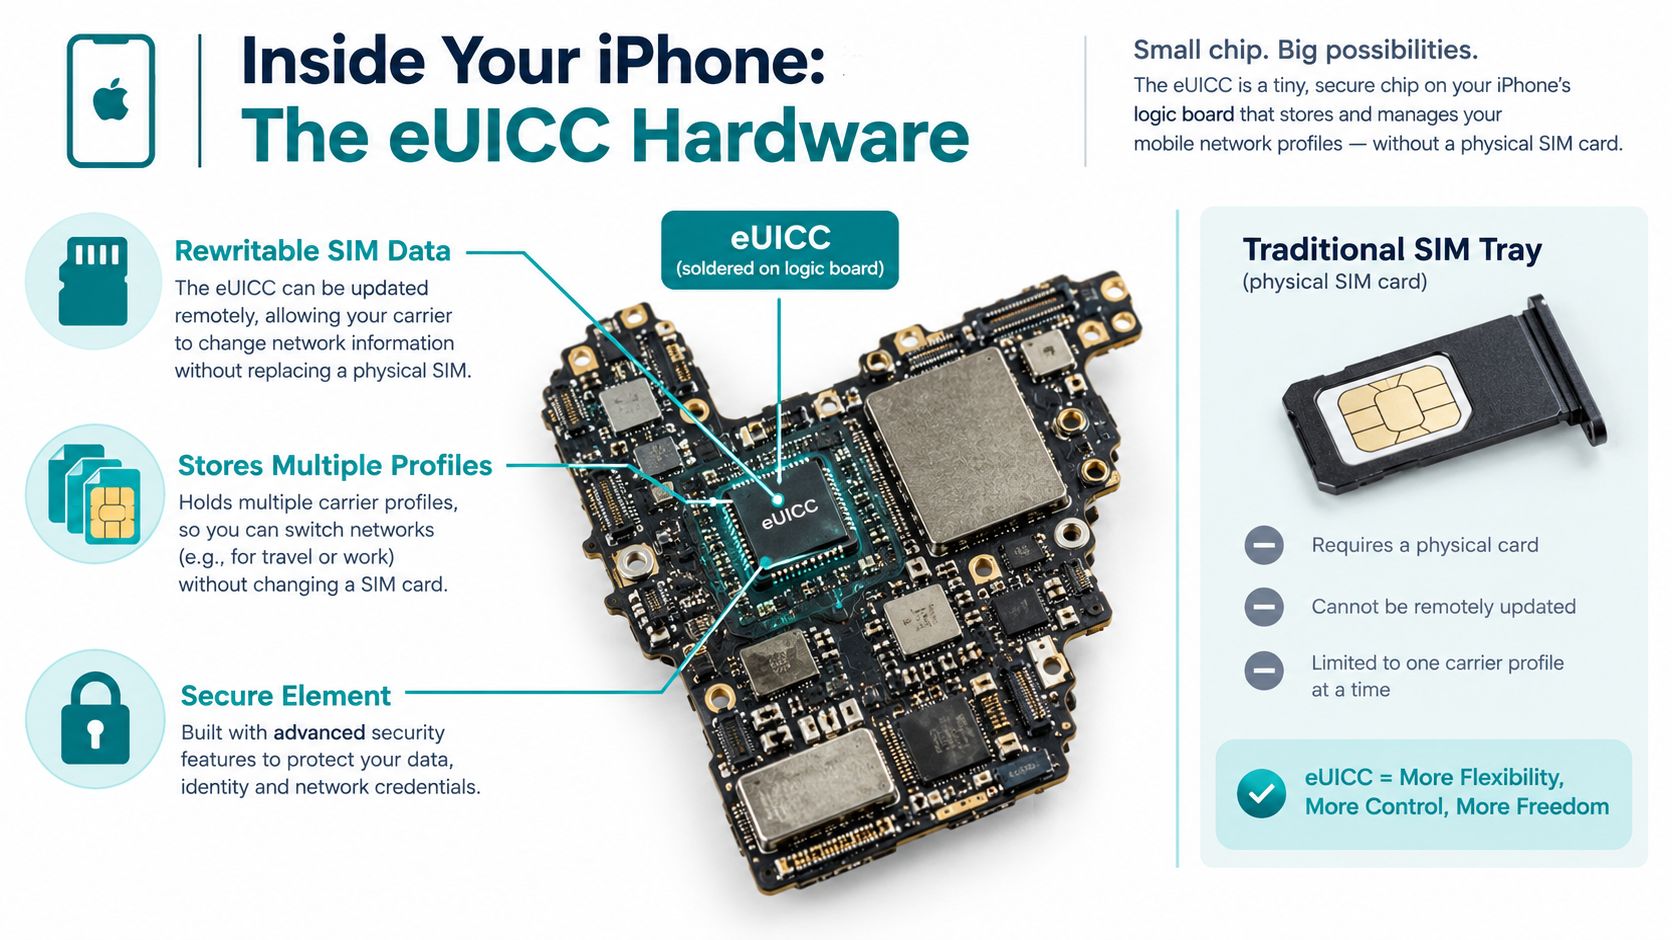
The eUICC is the secure storage and execution environment. The carrier profile is the digital set of credentials and network instructions installed into it. Removing a profile doesn't remove the eUICC, just as checking out of a hotel doesn't destroy the keycard system.
The profile lets the iPhone identify and authenticate with the operator. It can include the subscriber identity, security credentials, network information, and settings needed for the modem to connect. Those details aren't something you normally inspect, because iOS presents the result as a line under Cellular settings.
The process follows the GSMA Remote SIM Provisioning architecture, with consumer-device behavior standardized in SGP.22 by the GSMA. In plain English, a carrier prepares a profile on its provisioning system, the iPhone securely requests it, and the eUICC receives and installs it over the air.
A secure element protects the sensitive keys used during authentication. The phone and carrier systems verify that the requested profile belongs on that device, then deliver it through the provisioning flow. Apple's role is to provide the iOS interface and coordinate the process. The carrier remains responsible for the subscription and the network credentials.
If you want a broader introduction to the distinction between embedded and virtual SIM concepts, SwiftNet Wifi virtual sim provides useful background. The key point for iPhone users is simple: an eSIM isn't a picture of a SIM card, and it isn't merely an app. It's a carrier profile installed into protected hardware.
That architecture enables travel use without shipping logistics or a physical swap. You can keep several profiles resident, enable the one you need, and turn another off when a trip ends. The phone's ability to store profiles doesn't mean every profile can be active simultaneously, though. Active-line behavior depends on the iPhone model and carrier support.
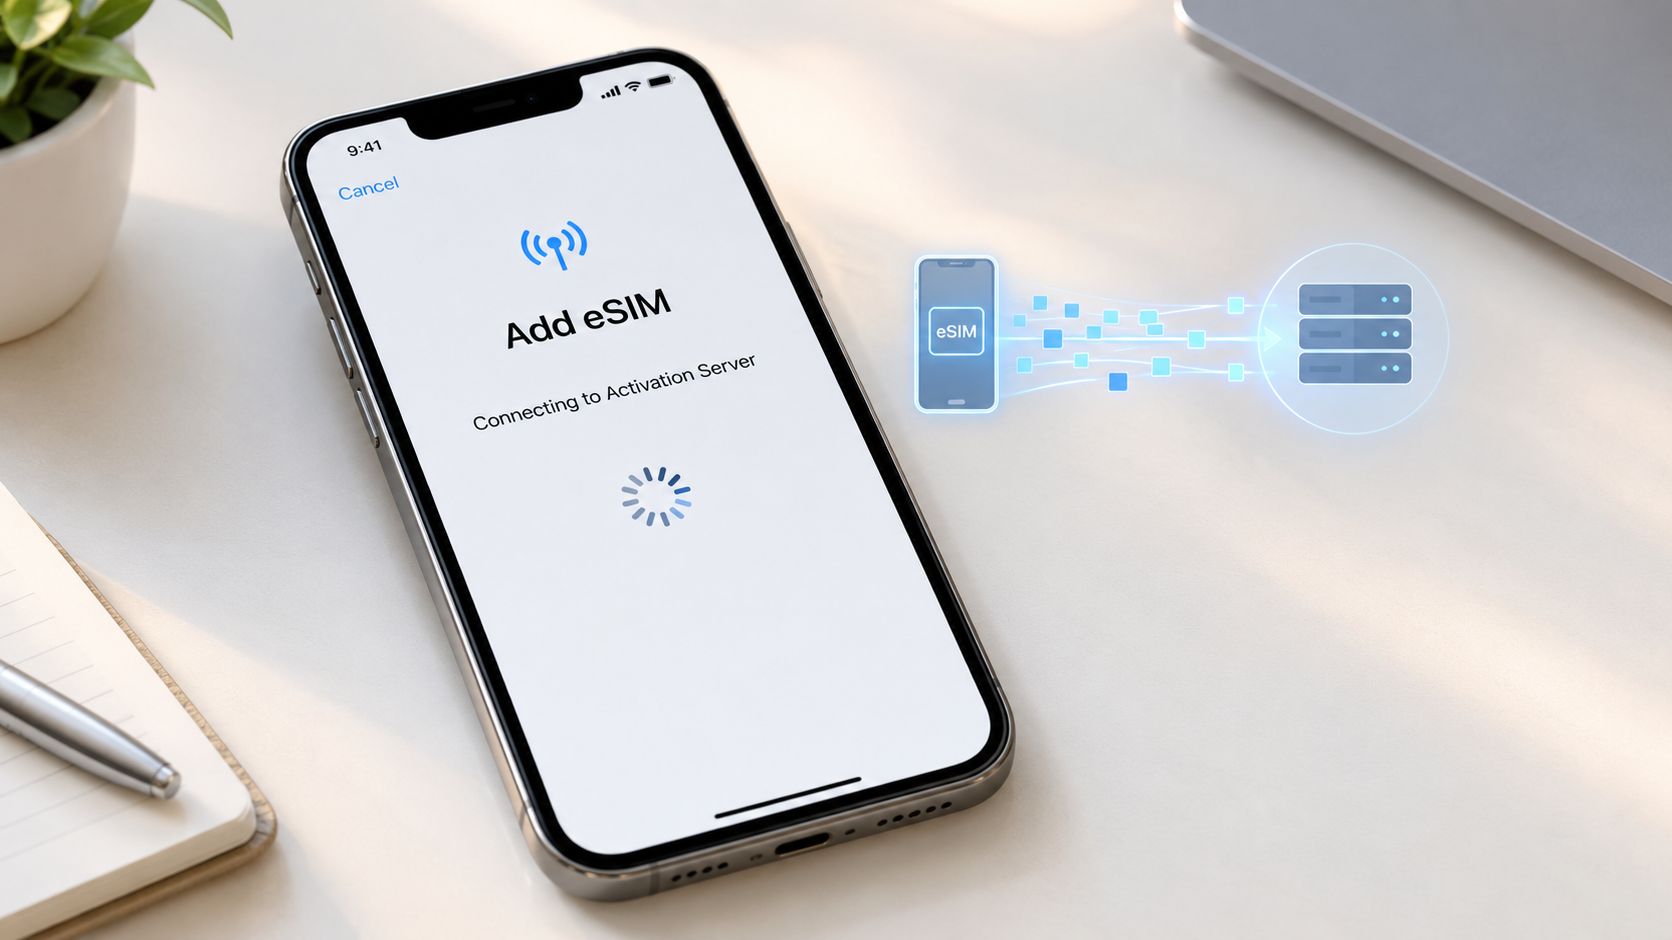
When you tap Add eSIM, iOS starts a controlled exchange between the phone, the carrier's provisioning service, and the eUICC. The QR code, carrier app, or transfer prompt is only the starting signal. Behind it, the phone identifies the destination eUICC and requests the profile associated with your purchase or account.
The carrier's provisioning platform checks the request, establishes the secure relationship, and sends the profile package. The eUICC verifies and installs it, while iOS adds the new line to Settings > Cellular or Settings > Mobile Service, depending on the wording used by the device and region.
iOS gives each line a label, such as Primary, Personal, Business, or Travel. That label is for your organization. It doesn't change the carrier profile or transform a data-only plan into a voice plan.
You can assign different roles through Cellular settings:
Only one line handles cellular data at a time in the normal dual-line arrangement, while supported iPhones can keep multiple lines available for calls and texts. iOS can offer data switching options, but that convenience needs careful review when one line is a home plan with roaming charges.
For a technical identity check, the EID number guide explains the device identifier associated with the eUICC. Carriers may request the EID or IMEI when a download fails because the provisioning system must match the handset identity with the correct profile.
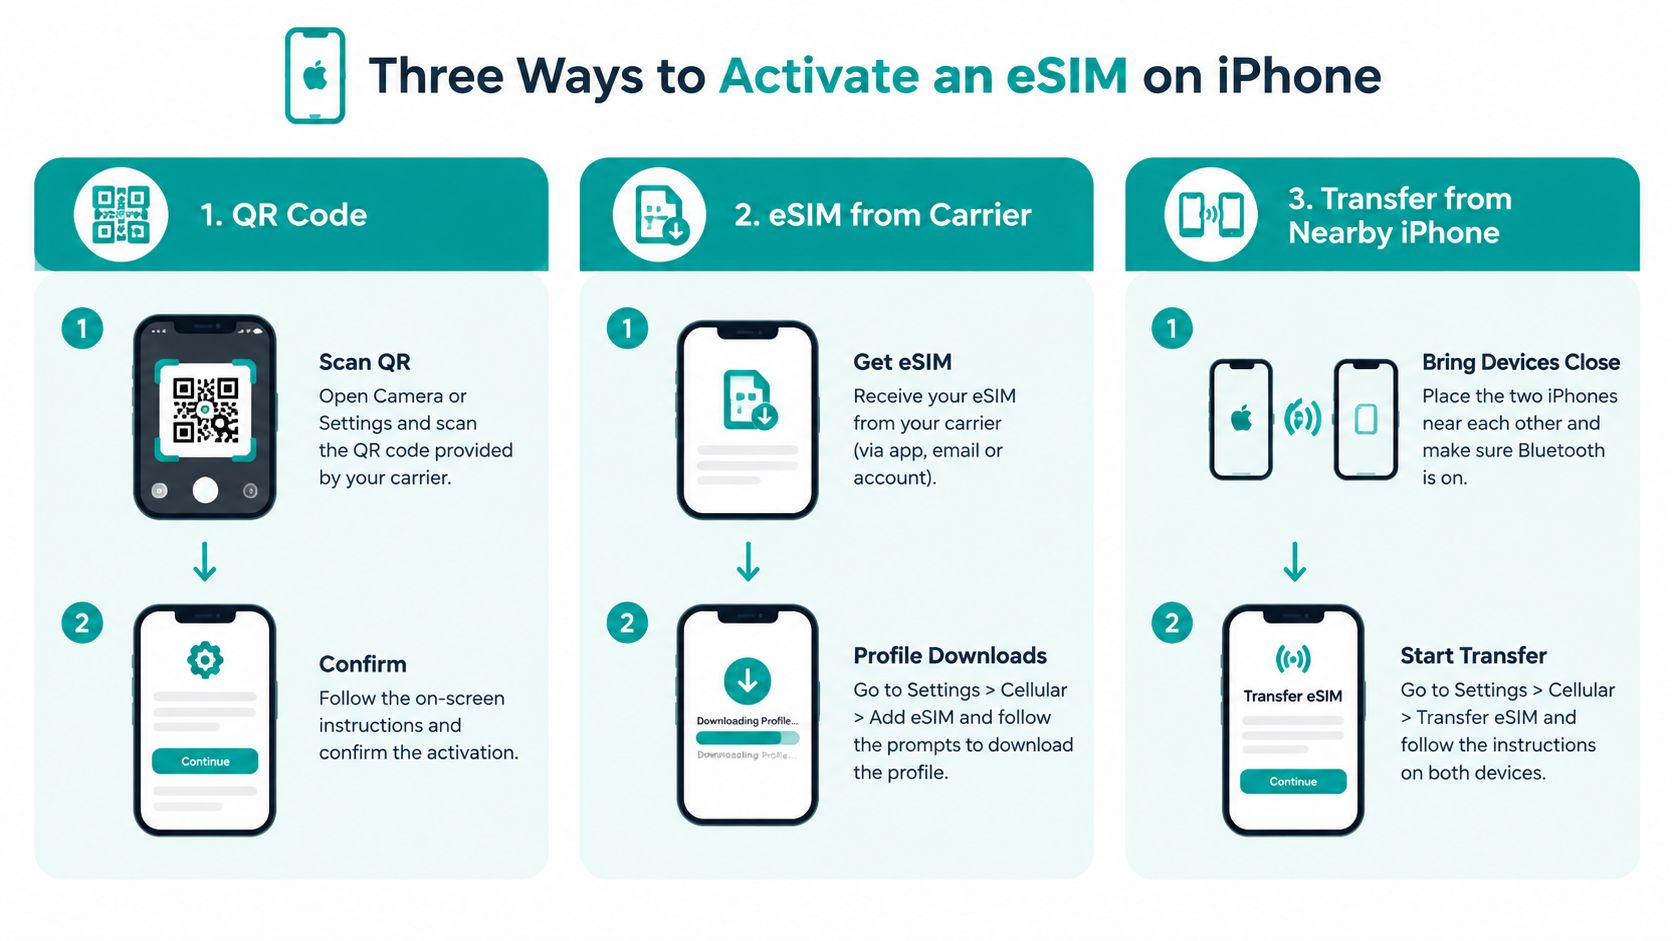
The iPhone can also support carrier activation, QR scanning, and transfer from a nearby iPhone. Each path ends at the same destination, the profile is installed into the eUICC and exposed as a manageable cellular line. The difference is how the carrier proves your eligibility and passes the installation details to iOS.
A device-to-device transfer moves an existing eligible line rather than creating a fresh travel subscription. Apple's support documentation describes the relevant setup options and notes that supported iPhones can manage eight or more eSIMs through methods such as carrier activation, QR code scanning, and iPhone-to-iPhone transfer. You'll still need a network connection during setup.
After installation, open Cellular settings and confirm three things: the new line appears, Turn On This Line is enabled when you're ready to use it, and the intended line is selected under Cellular Data. Those checks tell you that the profile is present, but network connection still depends on destination coverage and carrier provisioning.
The activation route matters less than the final profile installation, but choosing the right route can save time at the gate. Apple supports several paths, and carriers decide which ones they make available to their customers.
Open Settings > Cellular > Add eSIM > Use QR Code, then scan the code supplied by the carrier or travel provider. The QR code contains the information iOS needs to contact the carrier's provisioning service, request the profile, and install it on the eUICC.
This method works well when the code arrives by email and you have another screen available. If the code is displayed on the iPhone you're trying to configure, you may need to show it on a laptop, tablet, or second phone instead. Keep the display clean and make sure the entire code is visible.
Some carriers connect the purchase or account directly to the iPhone. You might see an Add eSIM prompt during setup, receive a carrier activation notification, or use an app that passes an authorized installation request to iOS.
The advantage is that you don't manually enter activation details. The carrier account, device identity, and eligibility checks happen through the provider's system. If the option doesn't appear, that usually means the carrier hasn't enabled that path for your account or model, not that the eUICC is defective.
A Smart Link opens an iPhone installation flow from a message or email. It's convenient when you don't want to scan a code manually, though the phone still performs the same secure provisioning exchange in the background.
Quick Transfer is different. It moves an existing eligible cellular plan from one nearby iPhone to another, subject to carrier support. It's the sensible choice when you're replacing a phone and want to move your established line, not when you're purchasing a new destination plan.
For a step-by-step overview of the user-facing process, see how to set up an eSIM. At an airport, use the route your provider supplied. Don't search for a QR code if the carrier has already sent a direct activation prompt, and don't expect Quick Transfer to install a newly purchased travel plan.
A practical selection rule looks like this:
Install over stable Wi-Fi, then wait until you're ready to use the plan before turning on the travel line if the provider's activation policy requires destination network connection.
Dual-SIM setup becomes much easier when you assign jobs instead of thinking of both lines as interchangeable. Your home line usually protects your familiar number for calls and messages. Your travel eSIM usually supplies destination data.
Apple's support guidance distinguishes between using only a travel eSIM and using both the travel eSIM and an existing line. It also confirms that supported iPhones can keep multiple eSIM plans installed, though the number of active lines and the available hardware combination vary by model and market.
Open Settings > Cellular and label the lines clearly. “Home Verizon” and “Europe Data” are more useful than vague labels such as Primary and Secondary, especially when you're tired and standing beside baggage claim.
Then set the travel eSIM under Cellular Data. On the home line, turn off Data Roaming unless you've deliberately confirmed that your home plan covers roaming. Keep the home line enabled only if you need its calls, texts, iMessage registration, or other account functions.
The Allow Cellular Data Switching option deserves caution. It lets iOS use the other line for data in certain situations, which can be helpful if the selected line loses coverage. If the fallback line is your home plan, however, the phone could use roaming data when you weren't expecting it.
Practical rule: Choose the travel eSIM for data, keep the home line available only for the communication services you need, and disable roaming data on the home line.
Wi-Fi calling can provide another route for calls from the home line when the carrier supports it and the phone is connected to a suitable Wi-Fi network. It doesn't remove carrier requirements, and it doesn't automatically make every call free, so check your home operator's terms before travel.
| Use case | Home line role | Travel eSIM role | Key setting |
|---|---|---|---|
| Maps and messaging abroad | Calls and texts only | Cellular data | Select travel eSIM under Cellular Data |
| No need for the home number | Turned off | Data and supported services | Turn off the home line |
| Home line must receive messages | Enabled, with data roaming reviewed | Cellular data | Disable home-line data roaming |
| Travel line loses coverage | Standby connection | Preferred data line | Treat data switching as a deliberate choice |
| Moving an established number | Source or destination line | Not applicable | Use supported Quick Transfer |
A US Verizon customer, for example, could leave the Verizon line enabled for expected calls and texts, select a Simsima Europe data eSIM under Cellular Data, and keep Verizon data roaming disabled. If the user later needs to call from the home number, they can select the appropriate line during the call rather than changing the entire configuration.
The assumption that every modern iPhone behaves identically is the first problem. Apple introduced eSIM with the iPhone XS, iPhone XS Max, and iPhone XR in 2018, and Apple's current support information lists compatible models from the iPhone SE (2nd generation) through the newest iPhone 17 family, as documented in this iPhone eSIM compatibility overview. Model support still depends on the market version.
China mainland is a notable exception. Apple identifies regional restrictions there, with eSIM support limited to specific models. A phone's name alone isn't enough, so check the exact model and purchase region before buying a travel plan.
A carrier lock creates another barrier. If the iPhone is tied to a particular operator, a competing travel eSIM may not install or connect until the phone is released from its network restriction. Check Settings > General > About > Carrier Lock or the equivalent network-lock entry, then ask the carrier to confirm eligibility.
Older supported devices can also have more limited active-line behavior than newer models. Being able to store multiple profiles doesn't guarantee that two eSIM lines can operate together in the same way as a newer dual-eSIM iPhone. Physical nano-SIM plus eSIM may be available on one model, while another market version may use eSIM-only hardware.
Carrier plans matter just as much as hardware. Some accounts don't permit eSIM activation, and some plans restrict roaming, voice, or data use abroad. A data-only travel plan may install correctly but still require a separate network-selection or roaming setting before it connects.
The reliable approach is to verify model, region, carrier policy, and carrier activation status before departure. That short check is more useful than assuming a QR code can overcome a hardware or account restriction.
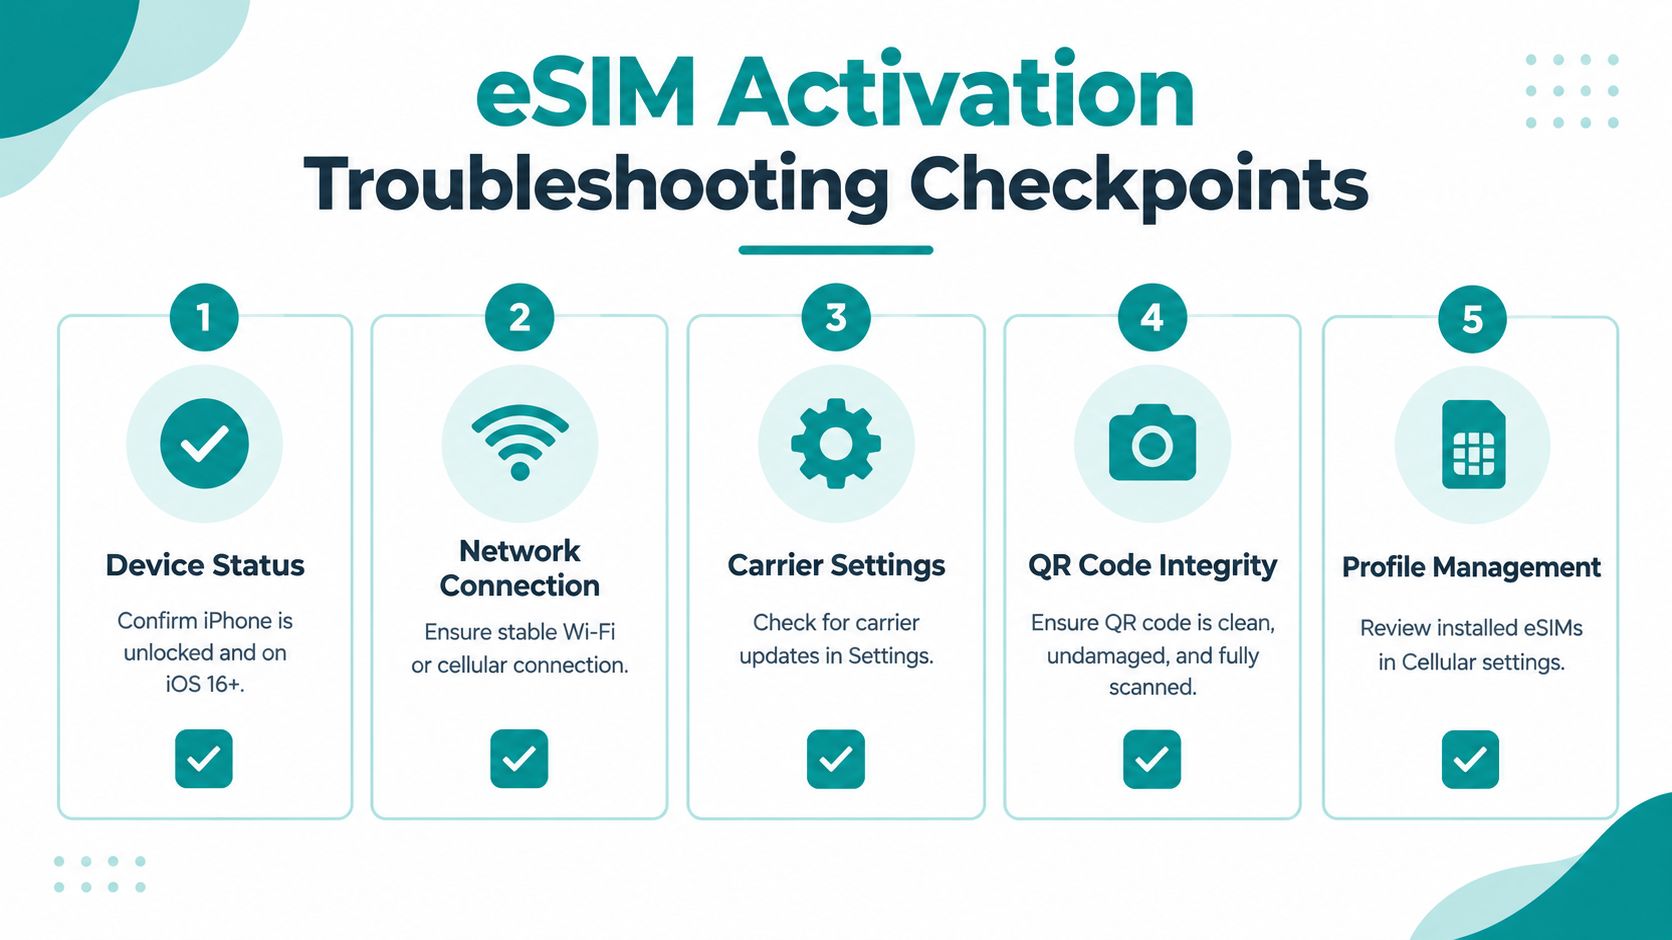
A stalled installation usually has a dependency problem. The phone needs an eligible model, a supported account, a network connection, and a valid profile request that matches the device identity.
Run these checks in order:
Apple's official eSIM troubleshooting guidance also directs users to verify the line, restart the phone, update carrier settings, and provide the IMEI or EID to the carrier when support is required. Those steps reflect the dependency chain: the handset identity and carrier record must agree with the profile.
A data-only travel eSIM also can't become the active cellular data source while another line is selected for data. Return to Settings > Cellular > Cellular Data and choose the travel profile. If the travel provider requires data roaming for its partner network, enable it on that travel line only, not automatically on the home line.
If the profile still won't install, use the provider's support channel to check whether the QR code has already been used, whether the plan is assigned to another device, or whether a replacement activation method is needed. For a focused troubleshooting sequence, see eSIM not working on iPhone.
Simsima offers prepaid travel data eSIMs for destinations around the world, with Smart Link installation or QR delivery and data-only plans that let you keep your regular number for calls and texts. Visit Simsima before your flight, check your iPhone's compatibility and carrier lock, and install your travel line over reliable Wi-Fi.

Founder of Simsima. A passionate traveler based in Barcelona, he helps travelers stay connected without breaking the bank on roaming fees.
LinkedIn