Install an eSIM on iPhone
Complete guide to installing your eSIM on iPhone XS and newer.
How to install your Simsima eSIM
Before you leave: install your eSIMStep 1 of 11
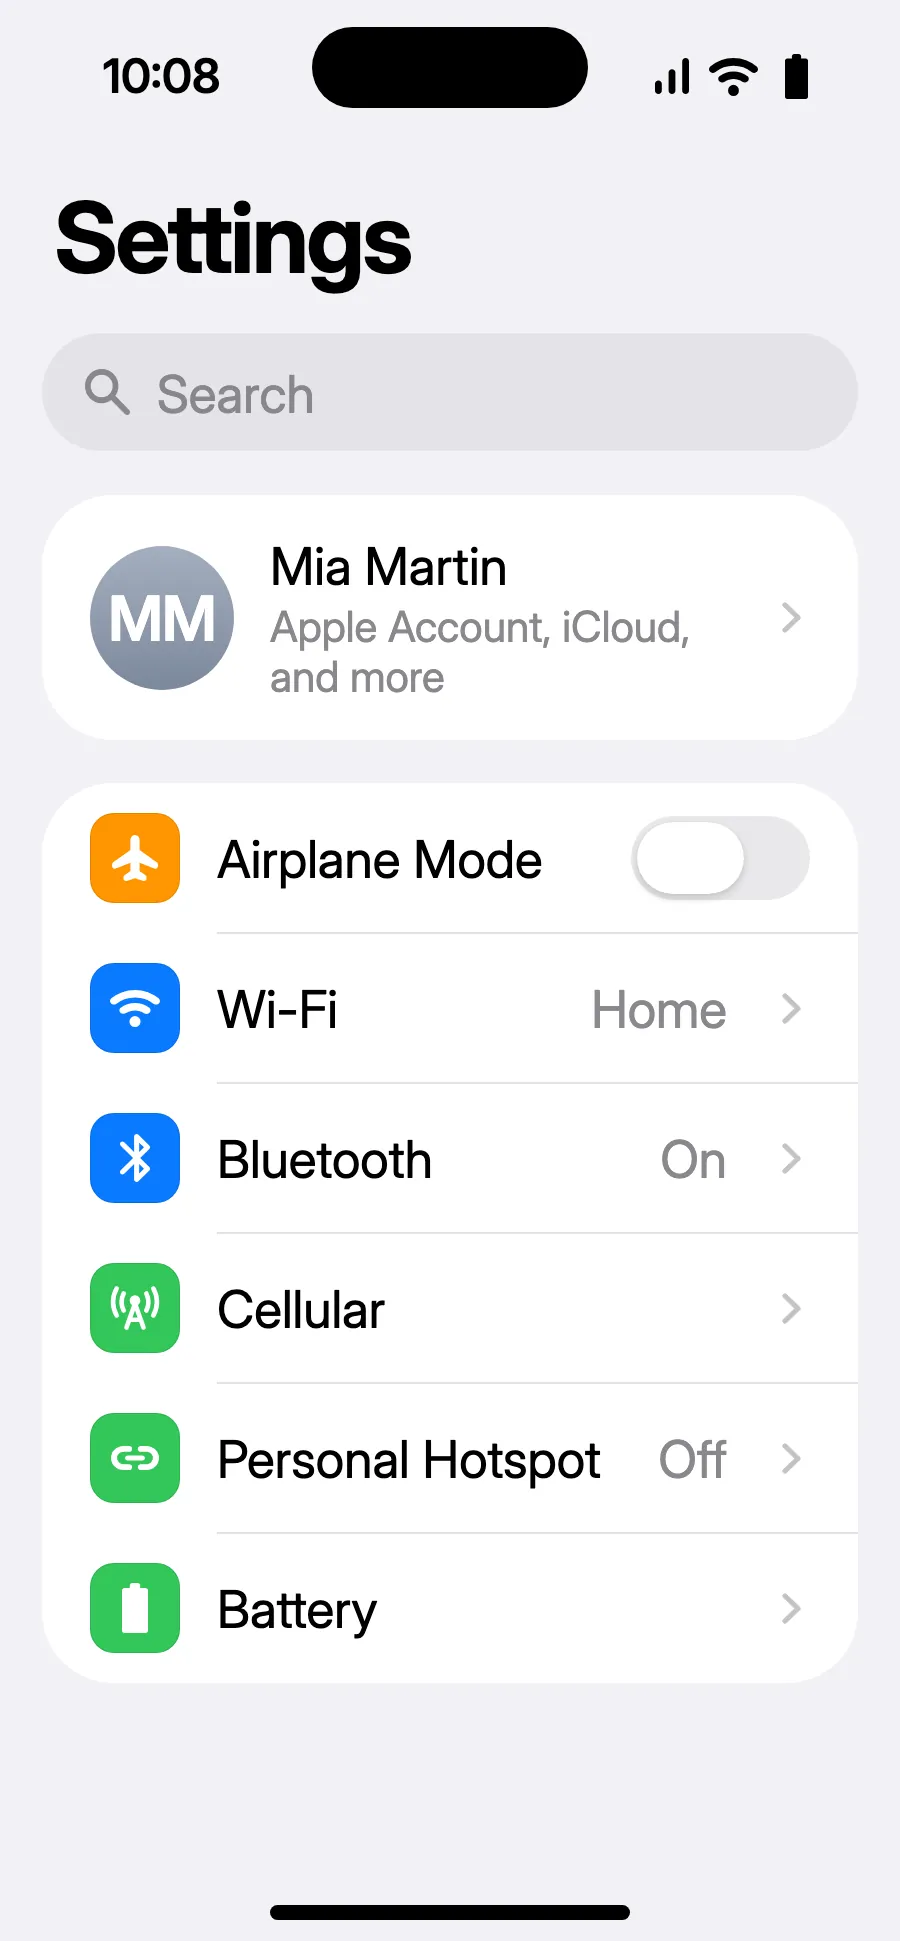
- Open Settings, then Cellular.
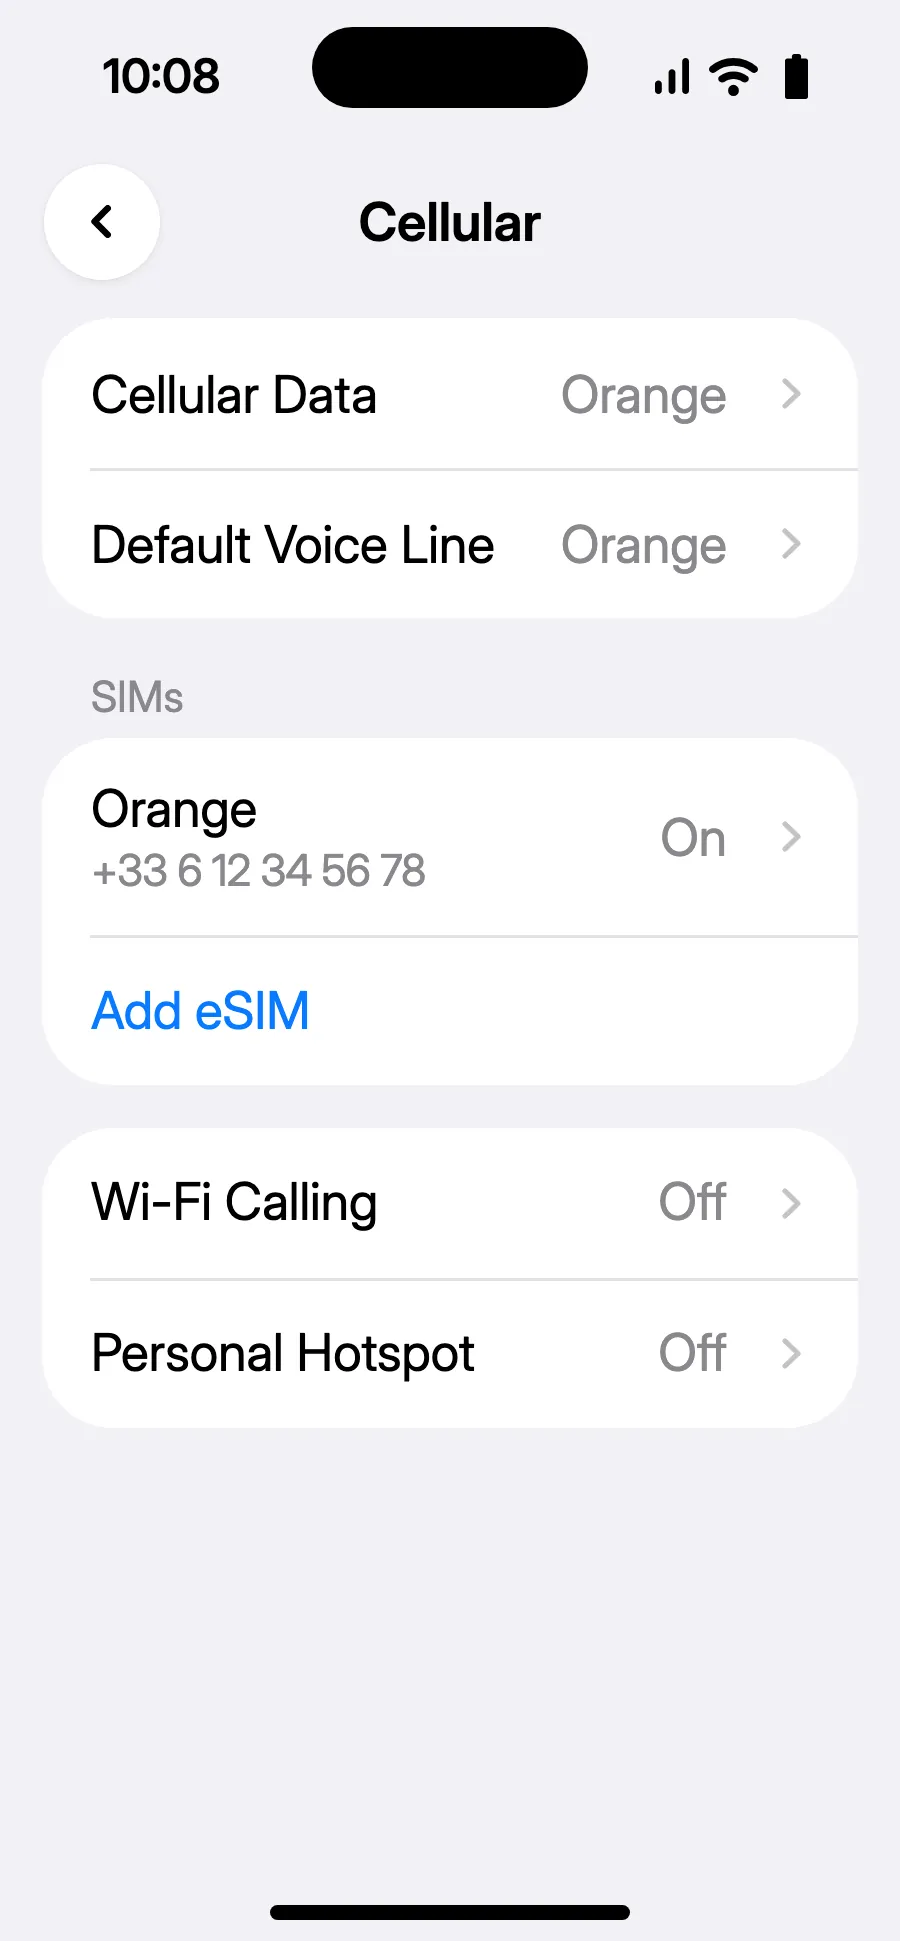
- Tap “Add eSIM”.
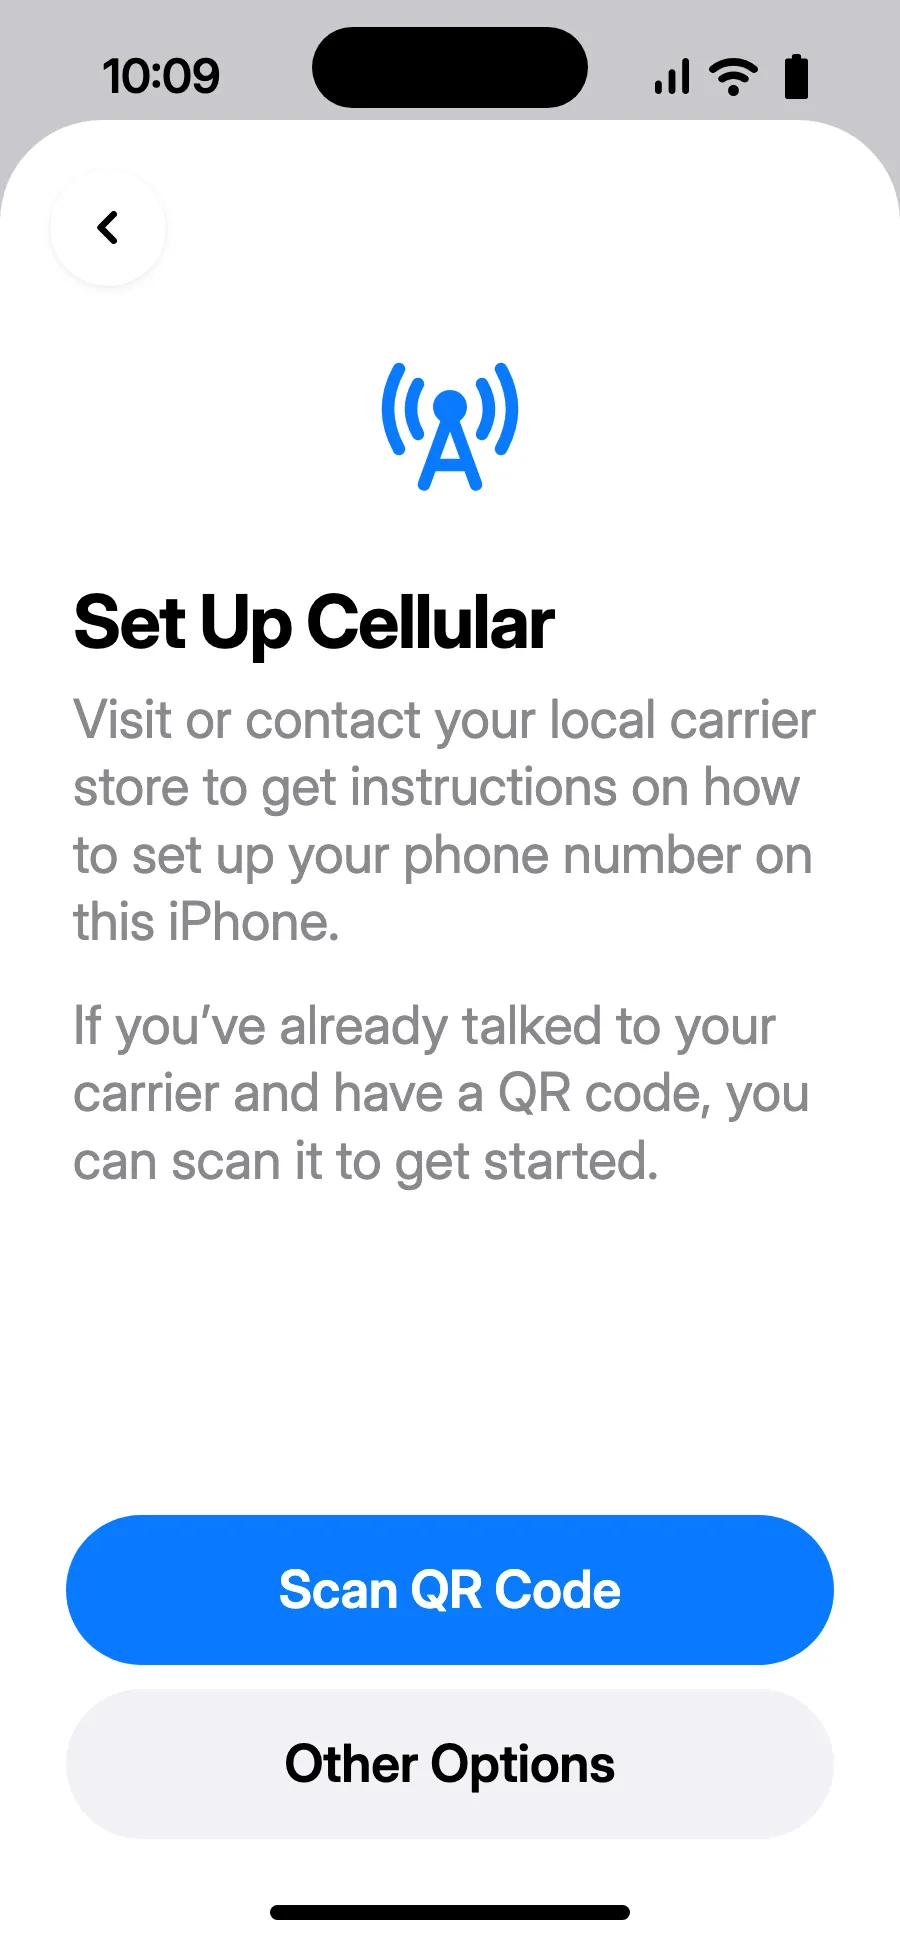
- Tap “Scan QR Code” and scan the QR code we email you after purchase (it's also in your account).
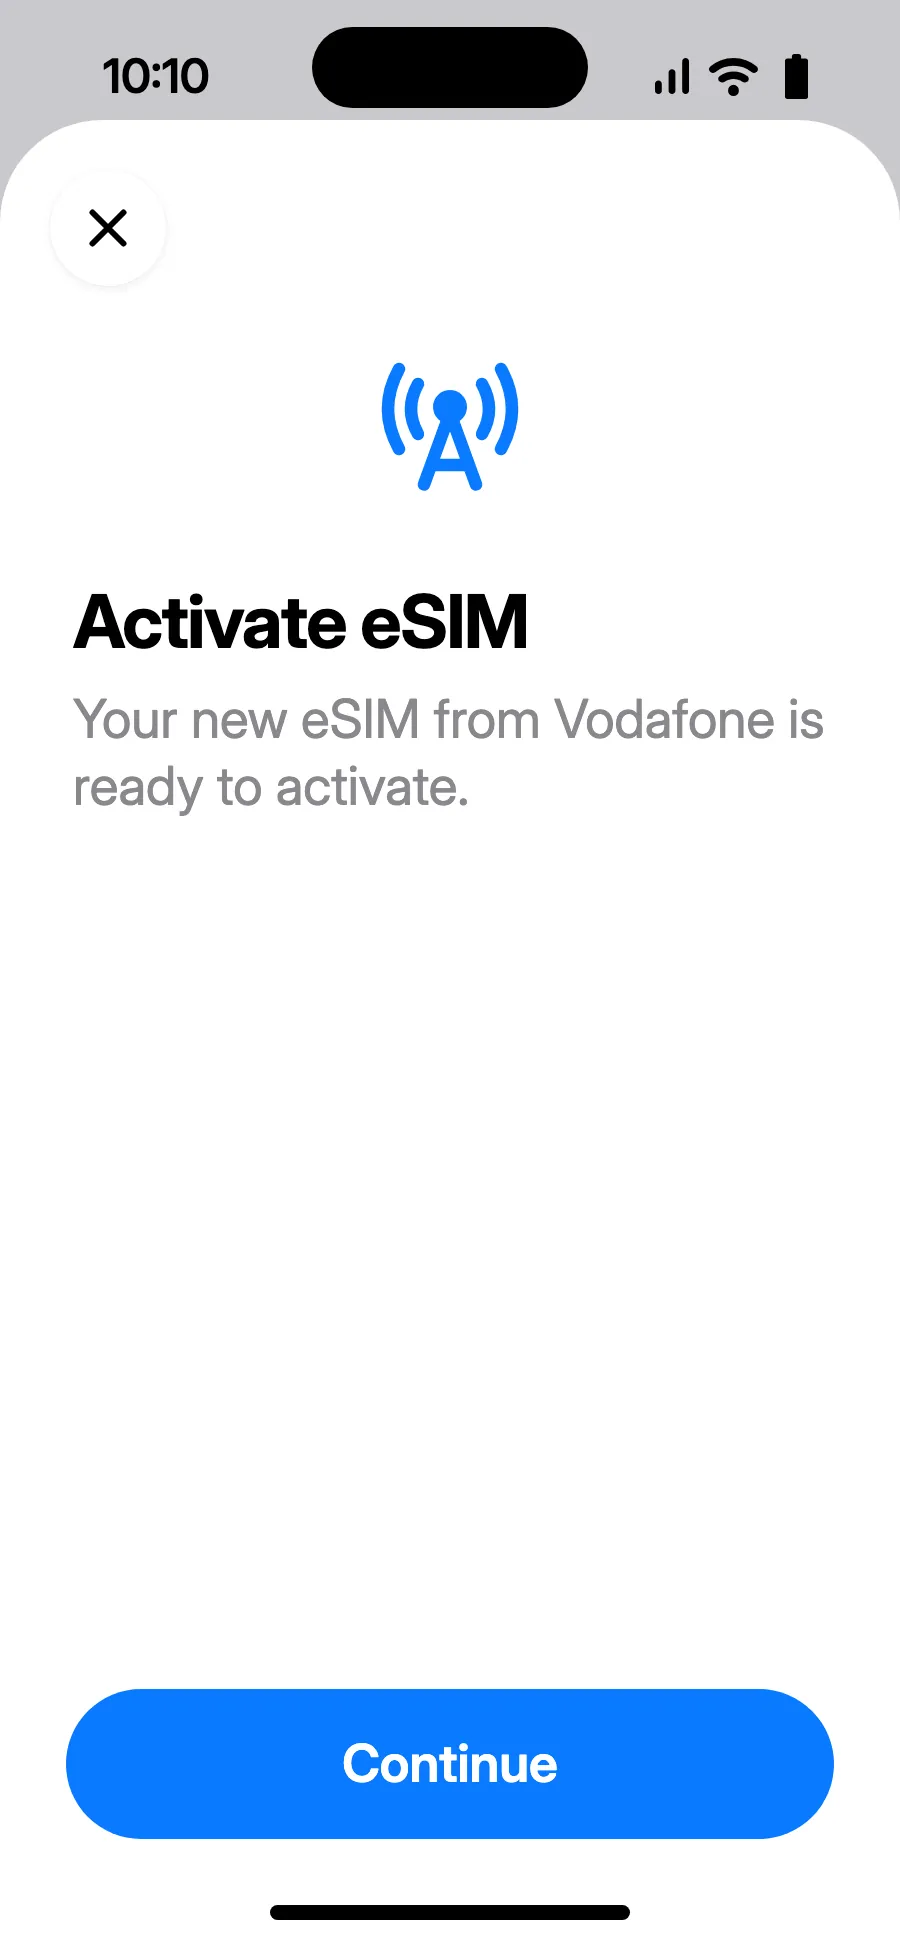
- “Activate eSIM” opens: tap Continue.
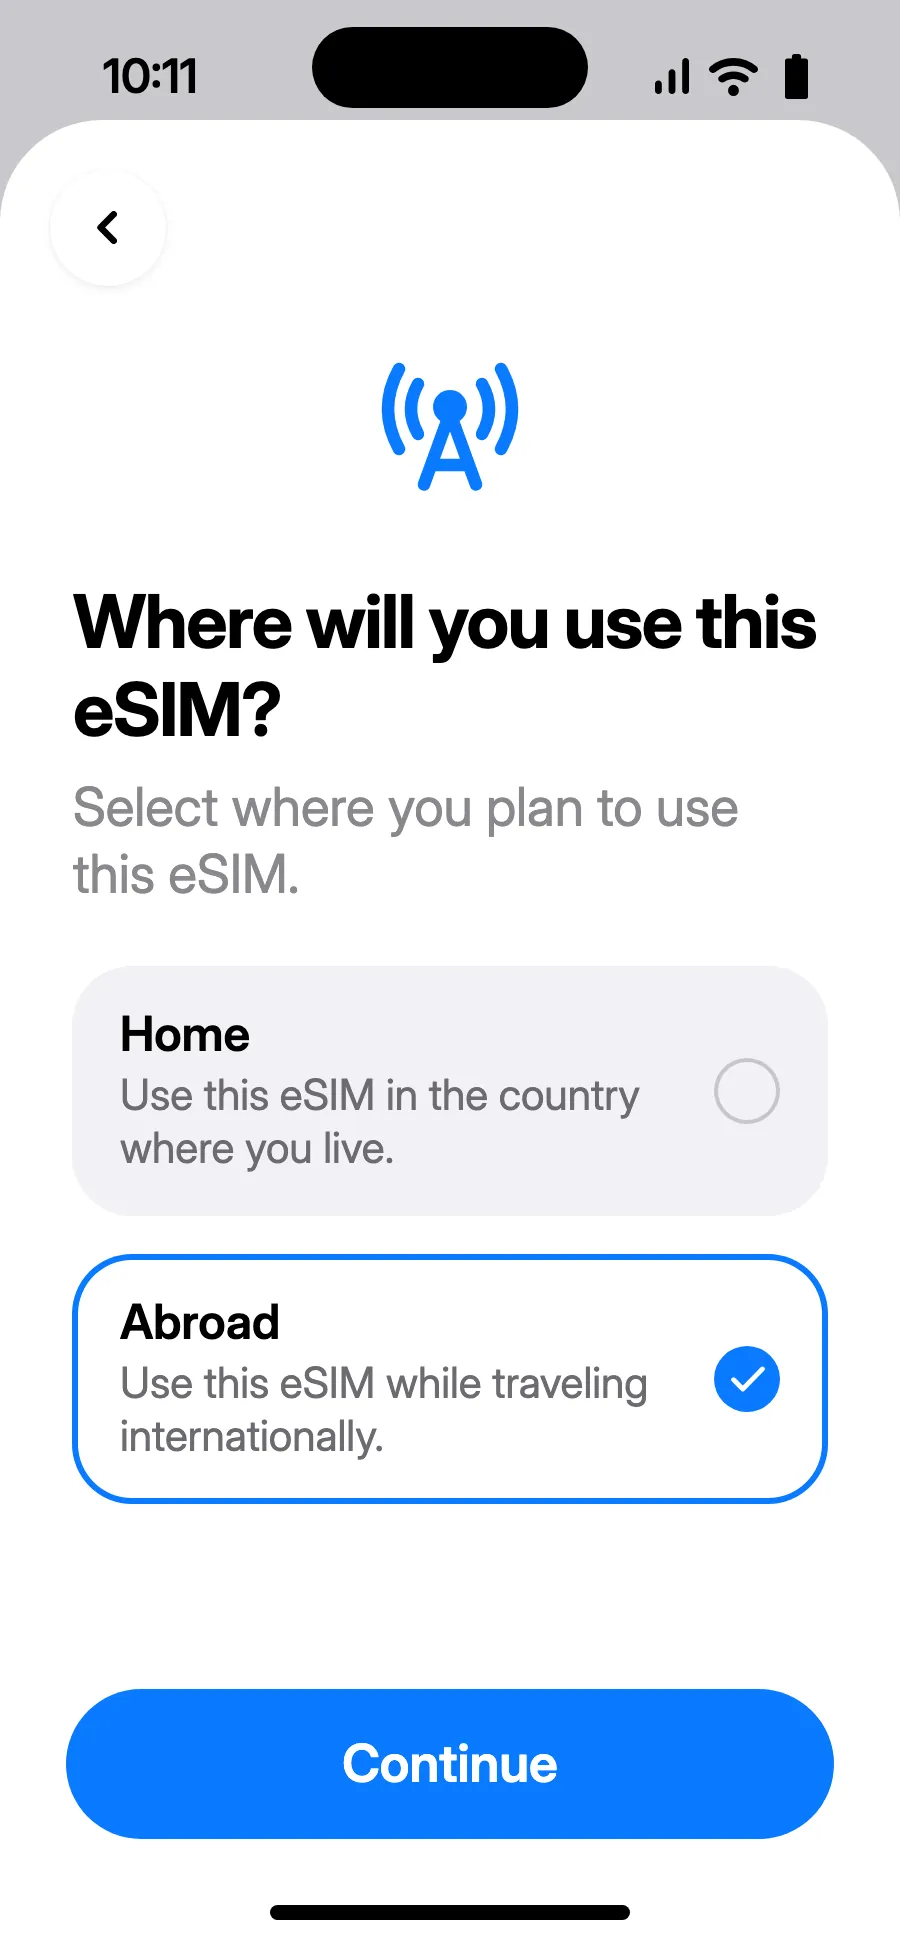
- Choose Abroad, then tap Continue.
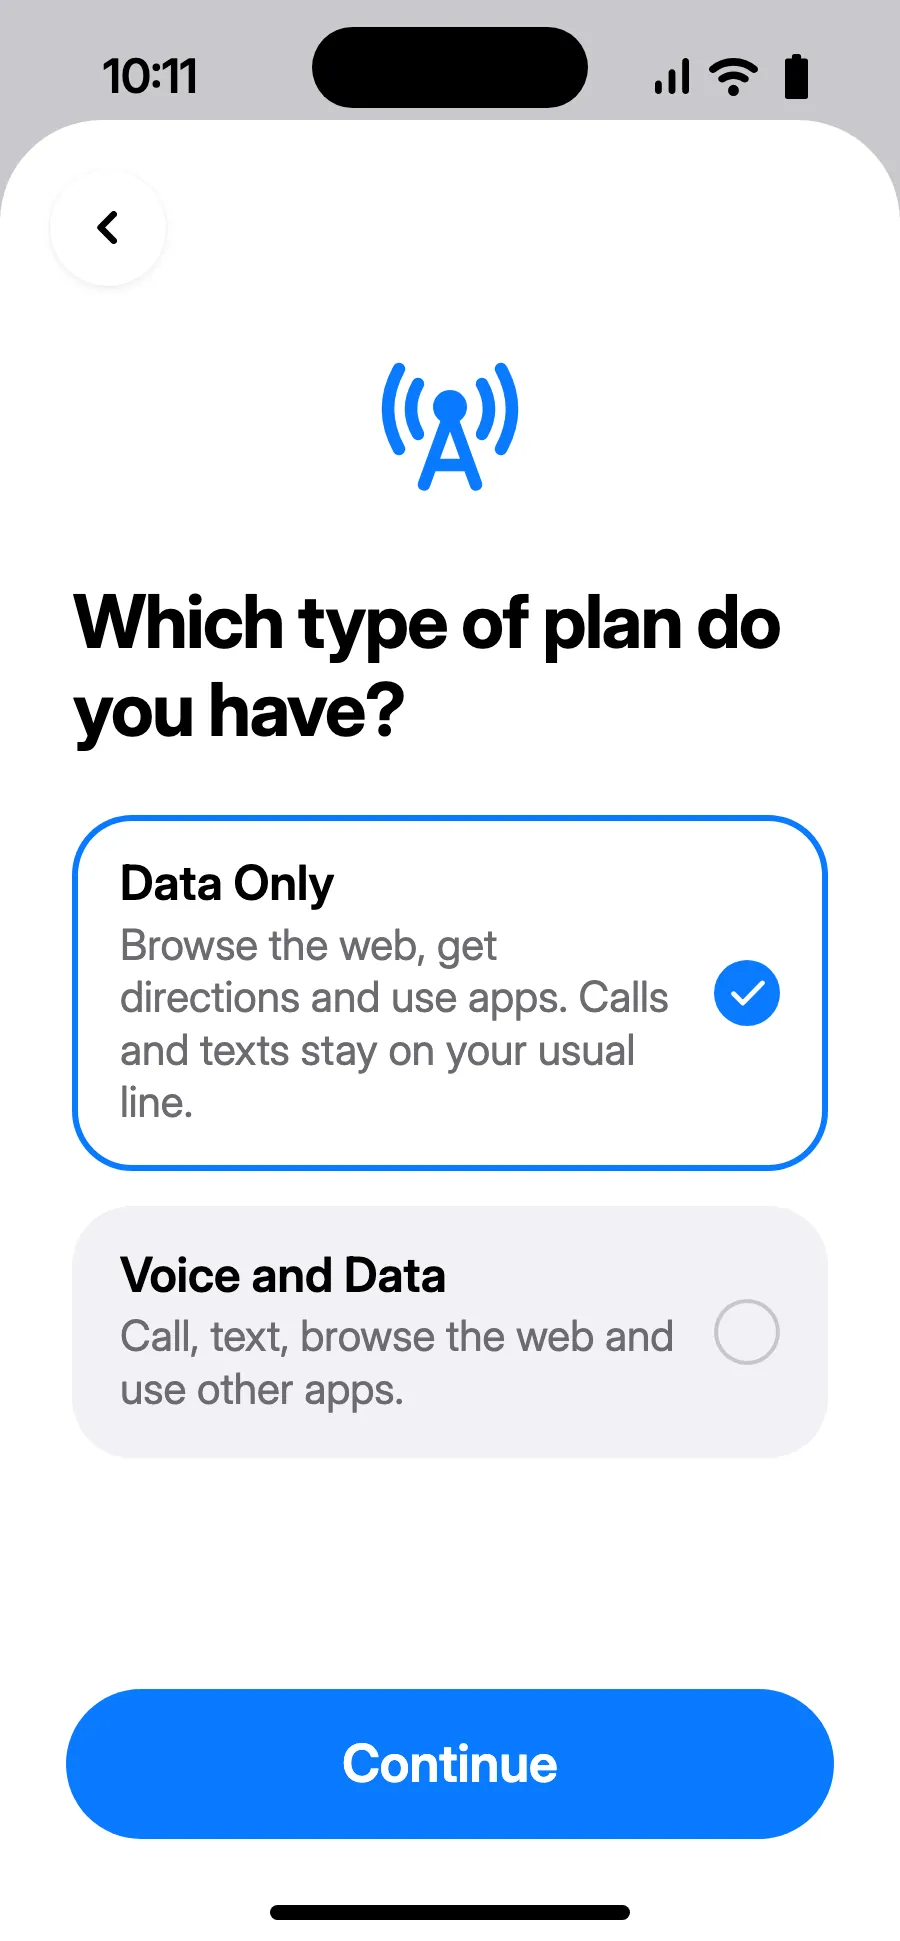
- Choose Data Only, then tap Continue. The eSIM is for data; your usual number keeps calls and texts.
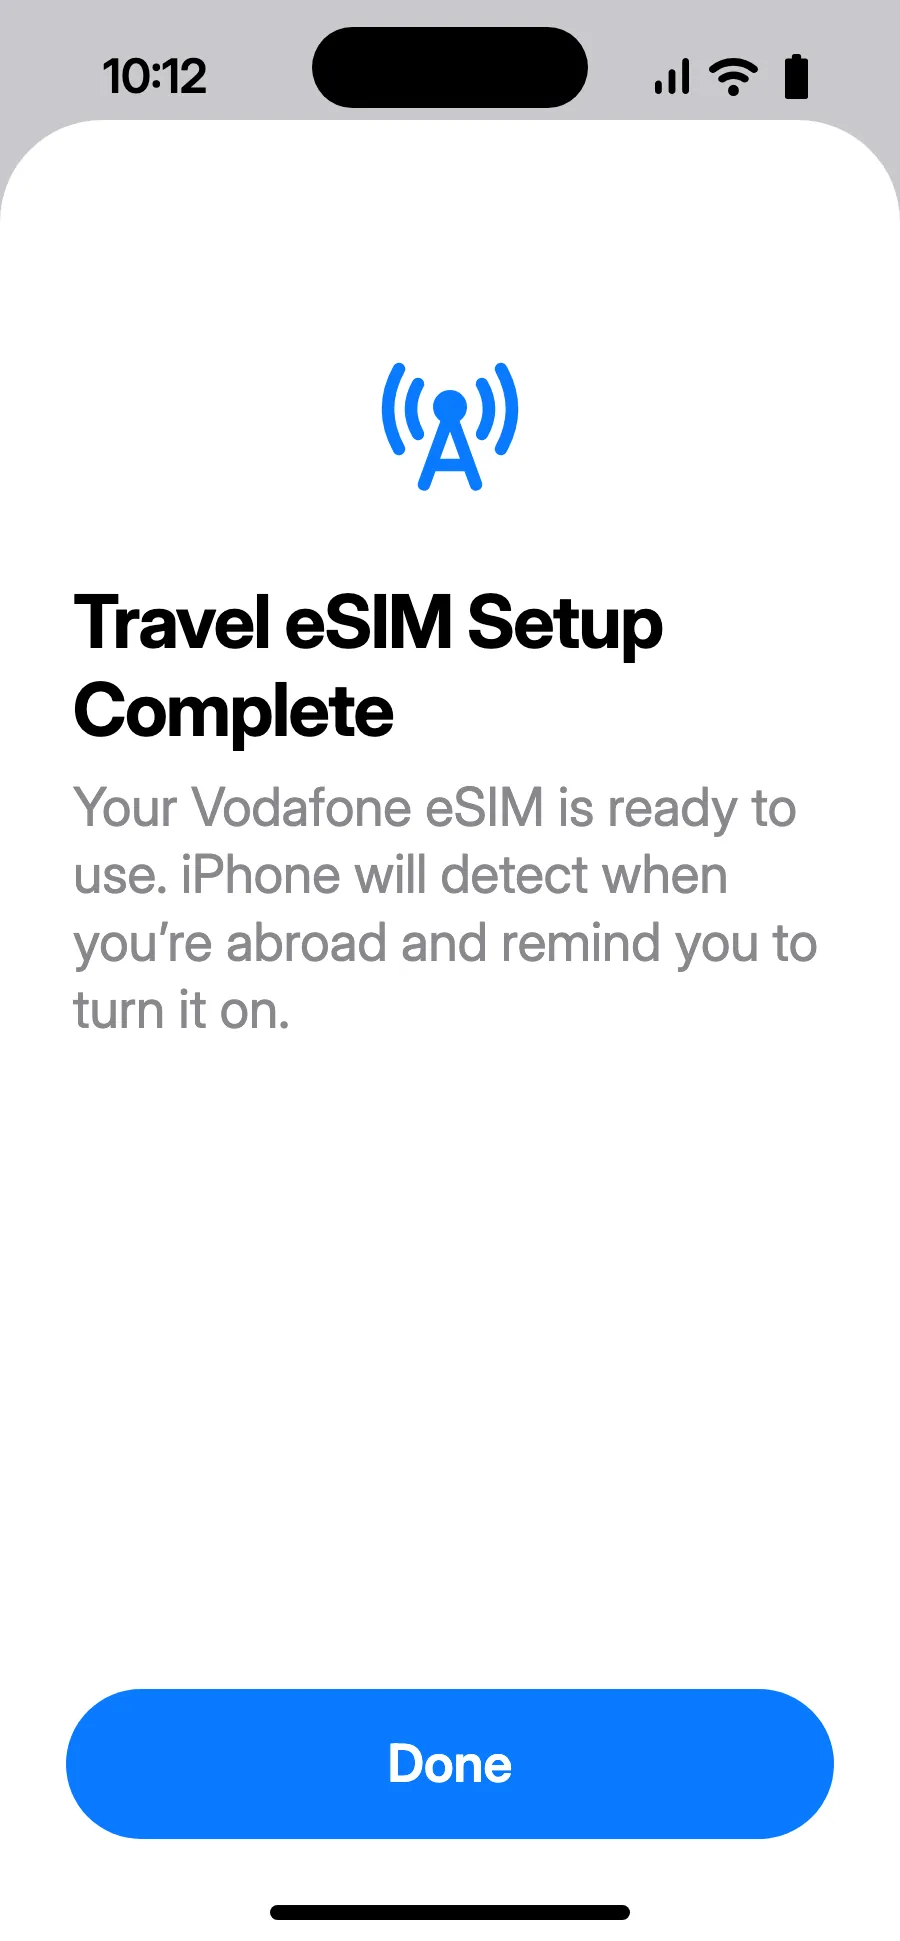
- Tap Done. Your iPhone will remind you to turn on the eSIM once you're abroad.
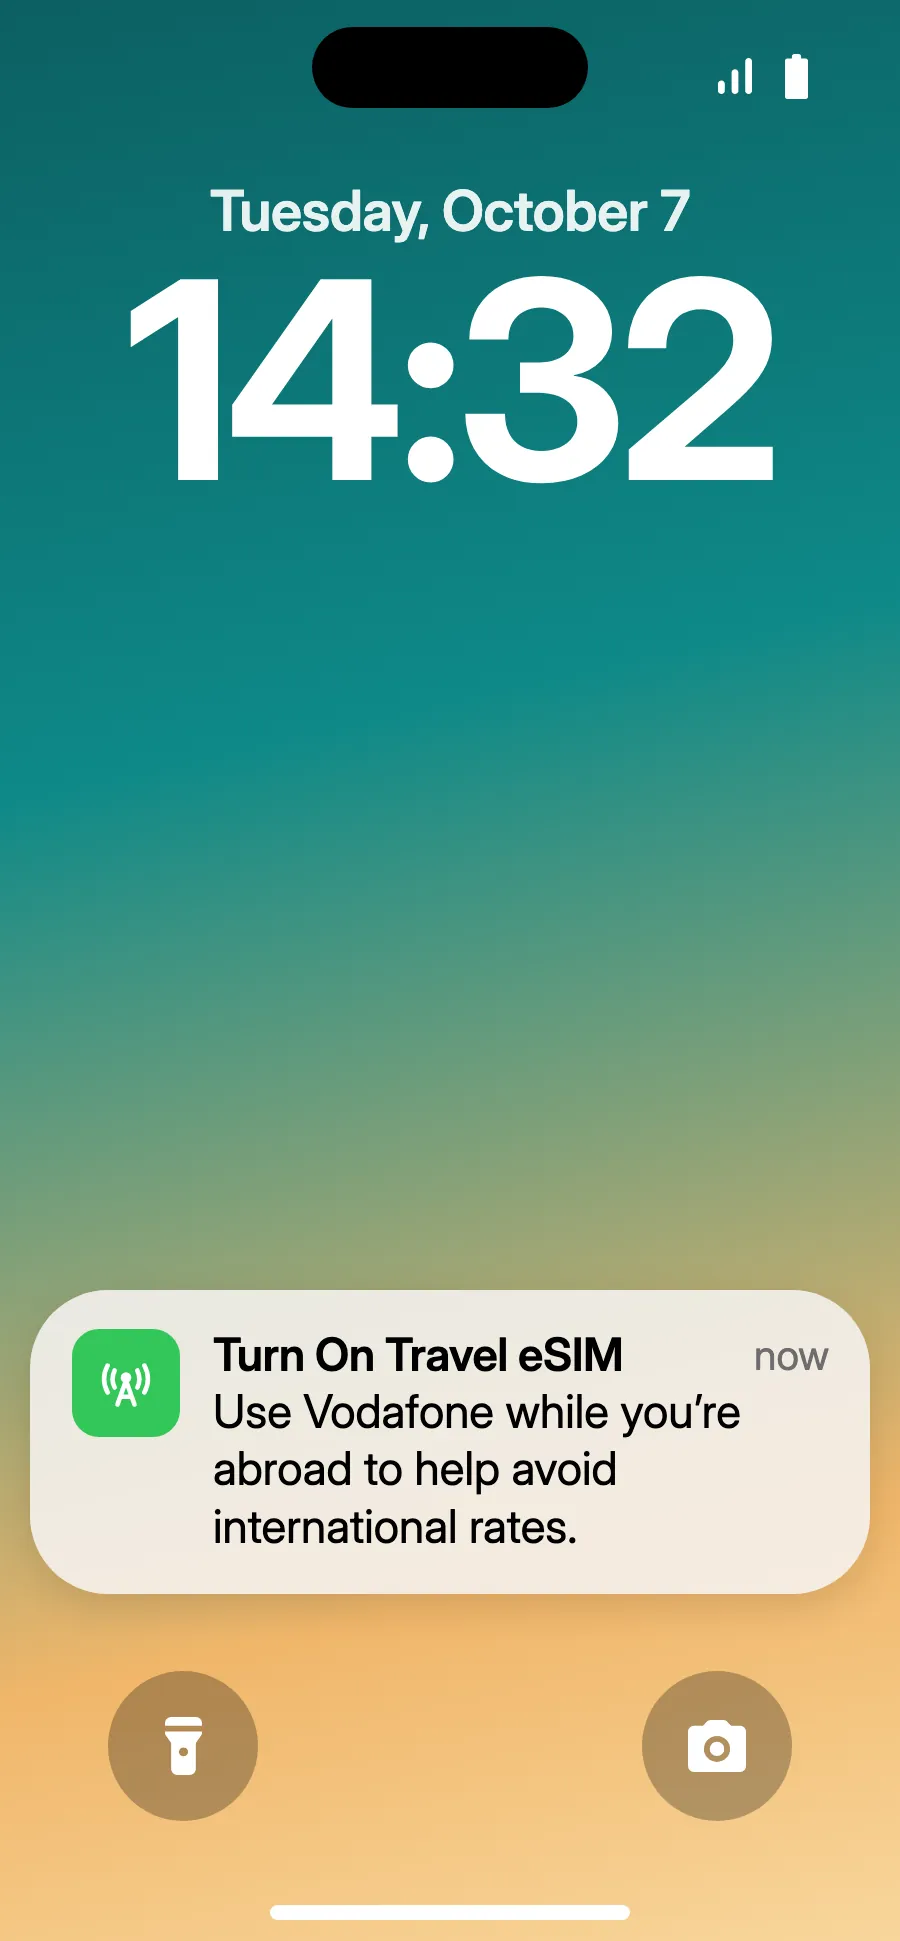
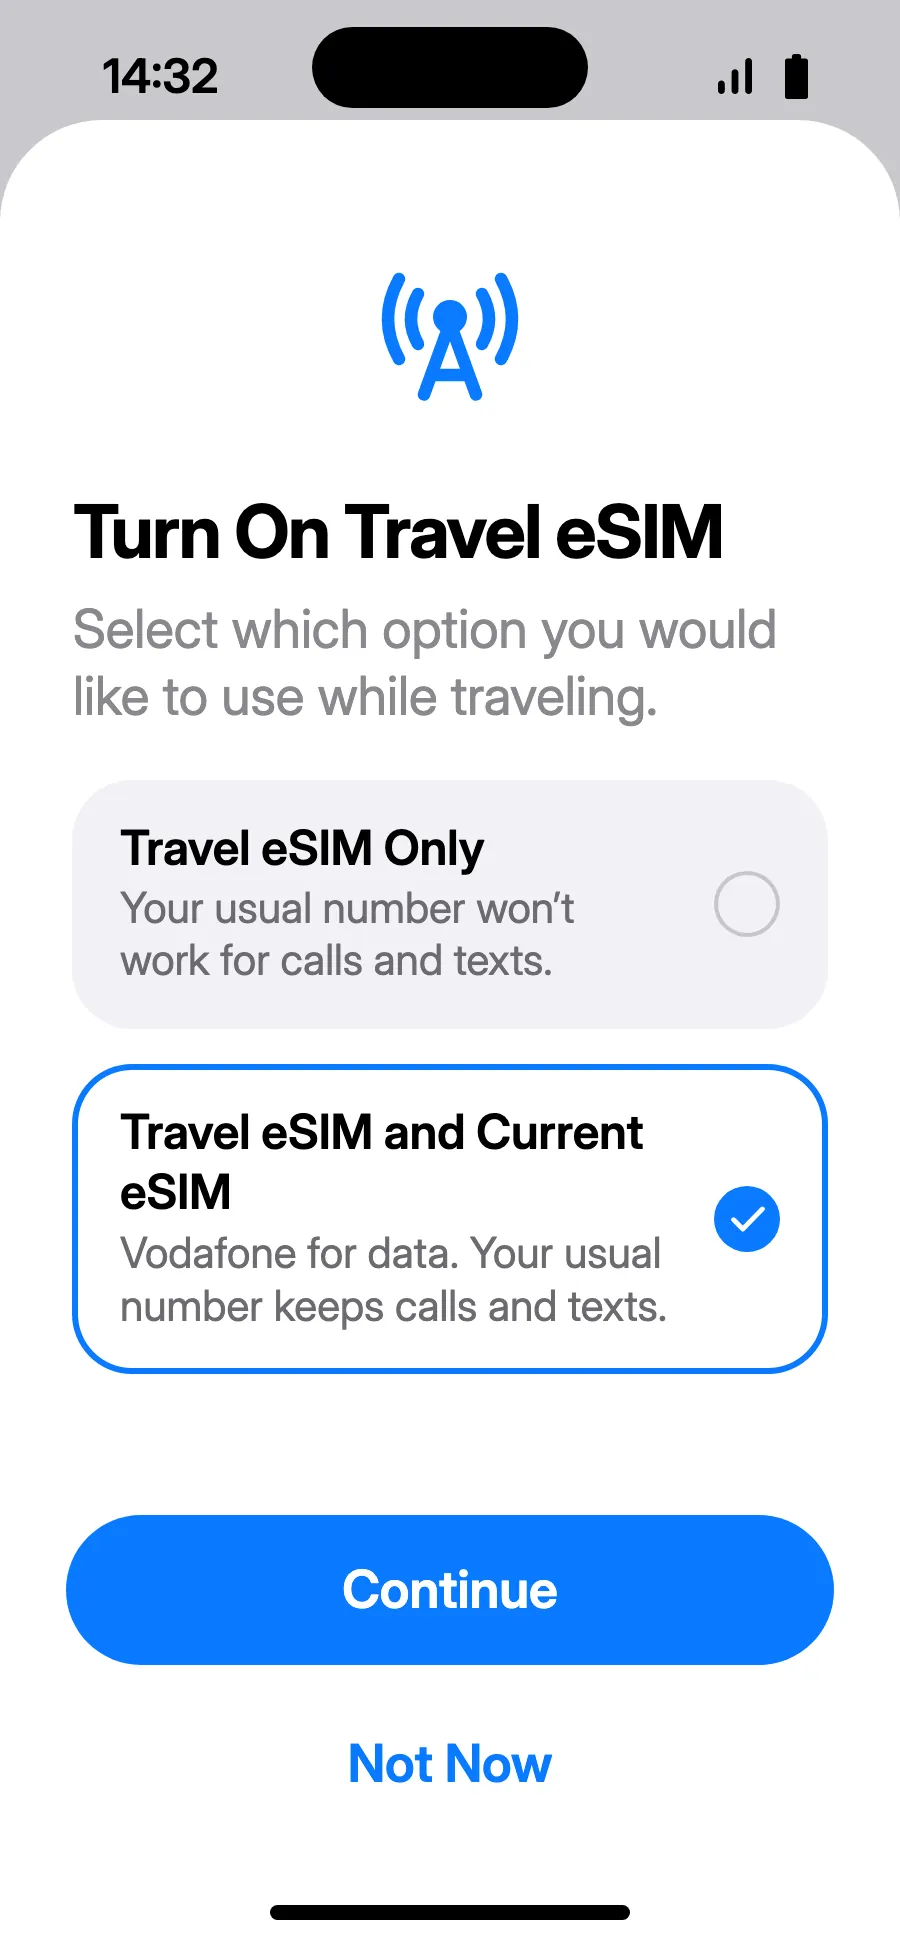
- When you land, your iPhone may show “Turn On Travel eSIM”: tap the notification.
- Choose “Travel eSIM and Current eSIM”, then Continue. You keep your number for calls and texts (bank codes included); your carrier may charge for calls you receive.
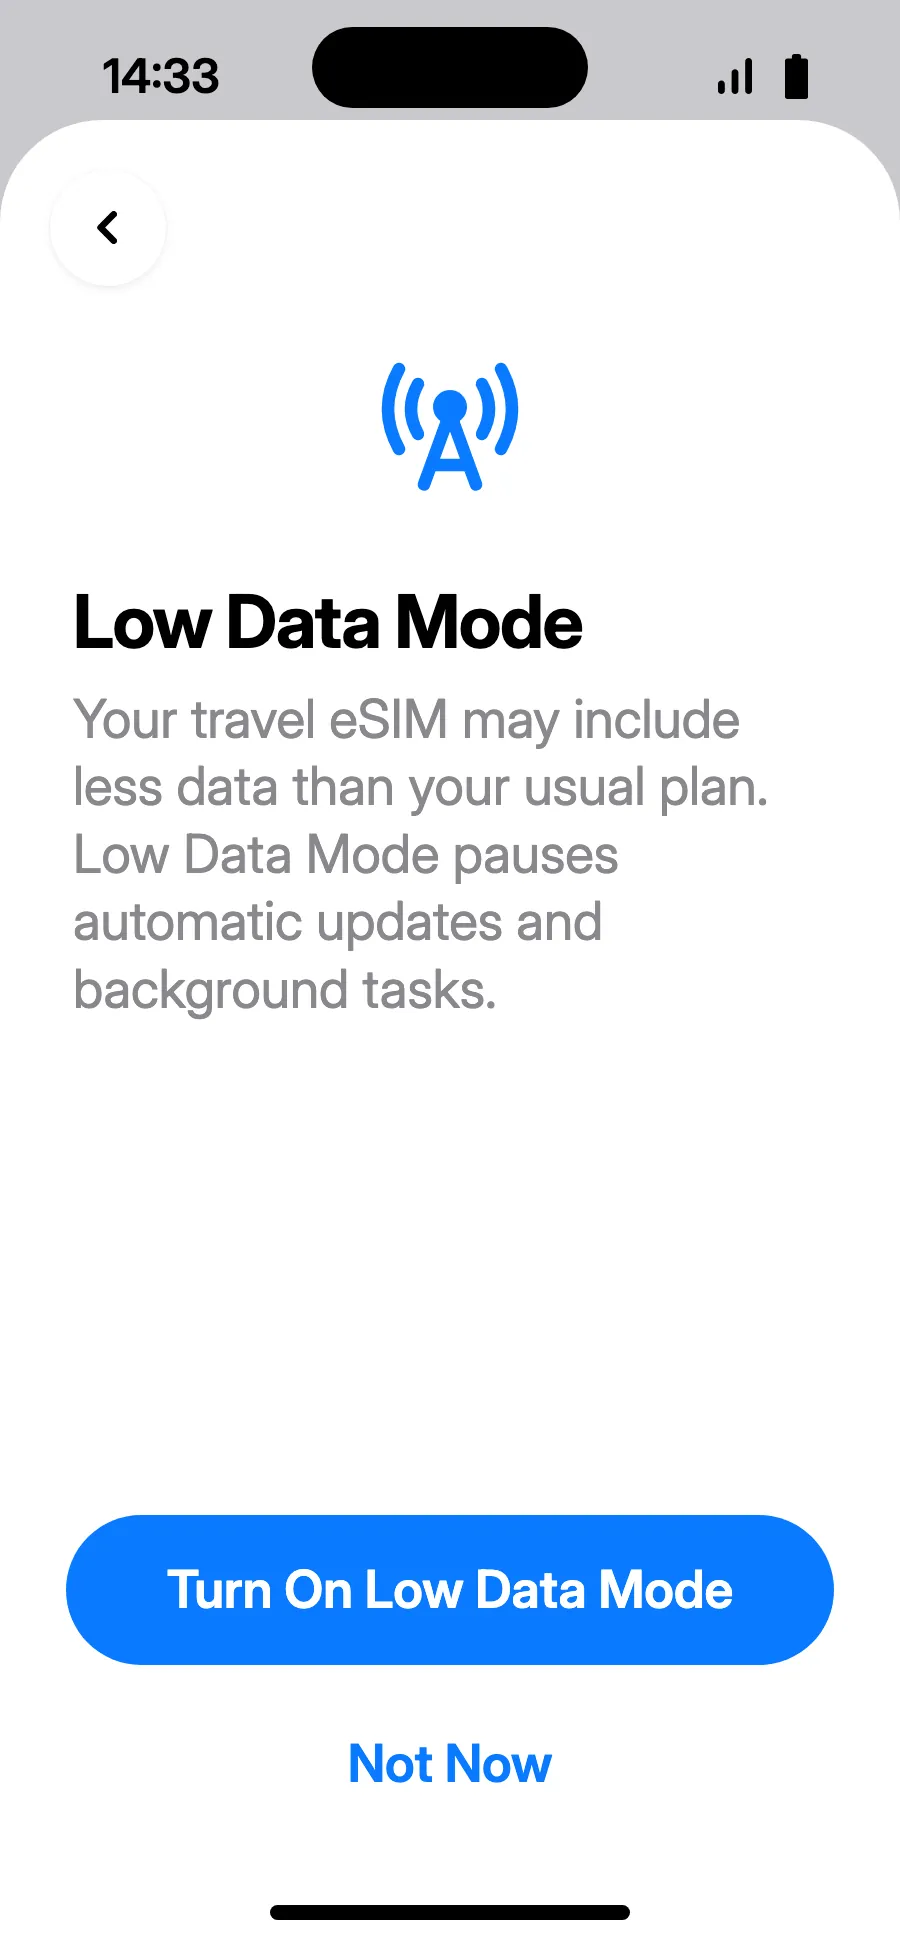
- Low Data Mode saves your plan: tap “Turn On Low Data Mode”, or “Not Now”.
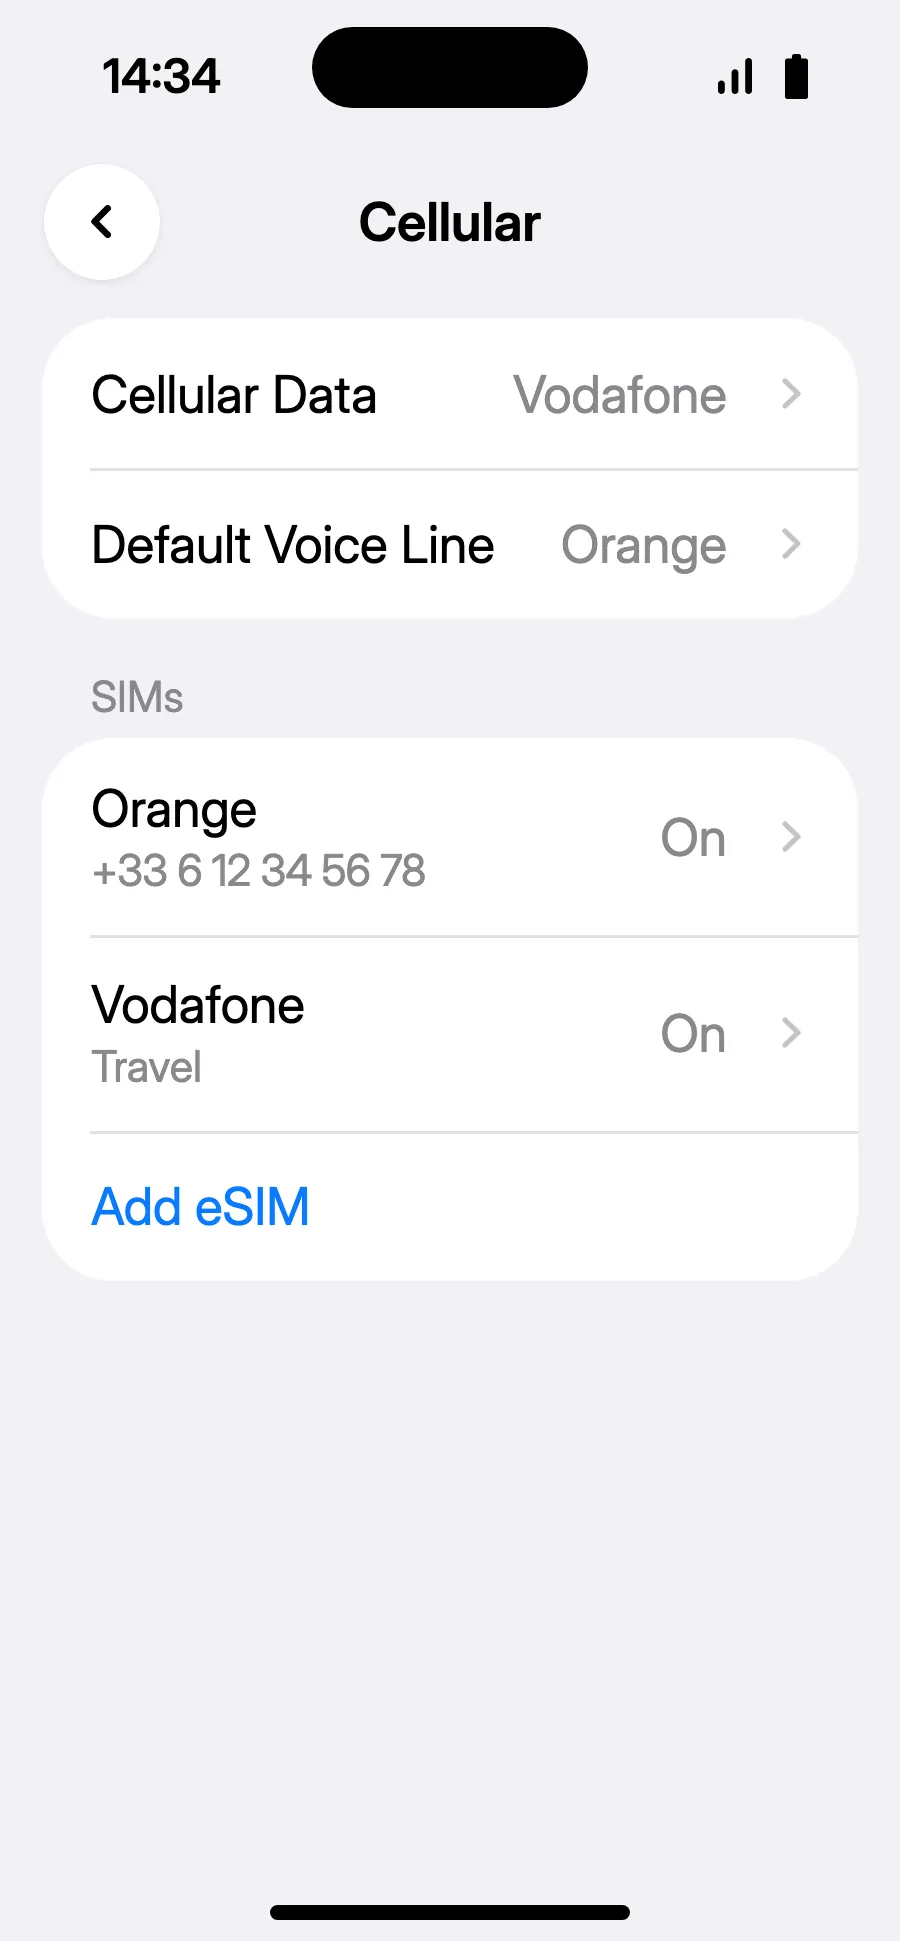
- You're set: Cellular Data shows the new eSIM.
After you buy, your QR code arrives by email and in your account. Show it on another screen, then follow these steps on your phone.
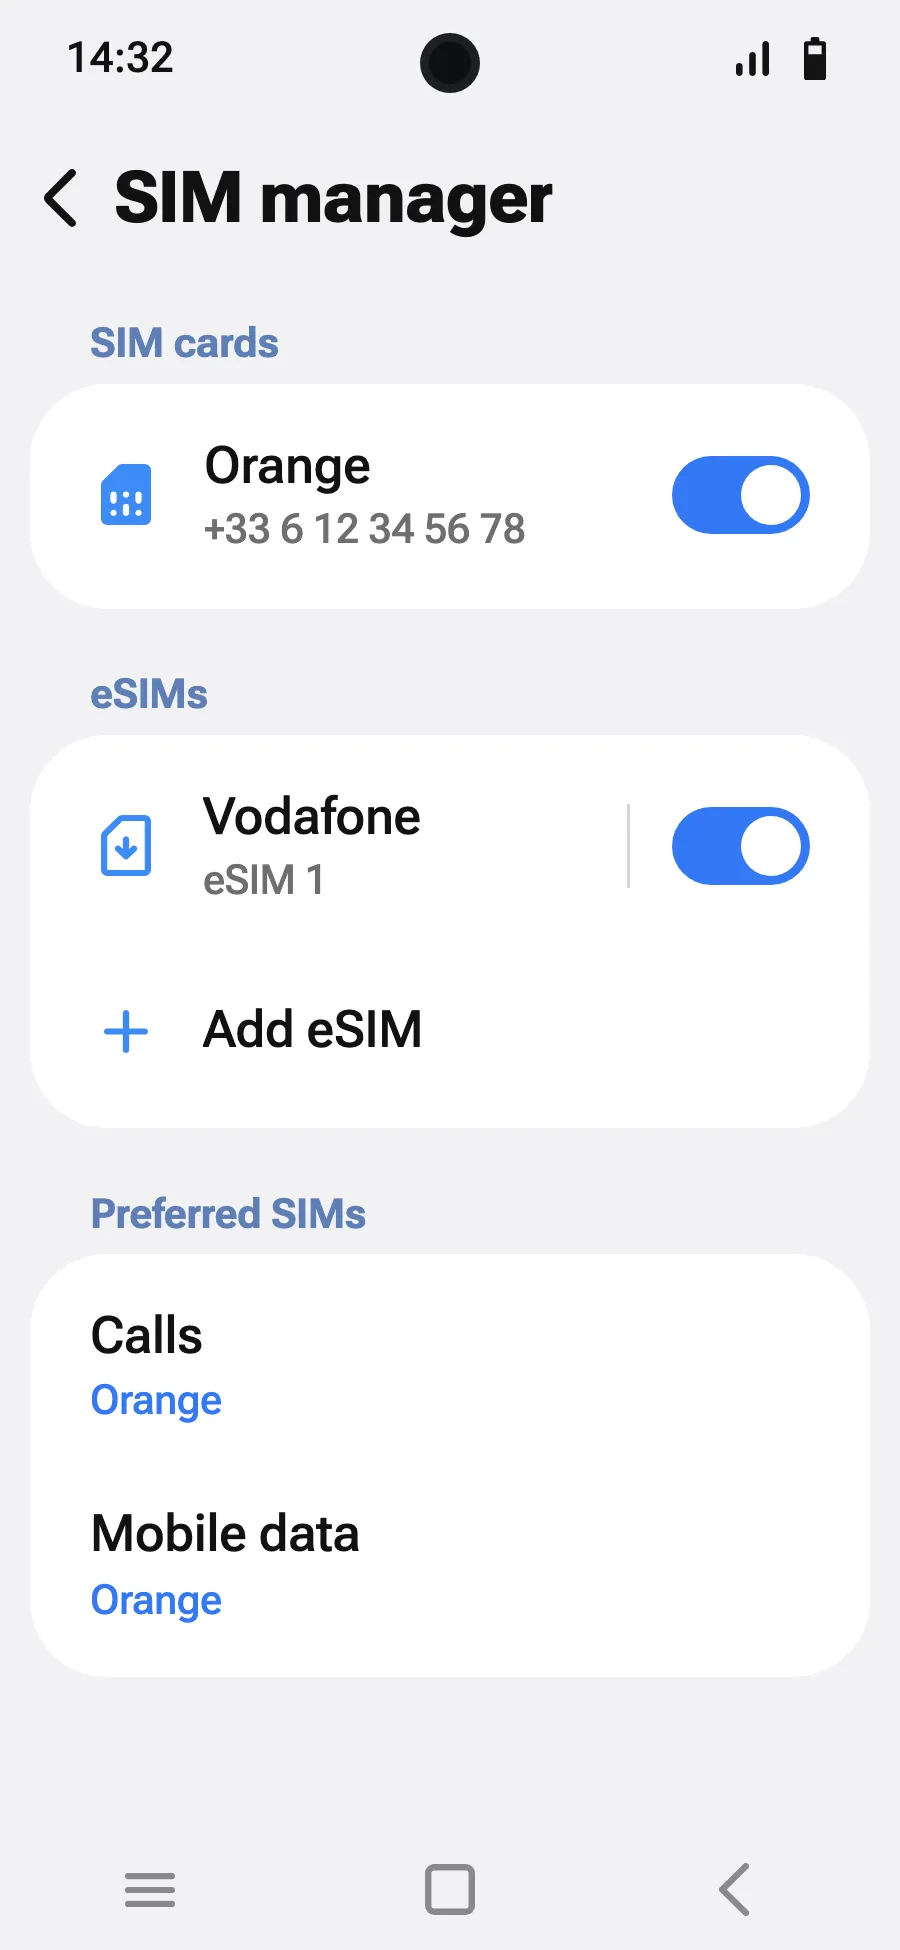
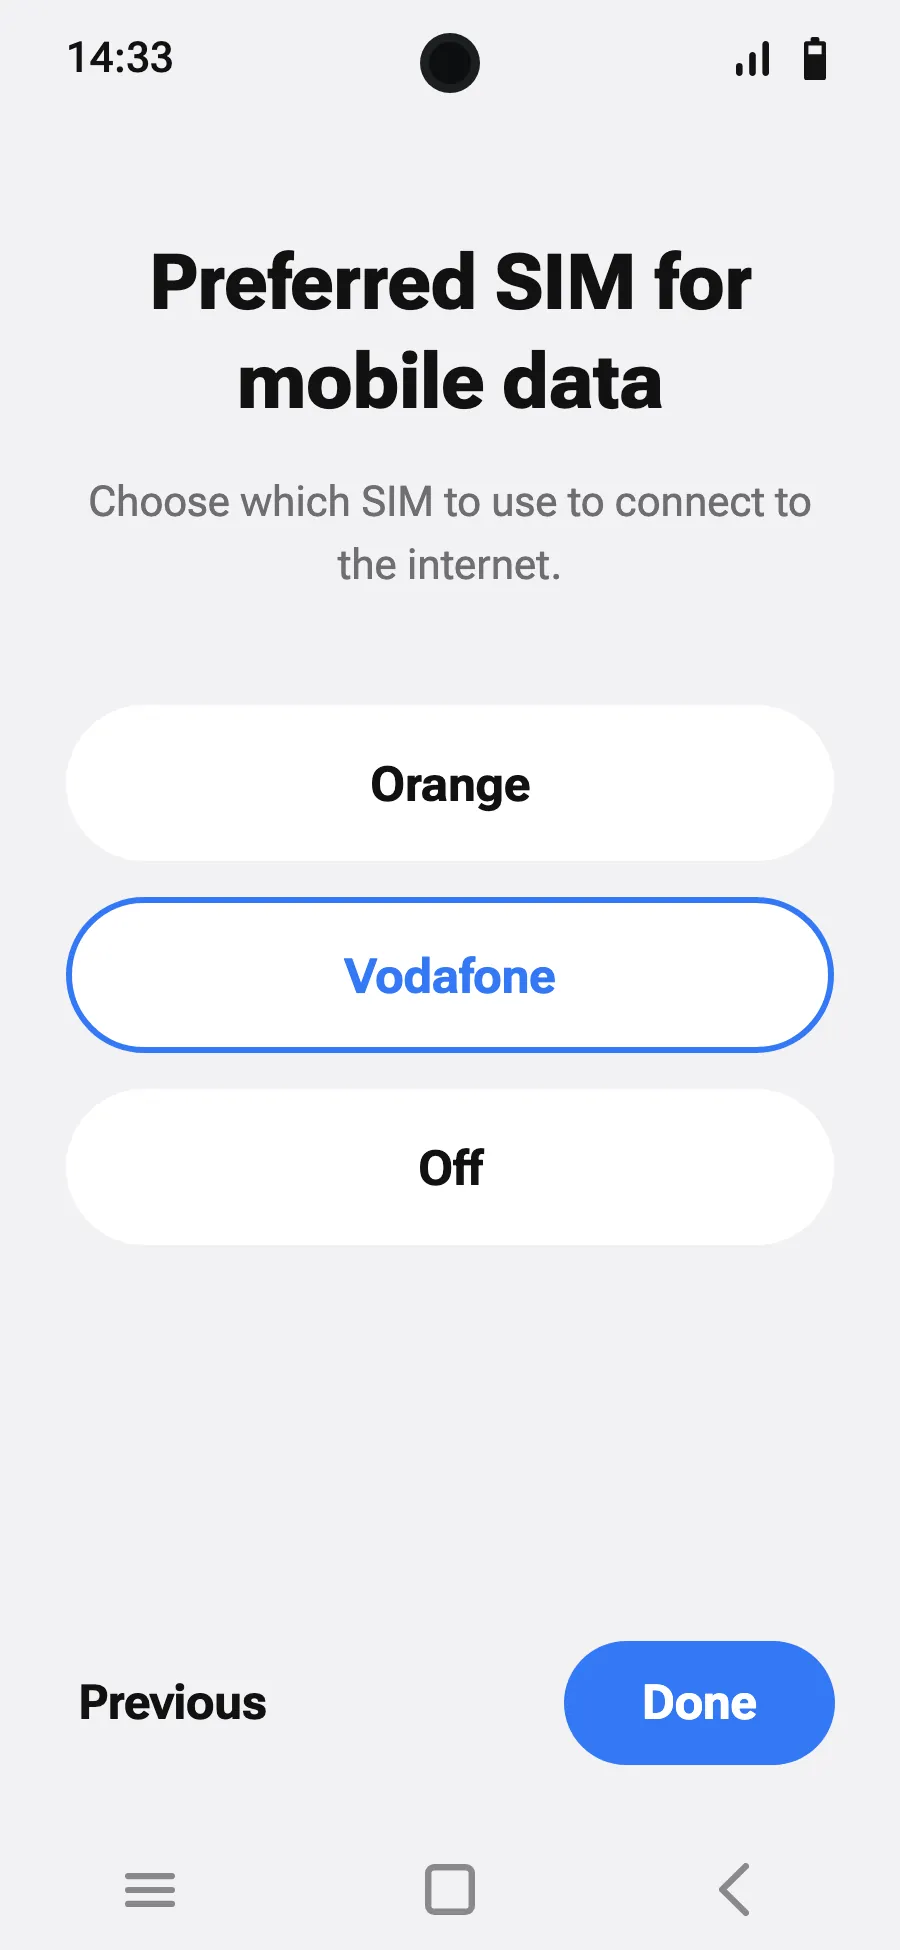
Before you leave: install your eSIMStep 1 of 8
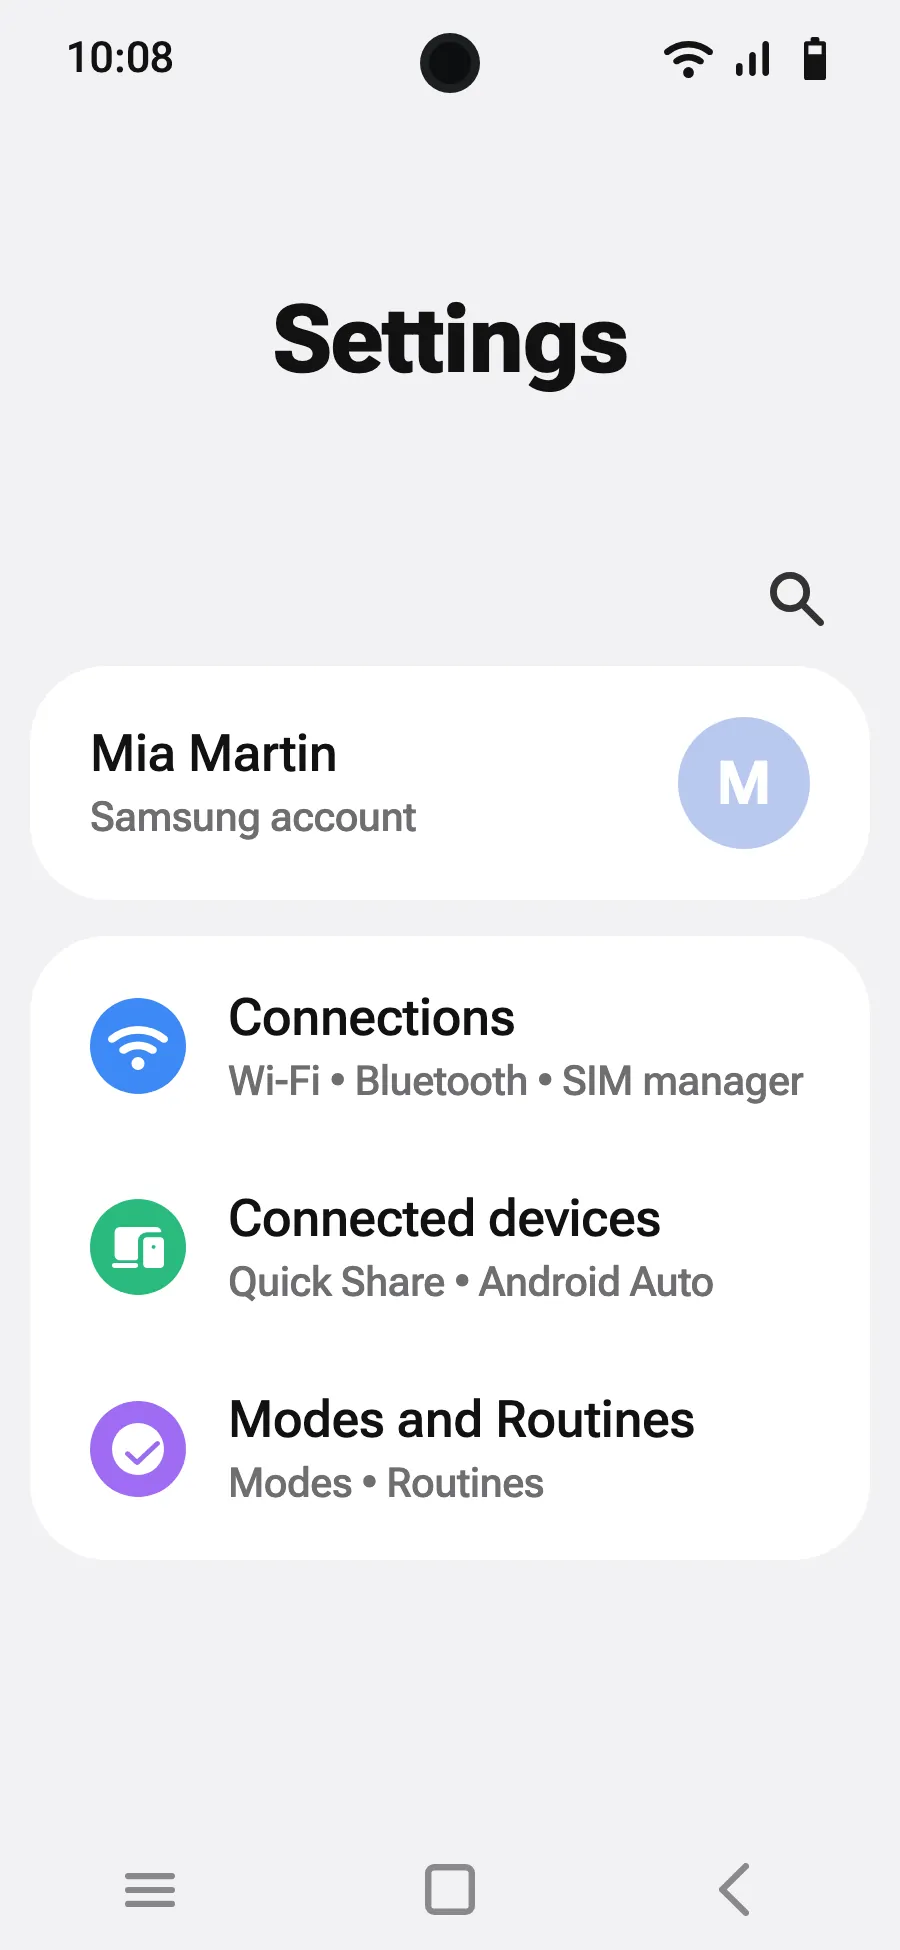
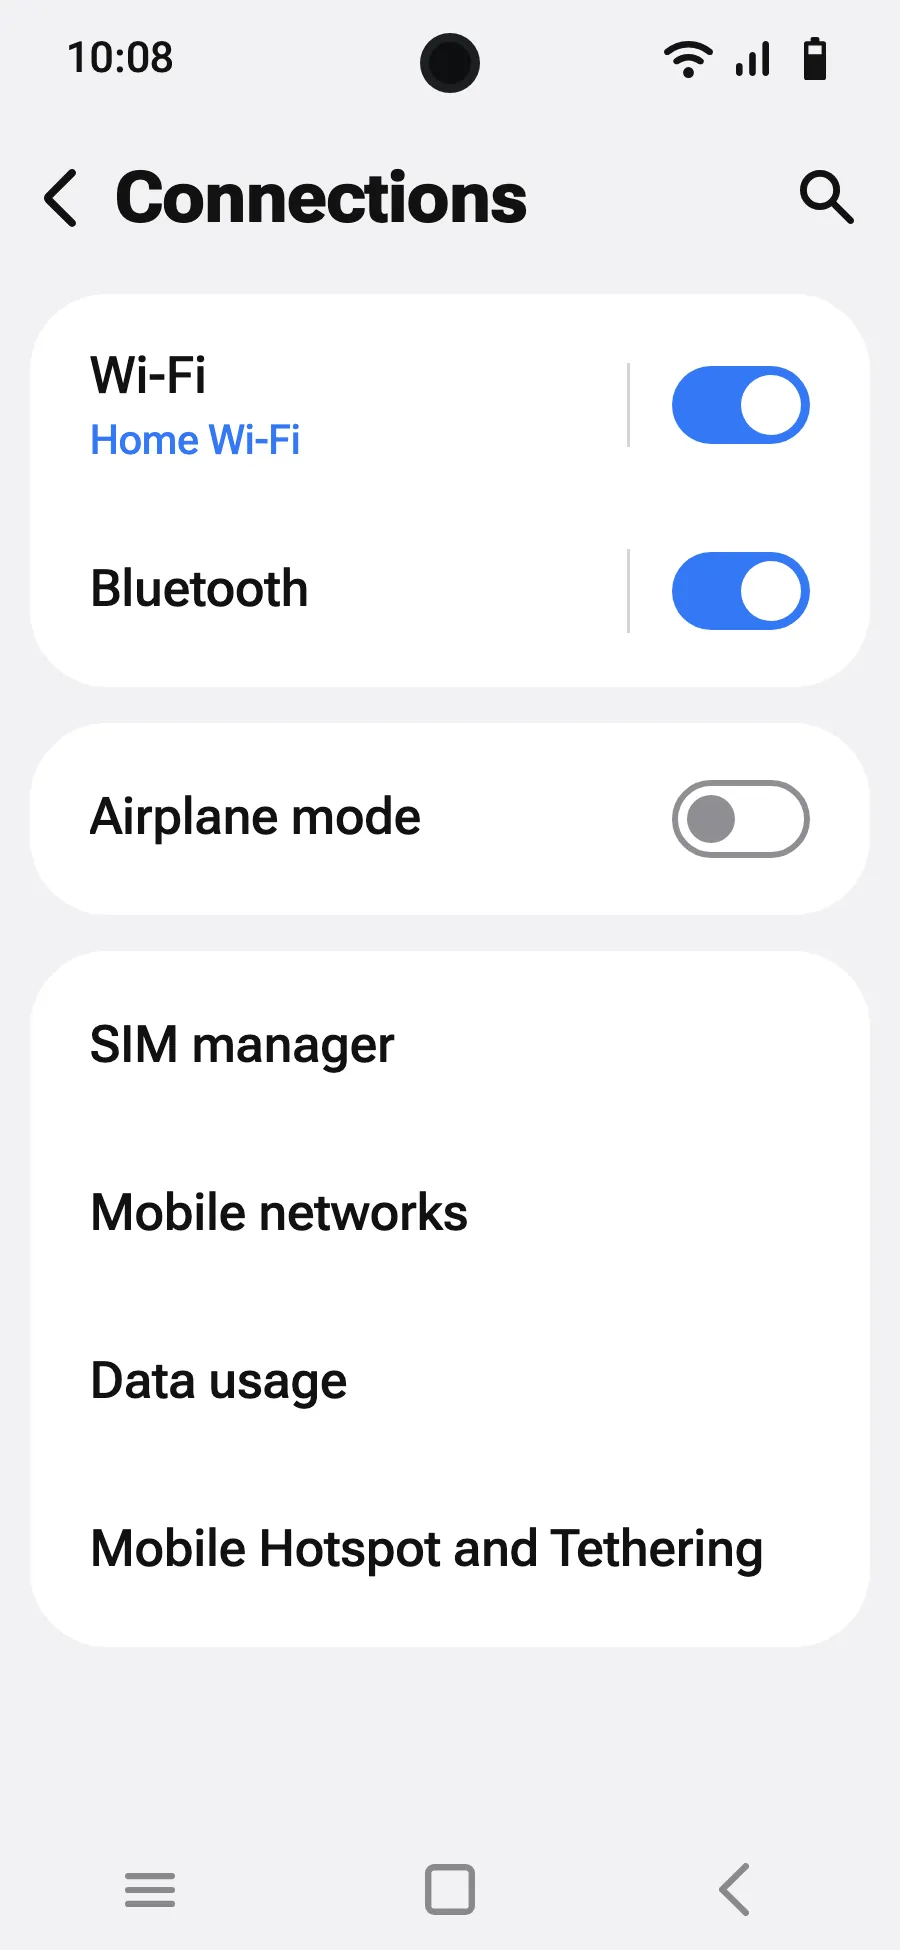
- Open Settings, then Connections.
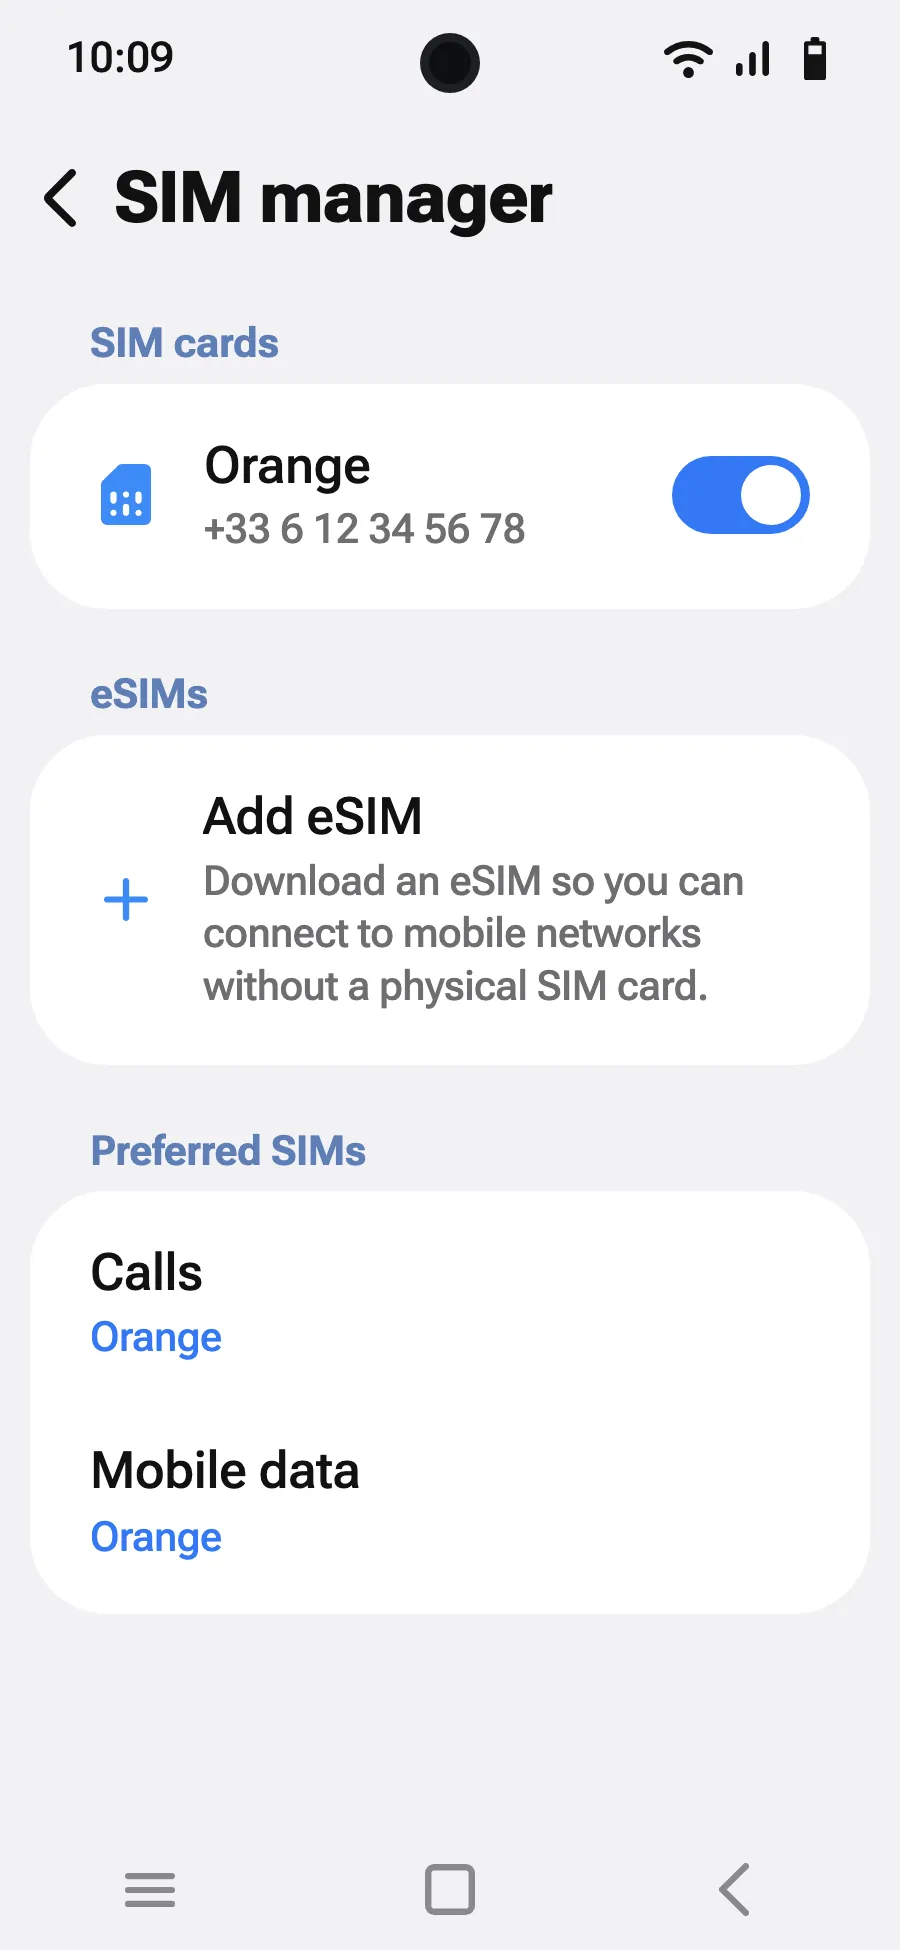
- Tap “SIM manager”.
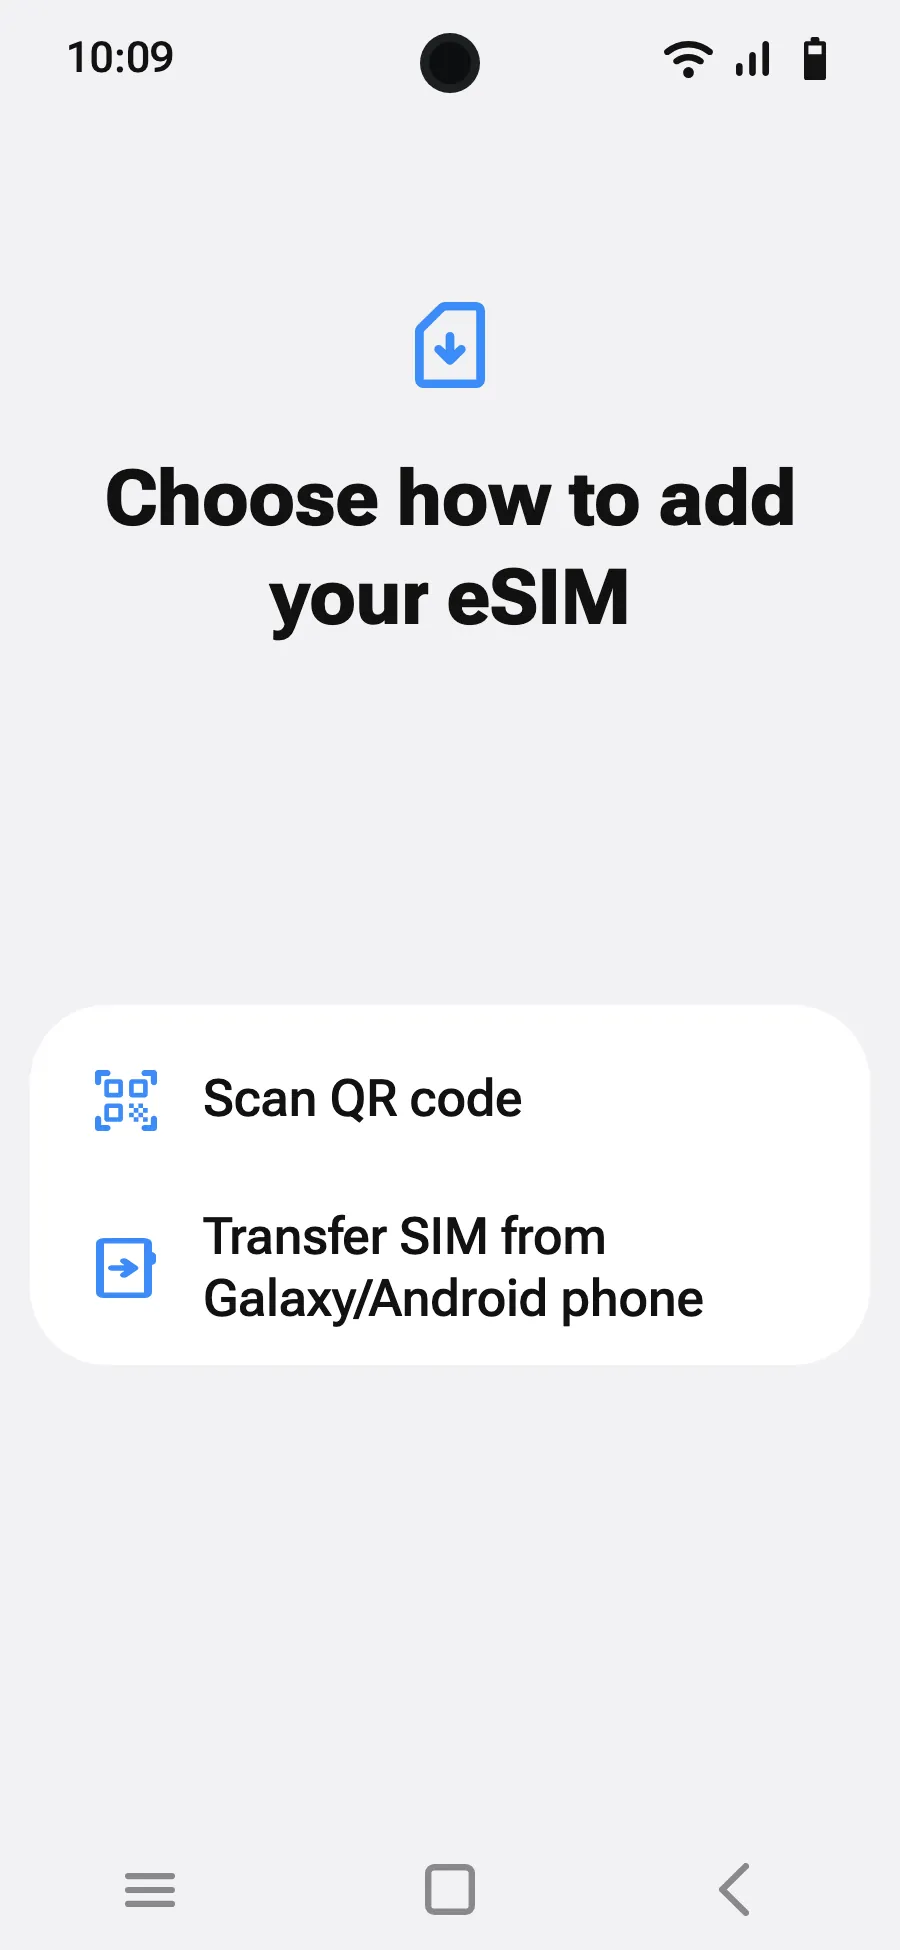
- Tap “Add eSIM”.
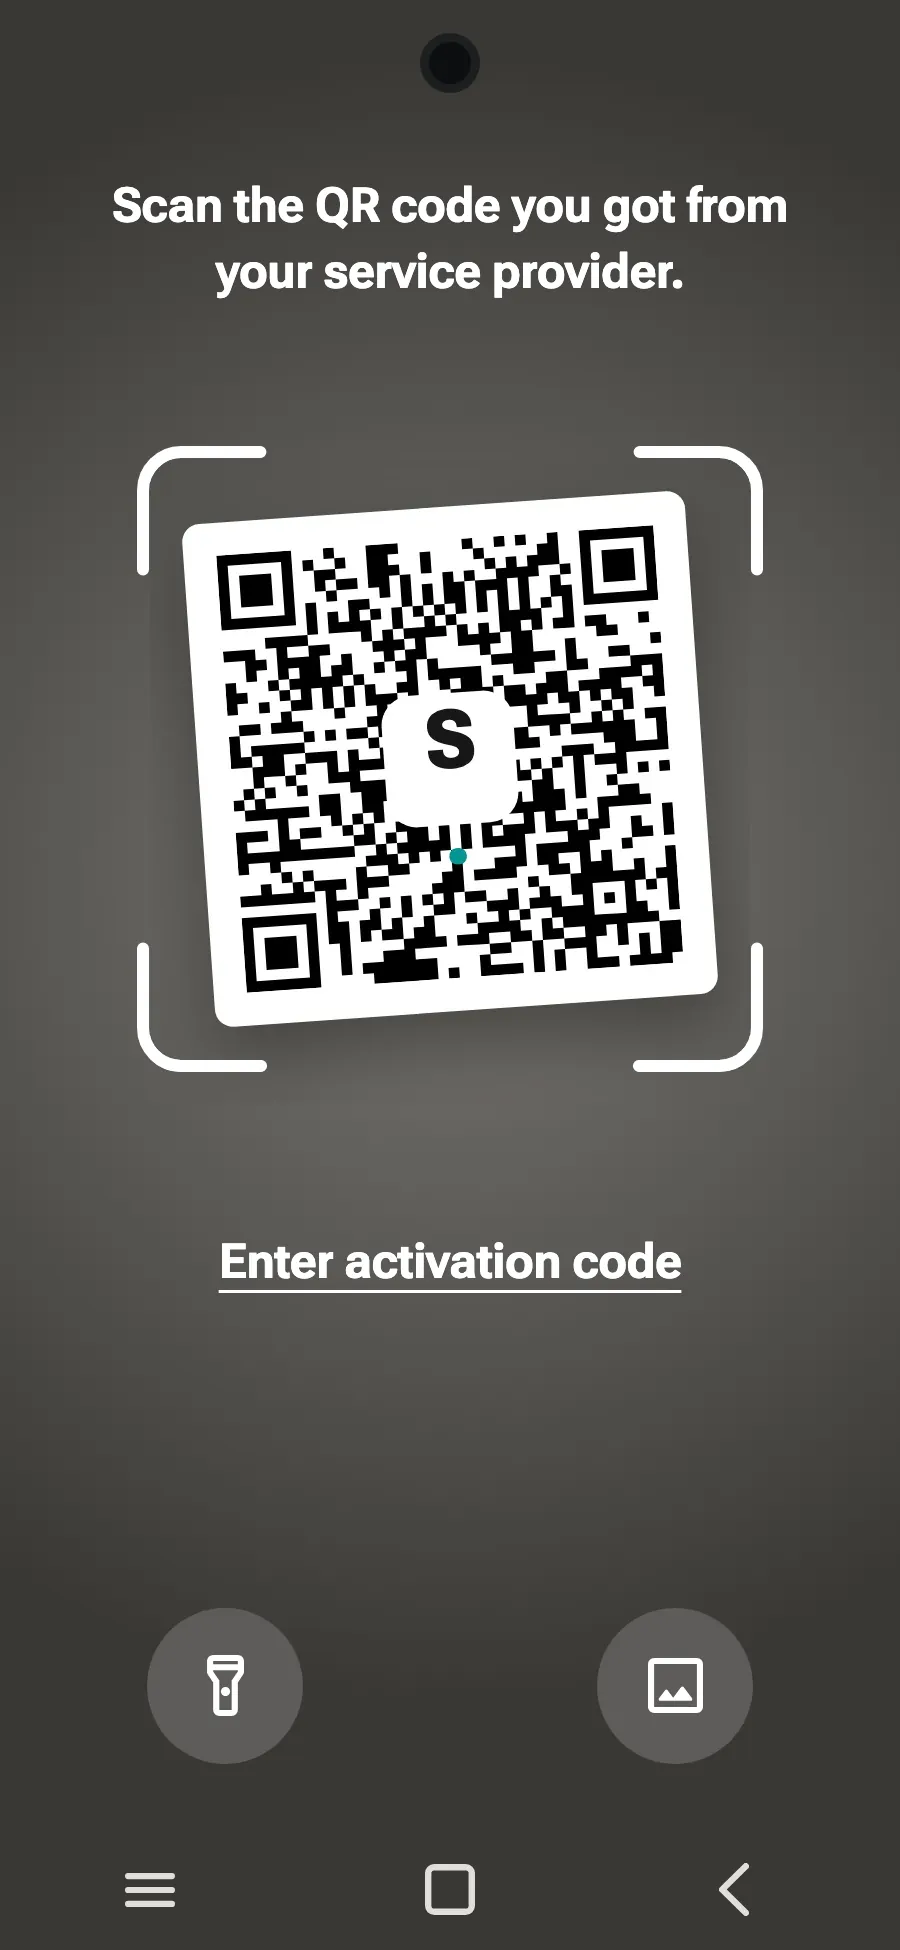
- Choose “Scan QR code”.
- Scan the QR code we email you after purchase (it's also in your account), then tap Add.
- When you land, turn on your new eSIM in SIM manager. It shows the name of a local or partner carrier.
- Choose the new eSIM for mobile data.
- In Connections, Mobile networks, turn on data roaming.
After you buy, your QR code arrives by email and in your account. Show it on another screen, then follow these steps on your phone.
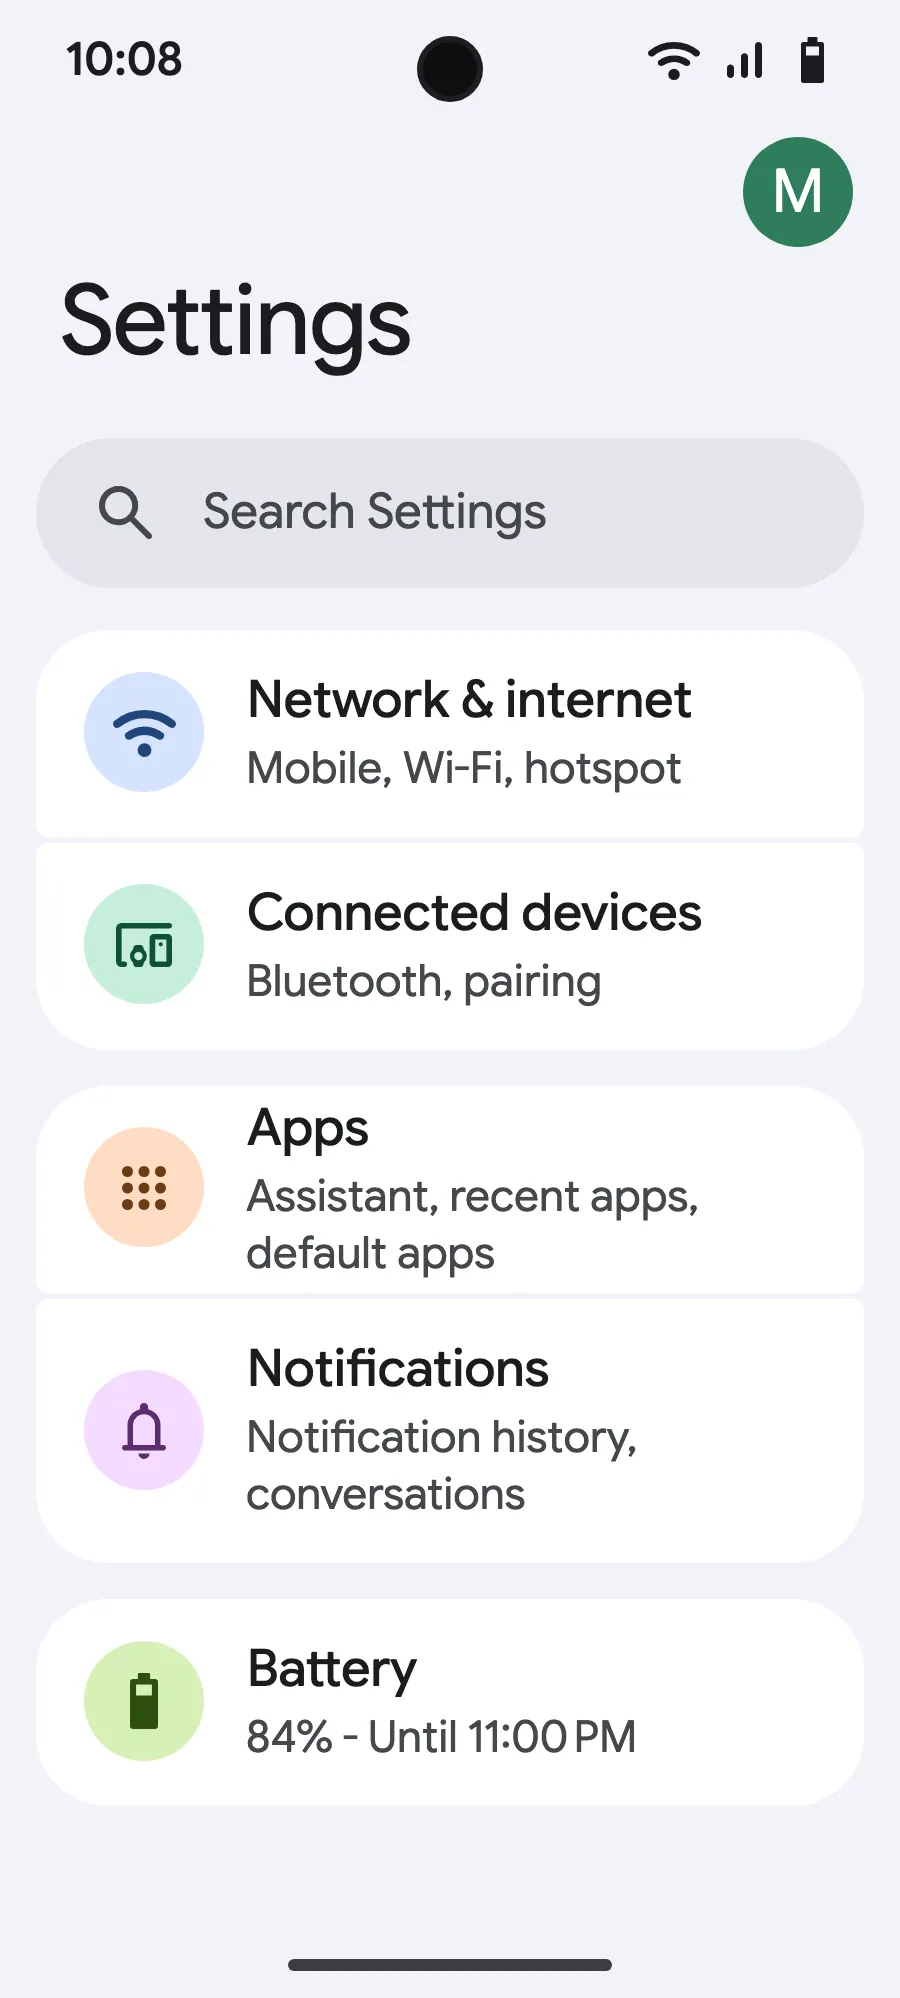
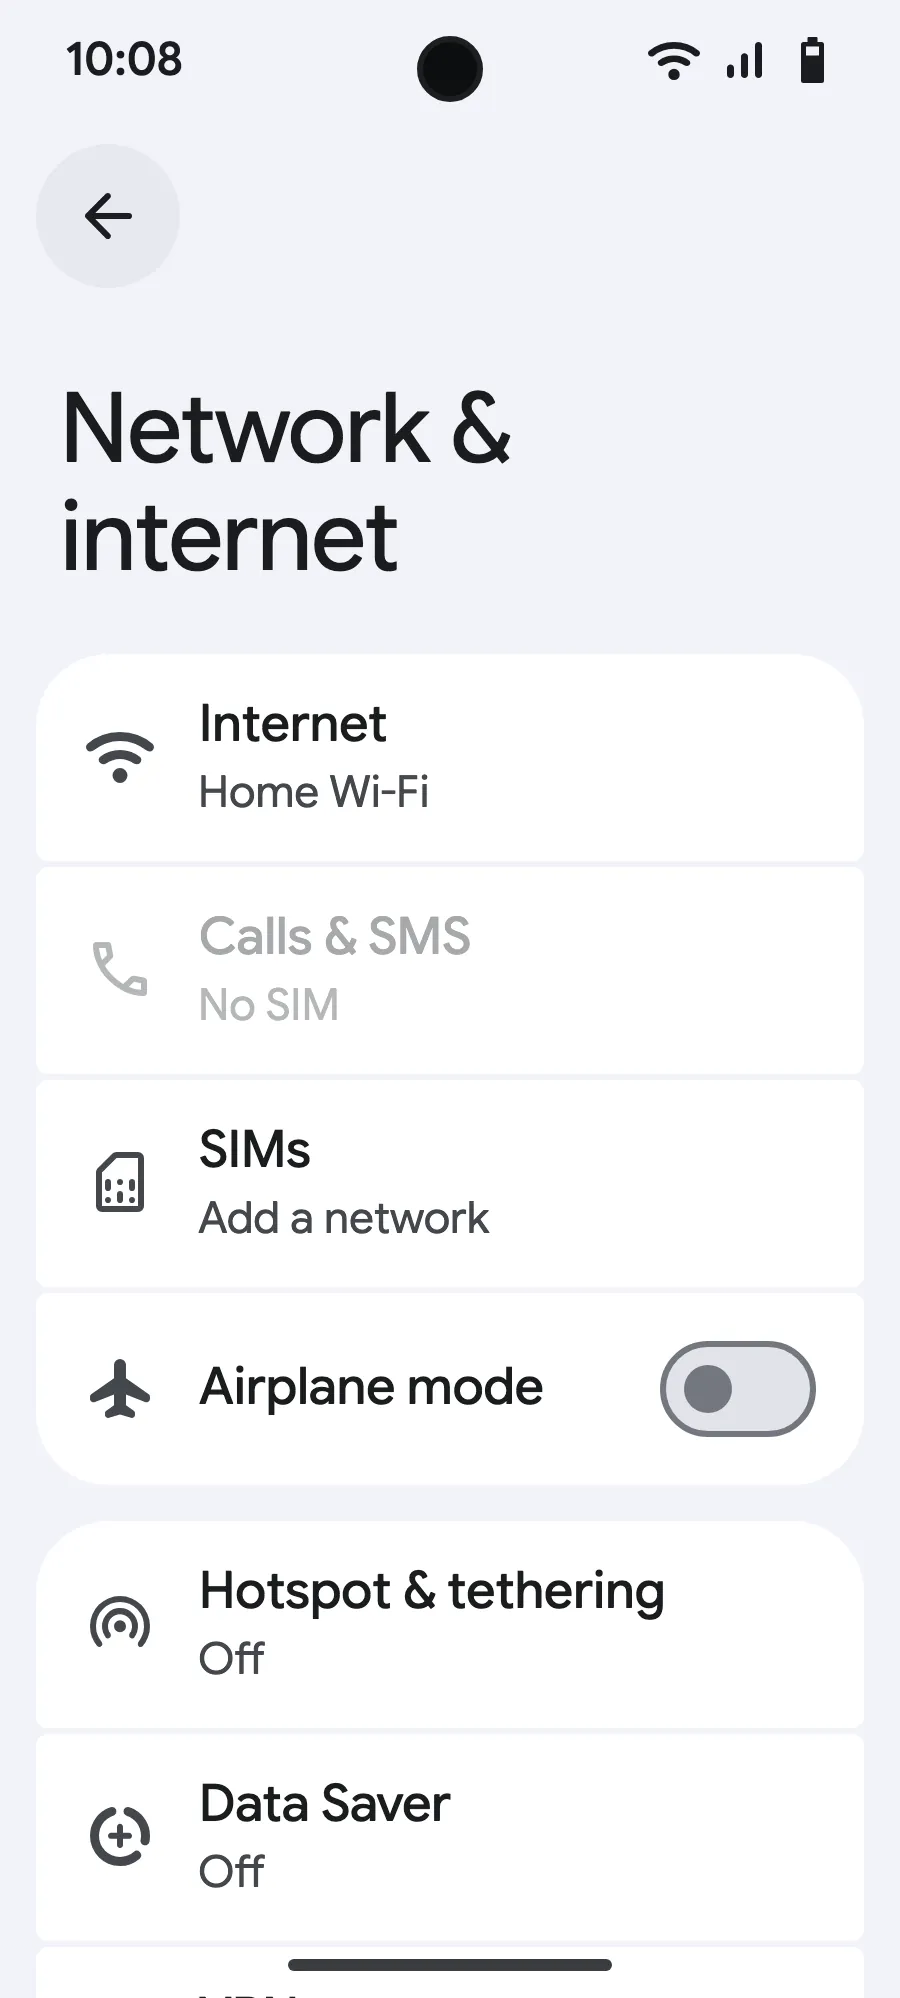
Before you leave: install your eSIMStep 1 of 7
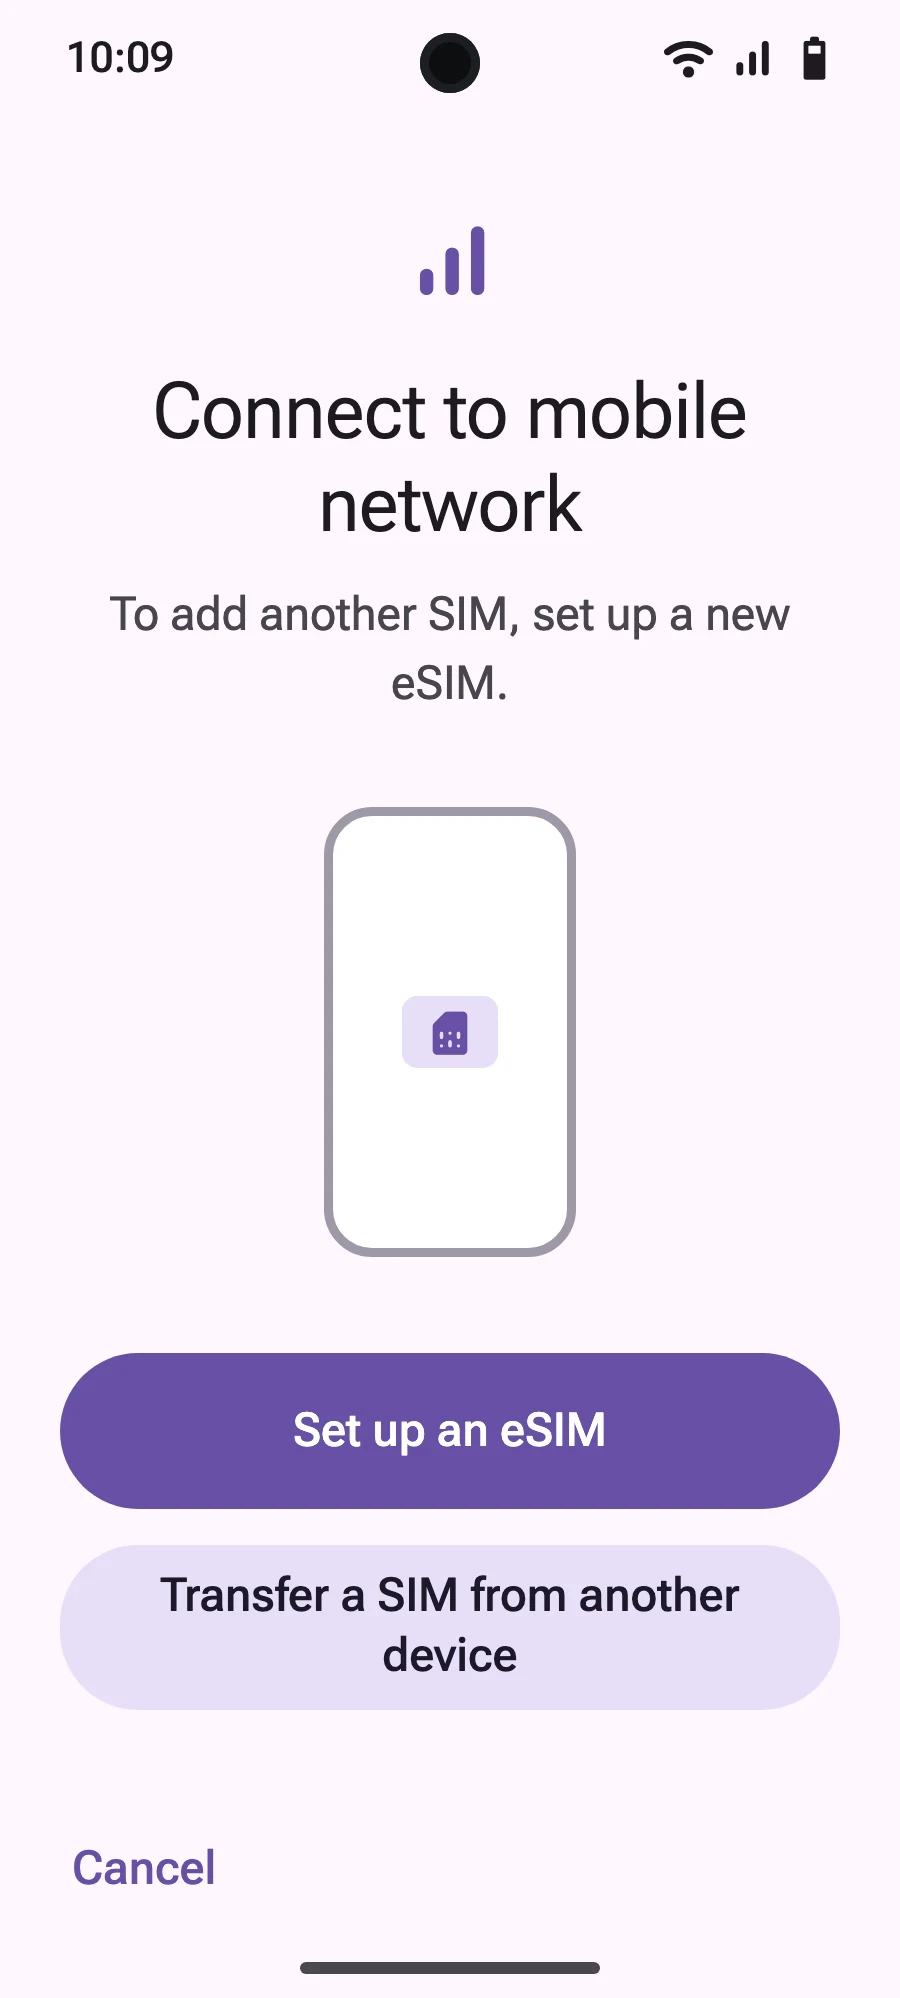
- Open Settings, then Network & internet.
- Tap “SIMs” (Add a network).
- Tap “Set up an eSIM”.
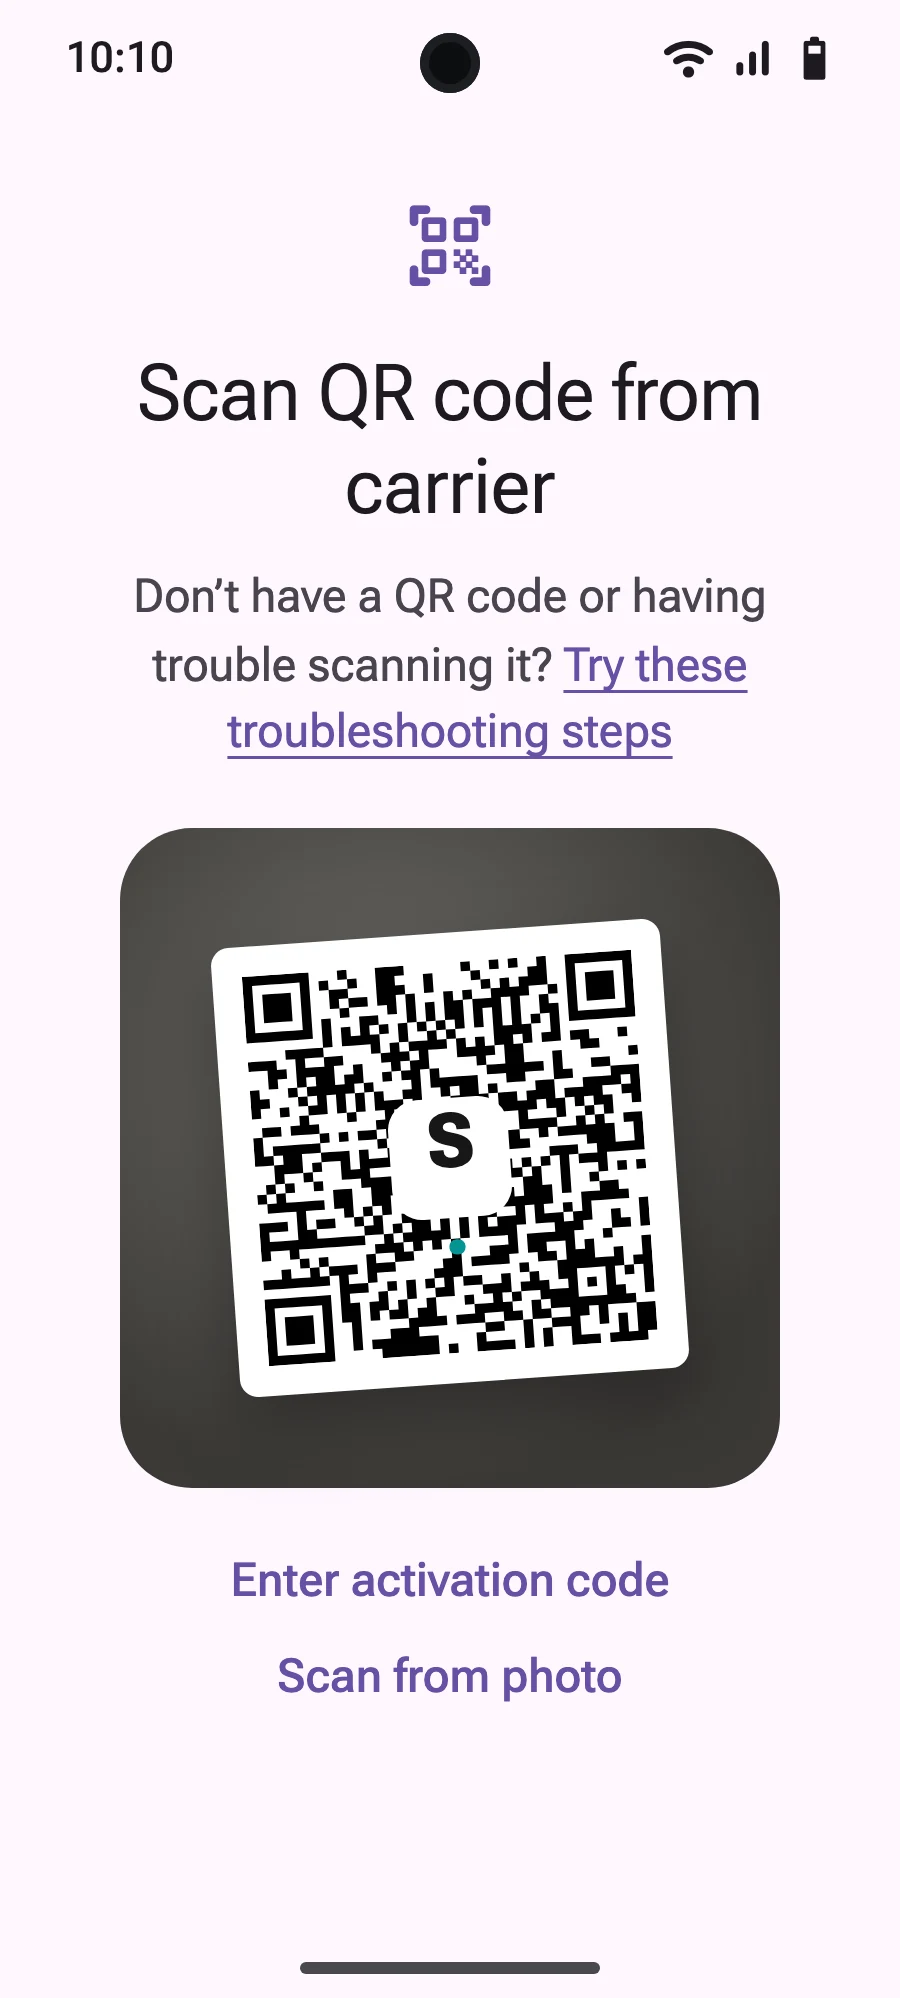
- Scan the QR code we email you after purchase (it's also in your account), then confirm.
- When you land, open your new eSIM (it shows the name of a local or partner carrier) and turn on “Use this SIM”.
- Turn on mobile data for the new eSIM.
- Turn on roaming. If nothing loads, turn off automatic network selection and pick the network manually.
After you buy, your QR code arrives by email and in your account. Show it on another screen, then follow these steps on your phone.
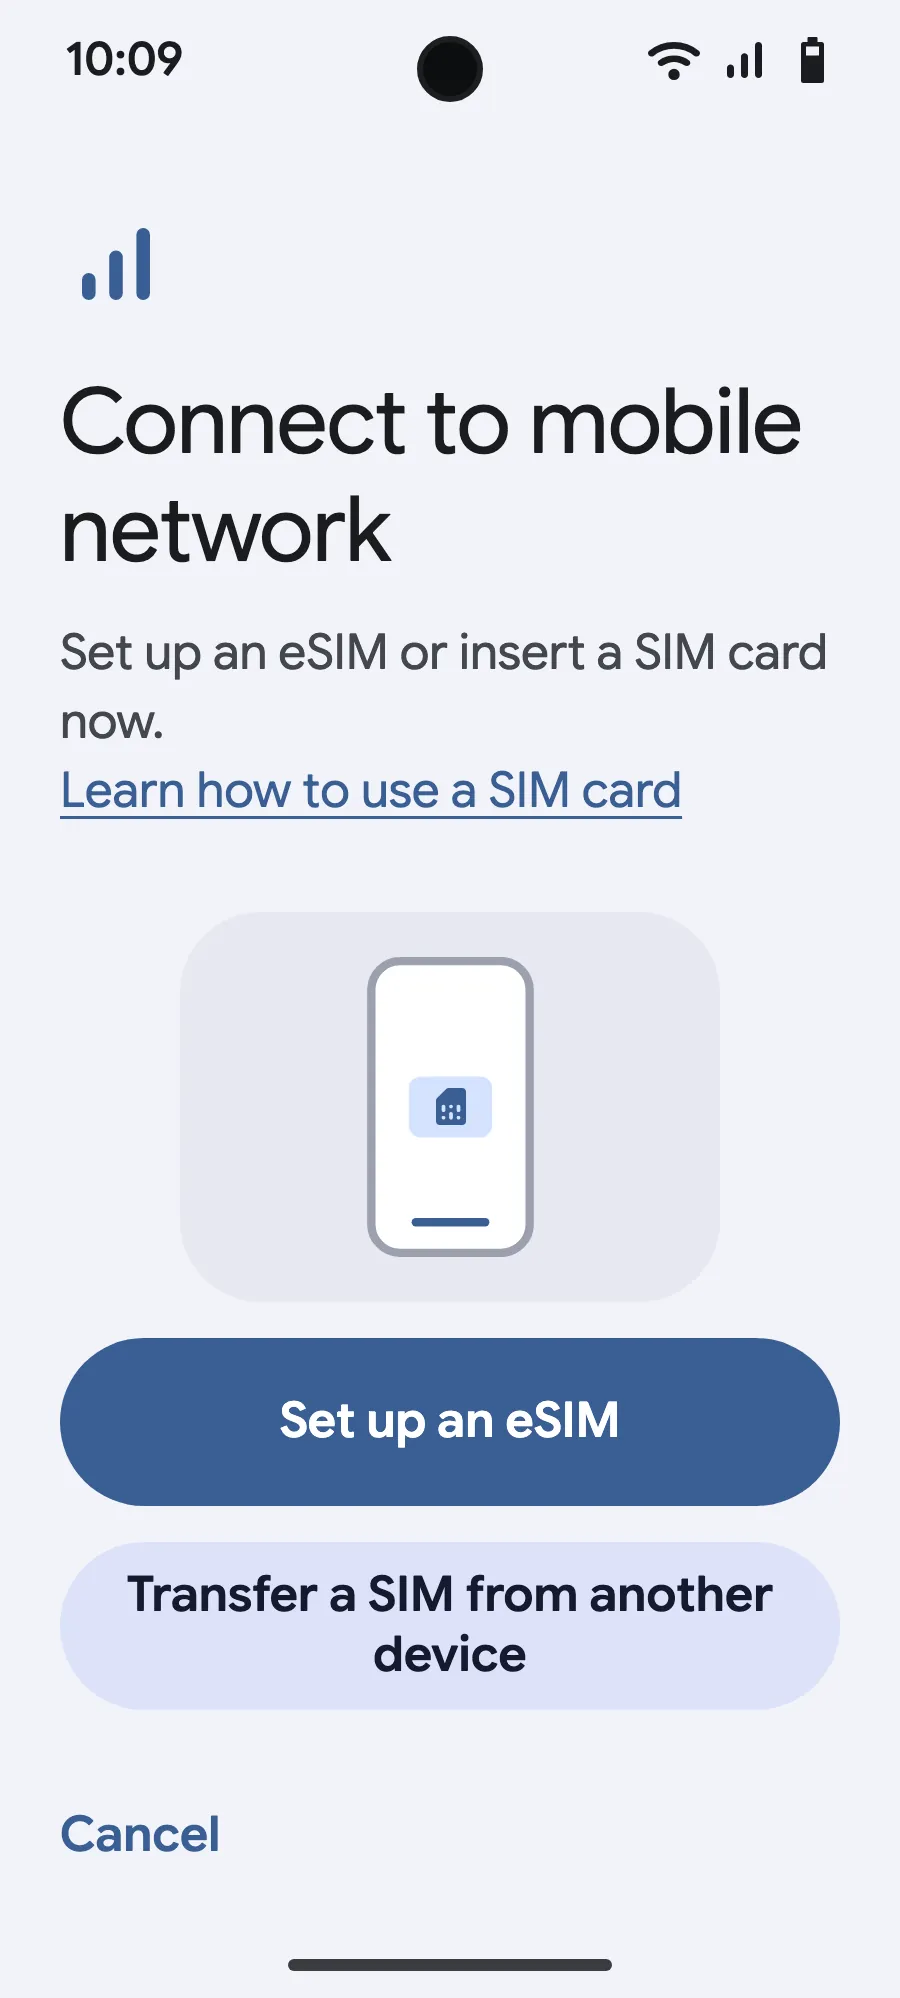
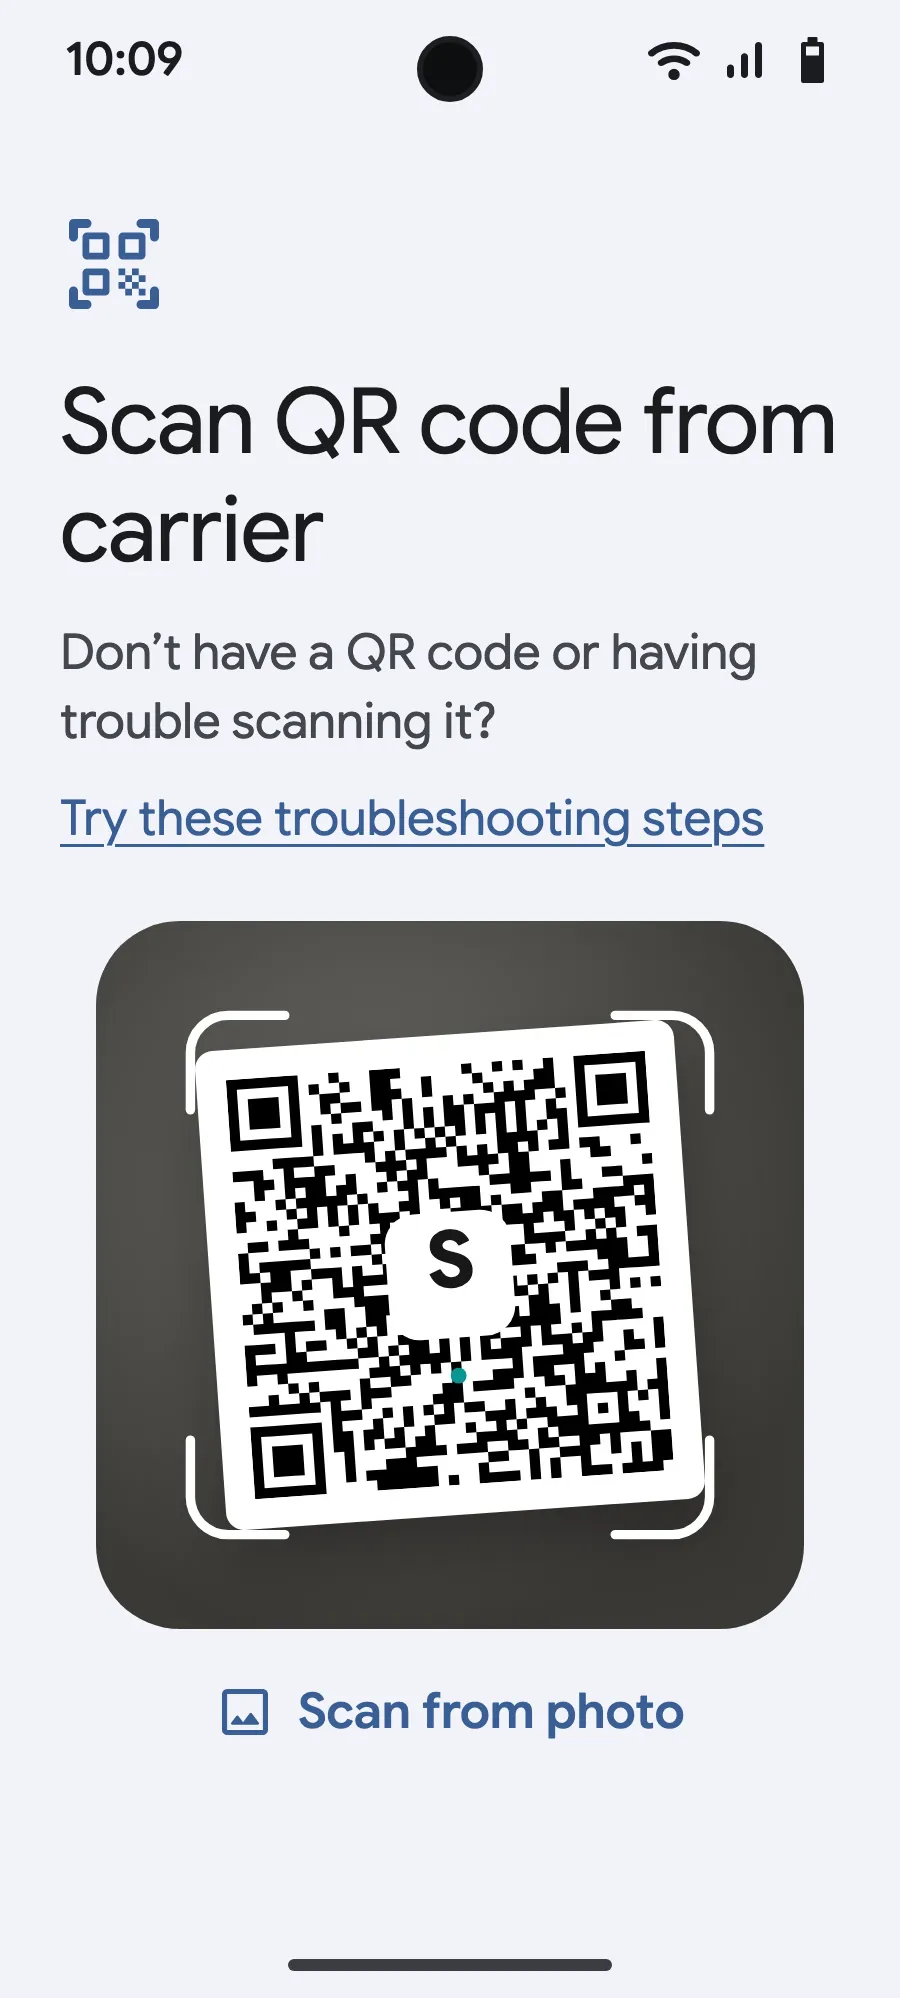
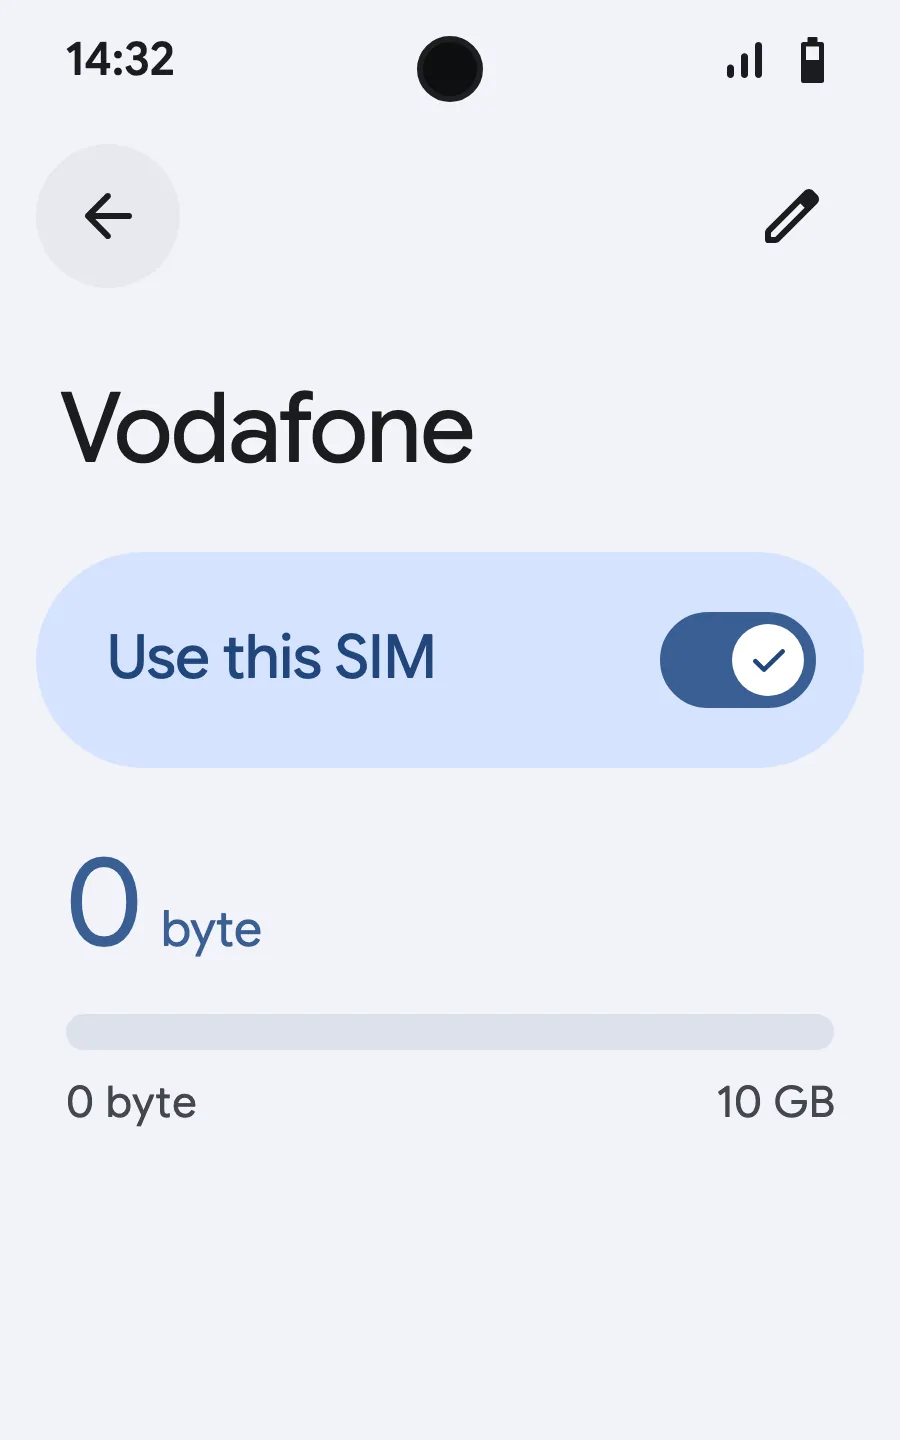
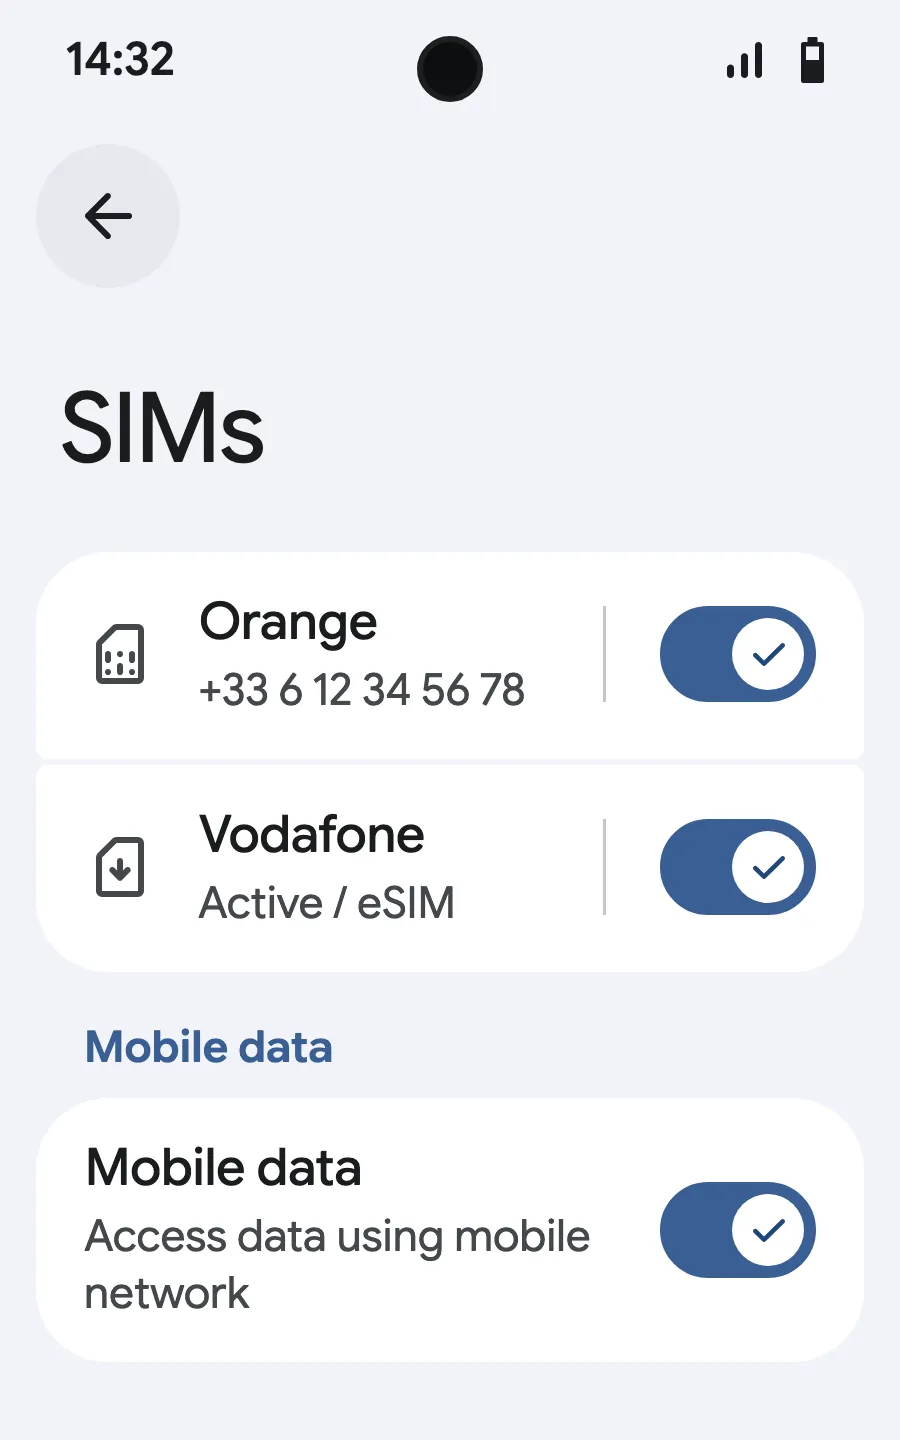
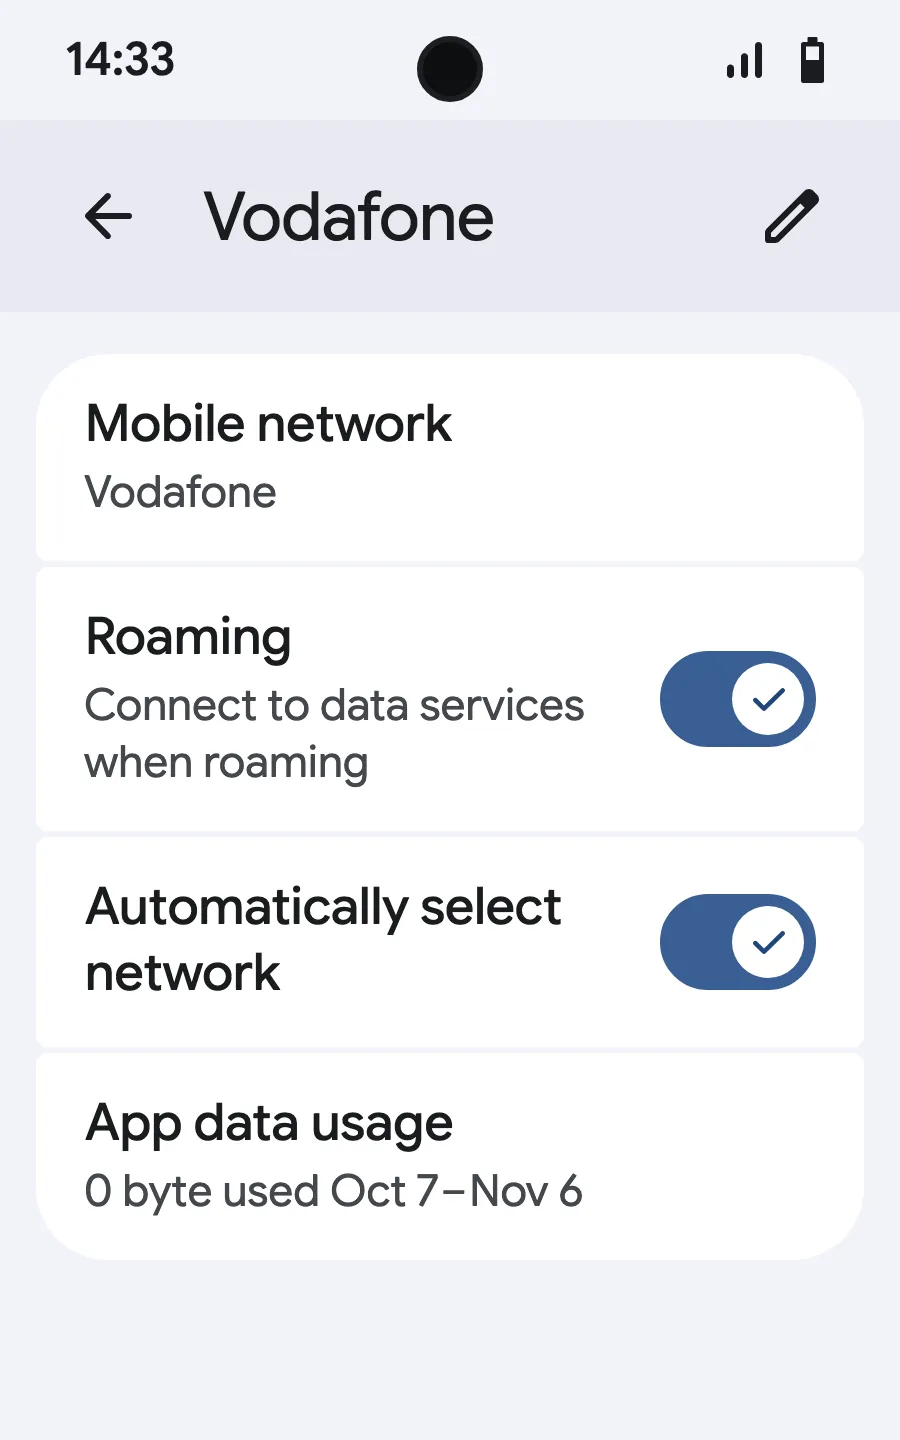
Before you leave: install your eSIMStep 1 of 8
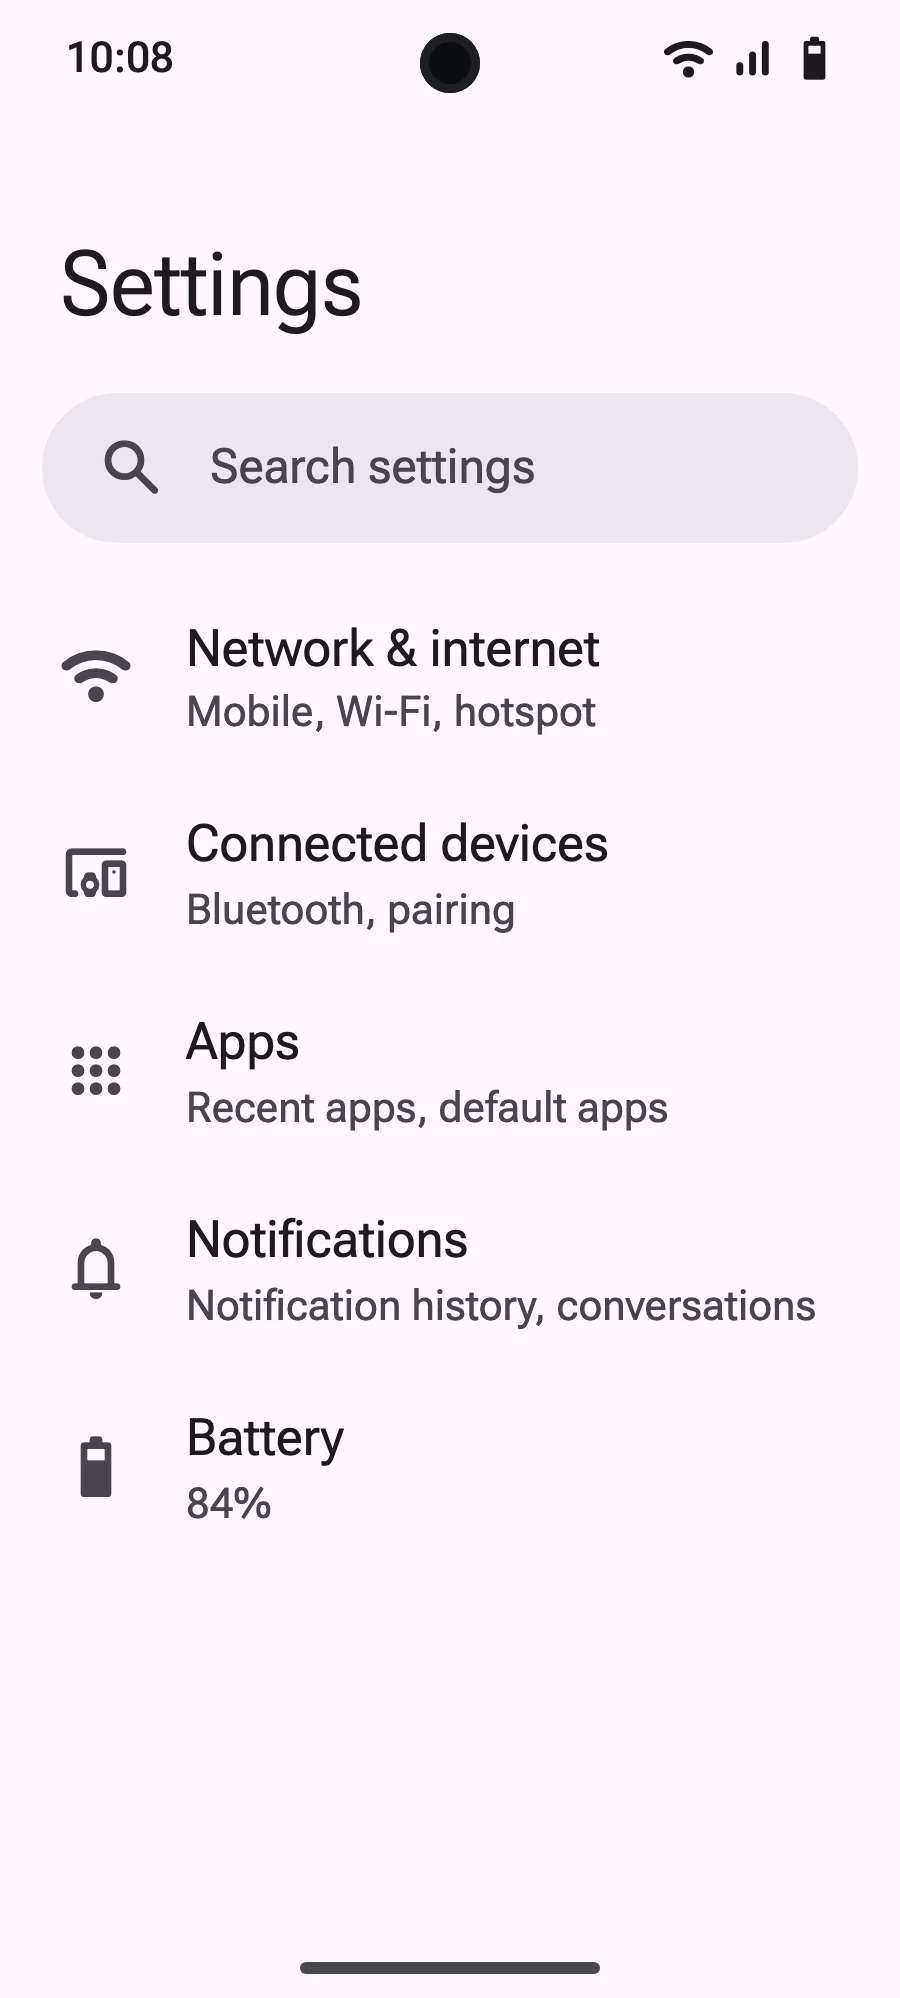
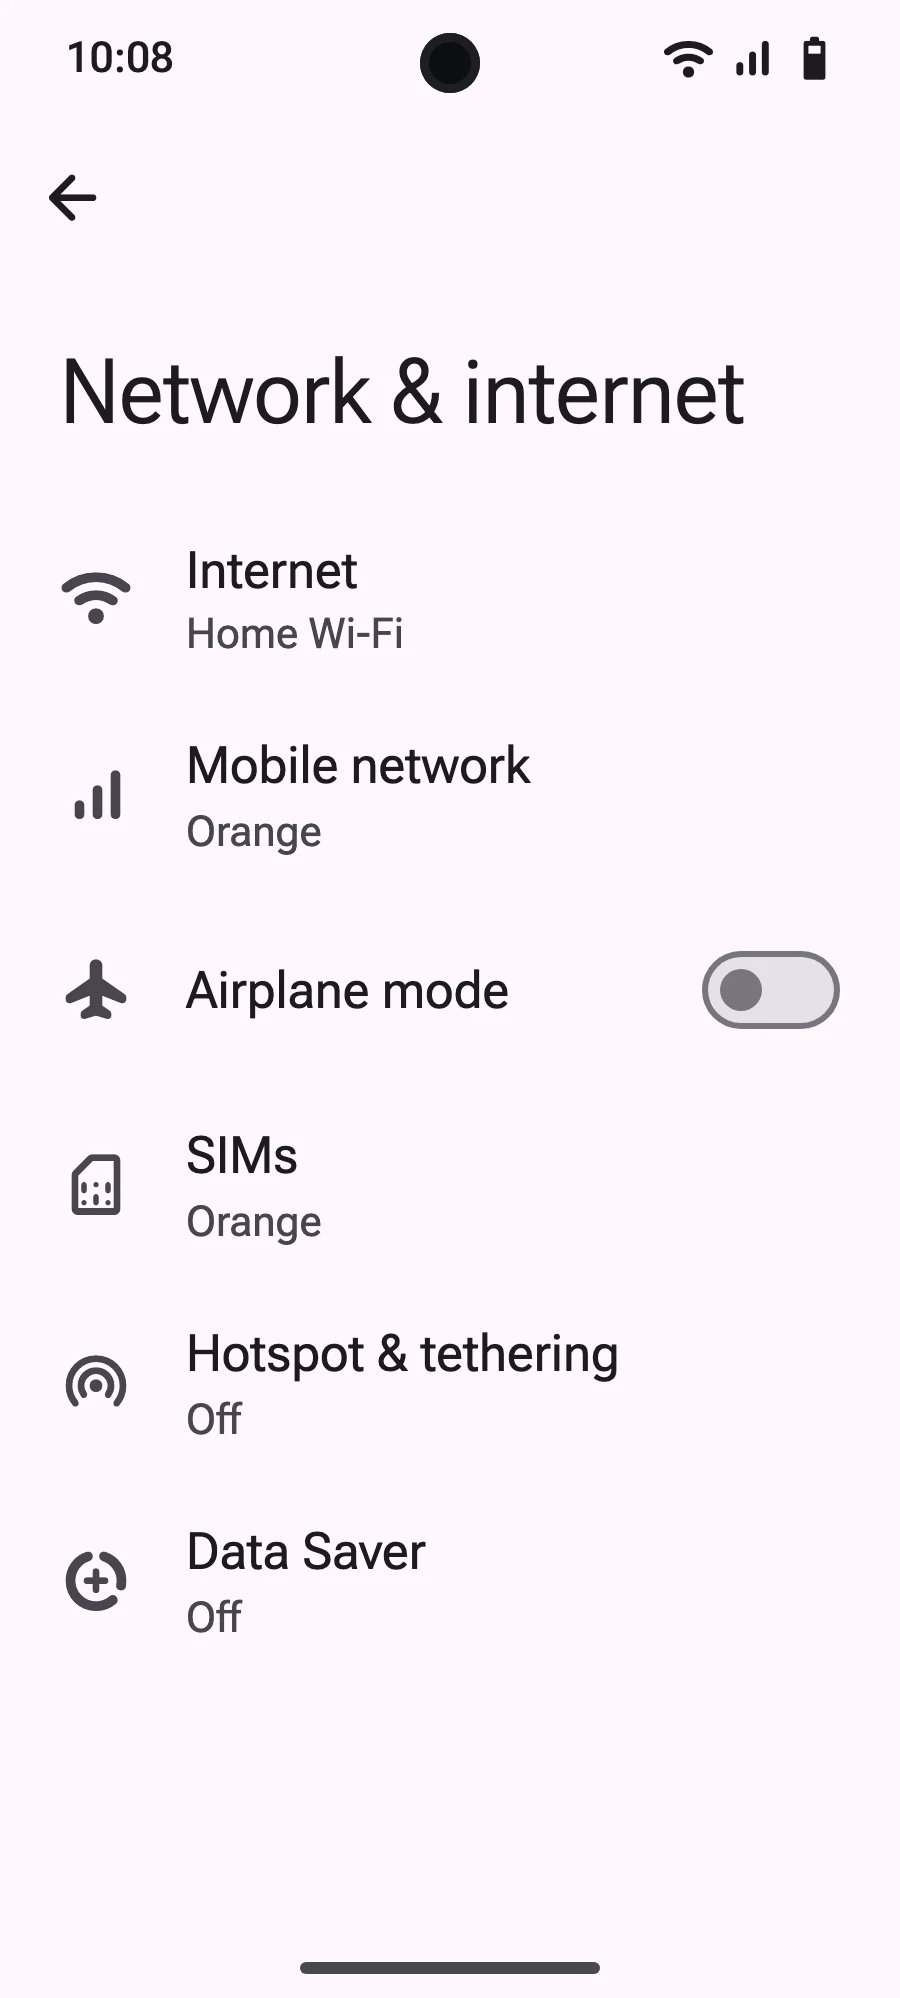
- Open Settings, then Mobile networks or Network & internet.
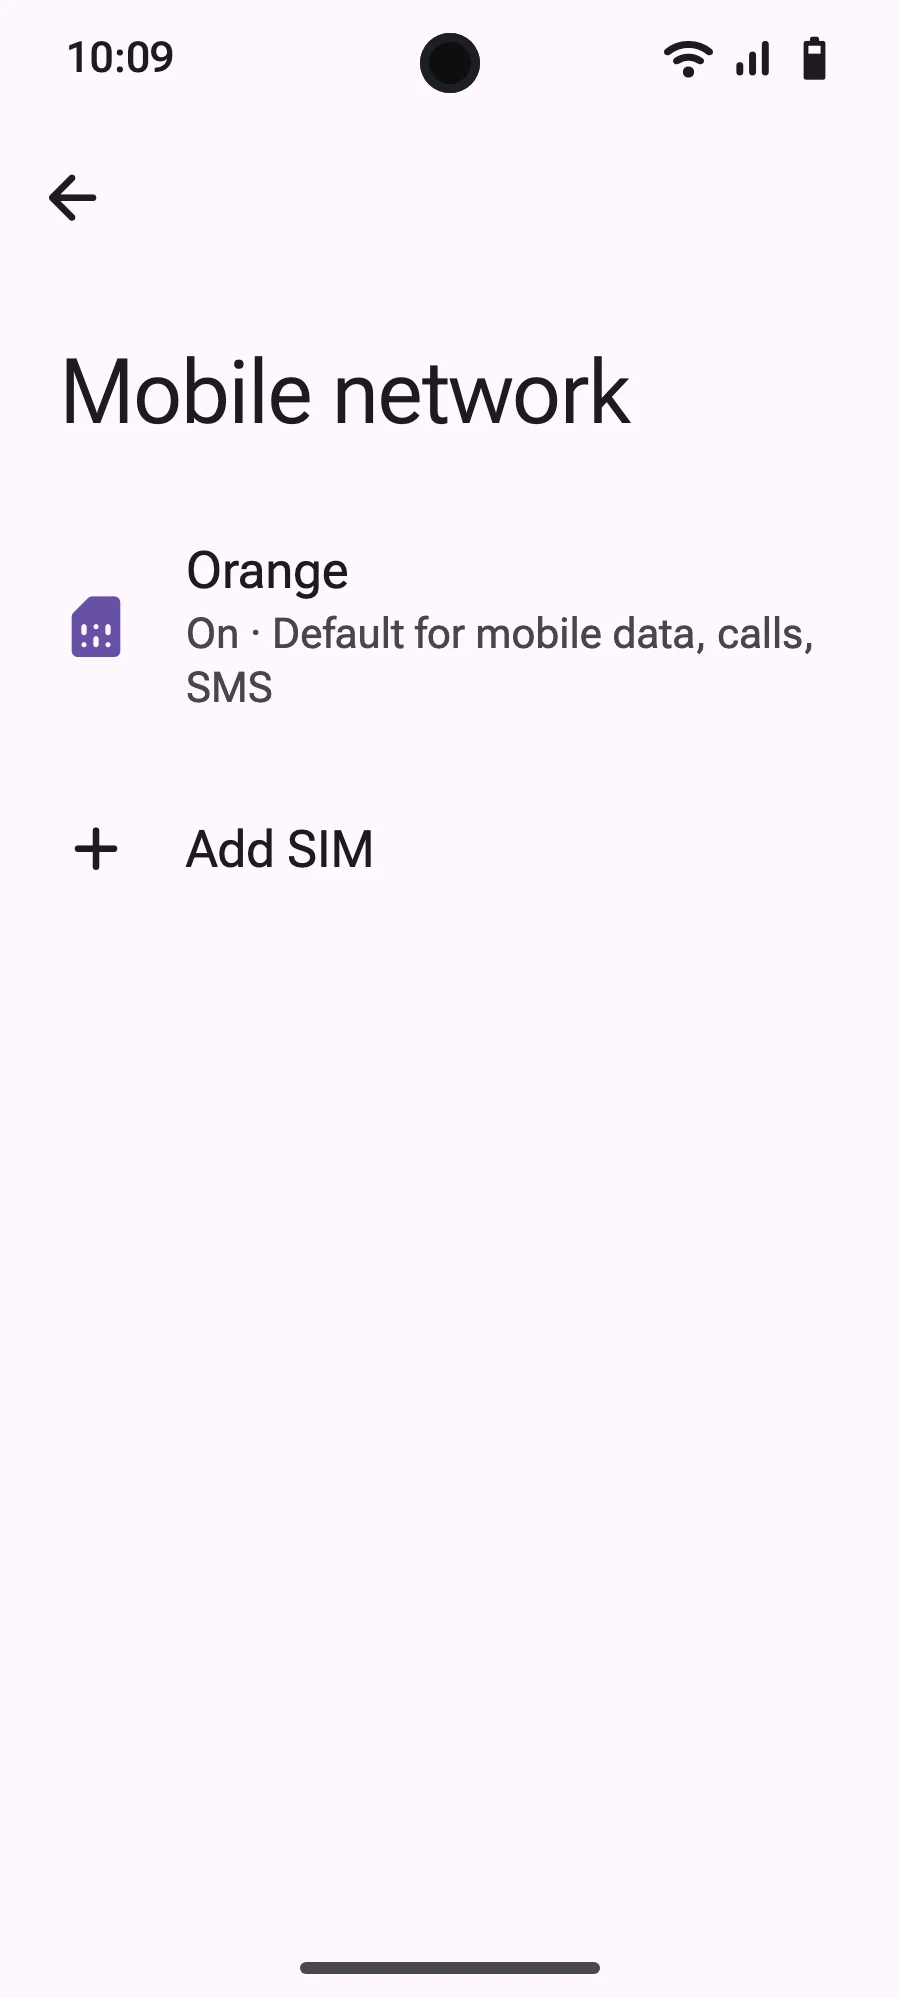
- Tap “Mobile network”.
- Tap “Add SIM”.
- Tap “Set up an eSIM”.
- Scan the QR code we email you after purchase (it's also in your account), then confirm.
- When you land, open your new eSIM (it shows the name of a local or partner carrier) and turn on “Use SIM”.
- Turn on mobile data for the new eSIM.
- Turn on roaming. If nothing loads, turn off automatic network selection and pick the network manually.
After you buy, your QR code arrives by email and in your account. Show it on another screen, then follow these steps on your phone. On Xiaomi, Oppo or OnePlus the menus have other names: search for “eSIM” in Settings.
Installing eSIM on iPhone
These steps work for iPhone XS/XR and all newer models. Not sure if your device is compatible? Check our eSIM Supported Devices page.
Before you begin
Method 1: Smart Link (Recommended)
Method 2: QR code
Method 3: Manual entry
If the QR code does not work:
After installation
Your eSIM is installed but not active yet. When you are ready to use it:
Dual SIM setup
Your iPhone can use two lines at once. A typical setup:
Go to Settings > Cellular to configure which line handles calls, messages, and data.
Still have questions?
Our team answers by chat or email, in your language.